How to Install Smart Light Switches: No Electrician Needed
A step-by-step guide to installing smart light switches safely. Learn how to turn off power, check for neutral wires, wire a smart switch, and get connected — with all the safety precautions you need.
Smart Switches: The Best Smart Home Starting Point
If you want to start building a smart home, smart light switches are the best place to begin. They work with your existing light fixtures, they do not require changing bulbs, and once installed, everyone in the house can use them — no app required (the physical switch still works normally).
Smart switches let you control lights from your phone, set schedules, create automations, and use voice control through Alexa, Google Assistant, or Apple HomeKit. And unlike smart bulbs, they do not lose their “smartness” when someone flips the wall switch.
The installation is straightforward for anyone comfortable with basic electrical work. You are not running new wire or creating new circuits — you are simply replacing one switch with another. That said, you are working with electrical wiring, and that demands respect. Follow every safety step in this guide, and you will be fine.
Safety First: The Non-Negotiable Rules
Before you touch a single wire, read and commit to these rules. Electrical work that goes wrong can kill you or burn your house down. These are not exaggerations.
Rule 1: Turn Off the Breaker
Not the switch. The breaker. Go to your electrical panel and flip off the breaker that controls the circuit you are working on. If breakers are not labeled, flip the switch you are replacing to the “on” position, then flip breakers one at a time until the light turns off.
Rule 2: Verify Power Is Off
After turning off the breaker, use a non-contact voltage tester to verify there is no power at the switch. Touch the tester to each wire in the box. If it beeps or lights up, power is still on — you have the wrong breaker.
A non-contact voltage tester costs $15-20 and is the single most important safety tool for any electrical work. If you do not own one, buy one before you start this project. Do not skip this step.
Rule 3: Do Not Work on Aluminum Wiring
If you open the switch box and see silver-colored wires instead of copper, you may have aluminum wiring. Aluminum wiring requires special handling and connectors. Do not proceed — call an electrician. Improperly handled aluminum wiring is a serious fire hazard.
Rule 4: If In Doubt, Stop
If anything looks unfamiliar, confusing, or wrong inside the electrical box, stop and call an electrician. A $150 service call is always cheaper than a mistake.
Before You Buy: Check for a Neutral Wire
This is the most important pre-purchase step that most guides gloss over. Most smart switches require a neutral wire to operate. Without it, the switch cannot power its internal electronics when the light is off.
How to Check
- Turn off the breaker (and verify with your voltage tester).
- Remove the existing switch cover plate.
- Unscrew the switch from the electrical box and gently pull it out.
- Look inside the box. You should see:
- Black wires (hot/line) — the power supply
- White wires (neutral) — what smart switches need
- Green or bare copper wire (ground)
- Possibly red wires (traveler wires for 3-way switches)
If you see white wires bundled together in the back of the box (usually connected with a wire nut and not attached to the existing switch), you have neutral wires. Standard dumb switches do not use the neutral, so it is just bundled and capped in the back of the box.
If there are no white wires in the box, you do not have a neutral at that location. You have two options:
- Buy a smart switch that does not require a neutral (like the Lutron Caseta, which uses its own bridge and does not need a neutral wire)
- Hire an electrician to run a neutral wire (usually not cost-effective for a single switch)
What About 3-Way Switches?
A 3-way switch controls one light from two locations (like the top and bottom of a staircase). These have an extra “traveler” wire (usually red) in addition to the standard wires. Smart 3-way switches work differently than traditional ones — you typically replace one switch with the smart switch and the other with a companion switch (included with most smart 3-way kits). Check your specific switch’s instructions for 3-way wiring diagrams.
Choosing a Smart Switch
Our Top Recommendations
Best Overall: Lutron Caseta Smart Switch (~$50-60)
Lutron Caseta is the most reliable smart switch system available. It uses its own wireless protocol (Clear Connect) with a required bridge, which means rock-solid connectivity that does not depend on your Wi-Fi network. Works with Alexa, Google, HomeKit, and nearly every smart home platform. No neutral wire required.
The downside: you need the Lutron Smart Bridge ($80-100) for the first switch, which adds to the initial cost. But the bridge supports up to 75 devices, so the per-switch cost drops quickly as you add more.
Best Wi-Fi Switch: TP-Link Kasa Smart Switch (HS200) (~$20-25)
If you want a straightforward, affordable smart switch that connects directly to Wi-Fi (no hub required), the Kasa HS200 is an excellent choice. It requires a neutral wire, works with Alexa and Google Assistant, and the Kasa app is well-designed. At $20-25 per switch, it is the most affordable way to outfit a whole house.
Best for Apple HomeKit: Meross Smart Wi-Fi Light Switch (~$18-22)
Native HomeKit support at the lowest price point available. Requires a neutral wire and connects via Wi-Fi. Also works with Alexa and Google Assistant.
Best Dimmer: Lutron Caseta Smart Dimmer (~$55-65)
If you want dimming capability (and you should — dimmable lights make every room more versatile), the Caseta dimmer is the gold standard. Same reliability as the Caseta switch, plus smooth dimming that does not buzz or flicker with compatible LED bulbs.
Tools and Materials
- Non-contact voltage tester — absolutely required
- Flathead and Phillips screwdrivers
- Wire strippers (if you need to strip wire ends)
- Wire nuts (usually included with the switch, but having extras is smart)
- Electrical tape
- Your smart switch
- Your phone (for the setup app)
- A flashlight or headlamp (the room light will be off, remember)
Step-by-Step Installation
Step 1: Turn Off Power and Verify
Go to your electrical panel and flip the breaker for the circuit you are working on. Return to the switch and use your non-contact voltage tester to confirm there is zero power. Test the tester on a known live outlet first to make sure it is working.
Put a piece of tape over the breaker in the off position so nobody accidentally turns it back on while you are working. If you live with others, tell them you are working on electrical and not to touch the panel.
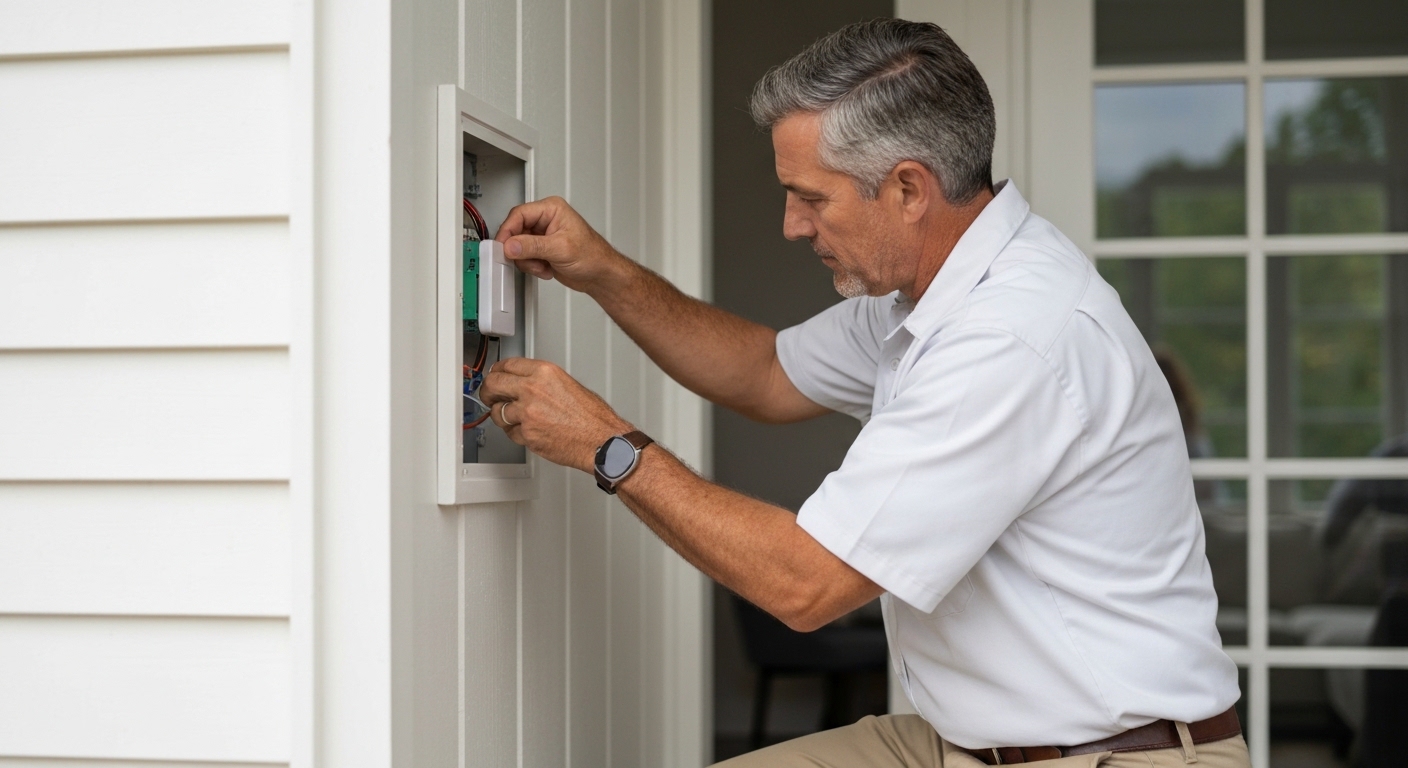
Step 2: Remove the Existing Switch
- Remove the switch plate cover (usually one or two screws).
- Remove the two screws holding the switch to the electrical box.
- Gently pull the switch out of the box. The wires have some slack — pull enough out to work comfortably.
- Test each wire with your voltage tester one more time now that they are exposed.
Step 3: Document the Existing Wiring
Before disconnecting anything, take a photo of the existing wiring. This is your insurance policy — if anything goes wrong, you can reconnect the old switch exactly as it was.
Note which wires connect to which terminals on the old switch:
- Common terminal (usually a black or dark-colored screw): This is where the hot wire (black) from the power source connects.
- Traveler terminals (on 3-way switches): Brass-colored screws with the traveler wires.
- Ground terminal (green screw): Green or bare copper wire.
Step 4: Disconnect the Old Switch
Loosen the terminal screws and remove the wires. If the wires are pushed into “stab-in” connectors on the back of the switch (common in builder-grade switches), insert a small flathead screwdriver into the release slot next to each wire and pull the wire out.
If wire ends are nicked, bent, or damaged, use wire strippers to cut off the damaged portion and strip a fresh 3/4 inch of insulation.
Step 5: Identify Your Wires
With the old switch removed, identify every wire in the box:
- Black wire(s): Hot/line wires. One brings power from the panel (line), and one sends power to the light fixture (load). On a standard single-pole switch, both connect to the switch — it does not matter which goes where on a dumb switch, but it does on a smart switch.
- White wire(s): Neutral wires, bundled in the back of the box.
- Green or bare copper: Ground wire.
- Red wire: Traveler wire (only present in 3-way switch boxes).
How to Identify Line vs. Load
The smart switch needs to know which black wire is “line” (power in) and which is “load” (power out to the light). Here is how to determine this:
- Separate the two black wires so they do not touch each other or anything else.
- Turn the breaker back on temporarily.
- Use your non-contact voltage tester on each black wire. The wire that is hot (tester beeps/lights) is the line wire. The other is the load wire.
- Turn the breaker off again and verify with the tester.
- Mark the line wire with a piece of tape so you do not forget.
Step 6: Connect the Smart Switch
Follow your specific switch’s wiring diagram (every smart switch includes one). The general connections for a single-pole smart switch are:
- Line (black wire from panel) → Connect to the terminal or wire labeled “LINE” on the smart switch.
- Load (black wire to light fixture) → Connect to the terminal or wire labeled “LOAD” on the smart switch.
- Neutral (white wire) → Connect the switch’s white neutral wire to the bundle of white neutral wires in the box. Remove the existing wire nut from the neutral bundle, add the switch’s neutral wire, and re-cap with a wire nut. Make sure the connection is tight.
- Ground (green or bare copper) → Connect to the switch’s ground wire or ground terminal.
Most smart switches use pigtail wires instead of screw terminals. To connect:
- Strip 3/4 inch of insulation from each wire end (if not already stripped).
- Hold the switch wire alongside the house wire (or wire bundle).
- Twist them together clockwise.
- Screw on a wire nut clockwise until tight.
- Tug gently on each wire to confirm the connection is secure.
- Wrap electrical tape around the wire nut and wire junction for extra security.
Step 7: Tuck the Wires and Mount the Switch
Smart switches are bulkier than standard switches, and the extra wires take up space. Carefully fold the wires into the electrical box in an accordion pattern. Do not force or crimp wires — damaged insulation can cause shorts.
If the box is very crowded and wires are difficult to fit, you may need to carefully rearrange them. Never push bare wire against the metal box or other bare wires.
Screw the smart switch into the electrical box using the provided screws. Make sure the switch is straight — use the elongated screw holes to adjust if needed.
Install the new cover plate. Most smart switches come with their own cover plate designed for their specific shape.
Step 8: Restore Power and Test
- Go to the panel and flip the breaker back on.
- Test the switch physically — press it and confirm the light turns on and off.
- If the light does not work, turn the breaker off and recheck your connections. The most common issue is a loose wire nut or a swapped line/load connection.
Step 9: Set Up the App
- Download the manufacturer’s app (Lutron, Kasa, Meross, etc.).
- Create an account if needed.
- Follow the in-app instructions to add the switch to your network.
- For Wi-Fi switches: you will need your Wi-Fi password. The switch connects to your 2.4GHz network (not 5GHz — this is a common setup failure).
- For Lutron Caseta: the switch pairs with the Lutron Bridge, which then connects to your Wi-Fi network.
- Name the switch something descriptive (“Kitchen Light,” “Bedroom Fan”) for easy voice control.
Step 10: Connect to Voice Assistants
- Alexa: Open the Alexa app > Devices > Add Device > follow the prompts for your switch brand
- Google Assistant: Open the Google Home app > Add > Set up device > Works with Google
- Apple HomeKit: For HomeKit-compatible switches, scan the HomeKit code during setup
Troubleshooting Common Issues
The Light Flickers or Buzzes
This usually means the smart dimmer is incompatible with your light bulbs. LED bulbs are particularly sensitive — look for bulbs explicitly rated as “dimmable” and check the switch manufacturer’s compatibility list. Lutron maintains an excellent LED compatibility tool on their website.
The Switch Will Not Connect to Wi-Fi
Make sure you are connecting to the 2.4GHz band, not 5GHz. Most smart switches do not support 5GHz. If your router uses a combined network name, temporarily split the bands during setup.
The Light Stays Dimly Lit When Off
This is a common issue with some smart switches and certain LED bulbs. It happens because a small amount of current leaks through to power the switch’s electronics. Solutions include:
- Replacing one bulb in a multi-bulb fixture with an incandescent bulb
- Installing a Lutron LUT-MLC bypass capacitor at the fixture
- Trying a different brand of LED bulb
The Switch Feels Warm
Smart switches generate some heat because they have active electronics inside. A slightly warm faceplate is normal. If the switch is hot to the touch, turn it off and check that you have not exceeded its rated wattage (typically 600W for dimmers, 1800W for on/off switches with LED loads).
Smart Switch Tips and Best Practices
Start With High-Impact Locations
You do not need to replace every switch at once. Start with the switches you use most:
- Kitchen and living room — the rooms where you spend the most time
- Porch and outdoor lights — scheduling outdoor lights is one of the best use cases
- Bedroom — turn off lights from bed with your voice or phone
Stick to One Ecosystem
Mixing Lutron, Kasa, Meross, and other brands means managing multiple apps. Pick one brand and stick with it for a cleaner, more reliable experience.
Set Up Schedules
The real value of smart switches is automation:
- Porch lights on at sunset, off at sunrise
- Bedroom lights dim to 20% at 9 PM
- All lights off at midnight (a “goodnight” routine)
- Lights on at random times when you are on vacation (security)
Use 3-Way Smart Switches for Stairs and Hallways
Staircases, hallways, and rooms with multiple entrances are ideal candidates for 3-way smart switches. You get both physical control from two locations and smart control from anywhere.
What This Project Costs
| Item | Cost |
|---|---|
| Smart switch (single-pole) | $18-60 |
| Non-contact voltage tester | $15-20 (one-time purchase) |
| Wire nuts and electrical tape | $5-10 (one-time purchase) |
| Lutron Smart Bridge (if choosing Caseta) | $80-100 (one-time purchase) |
| Per-switch total | $25-50 (after initial tool purchase) |
Compare that to hiring an electrician at $100-200 per switch (including their markup on the switch itself), and the savings add up fast if you are installing multiple switches.
The Bottom Line
Installing smart light switches is one of the most satisfying home improvement projects because the result is both practical and futuristic. You get immediate daily convenience (voice control, scheduling, remote access) for a modest investment of time and money. The electrical work involved is basic — you are disconnecting three or four wires from an old switch and connecting them to a new one. As long as you respect the electricity (breaker off, voltage tester, no shortcuts), this is a project that any intermediate DIYer can handle confidently.