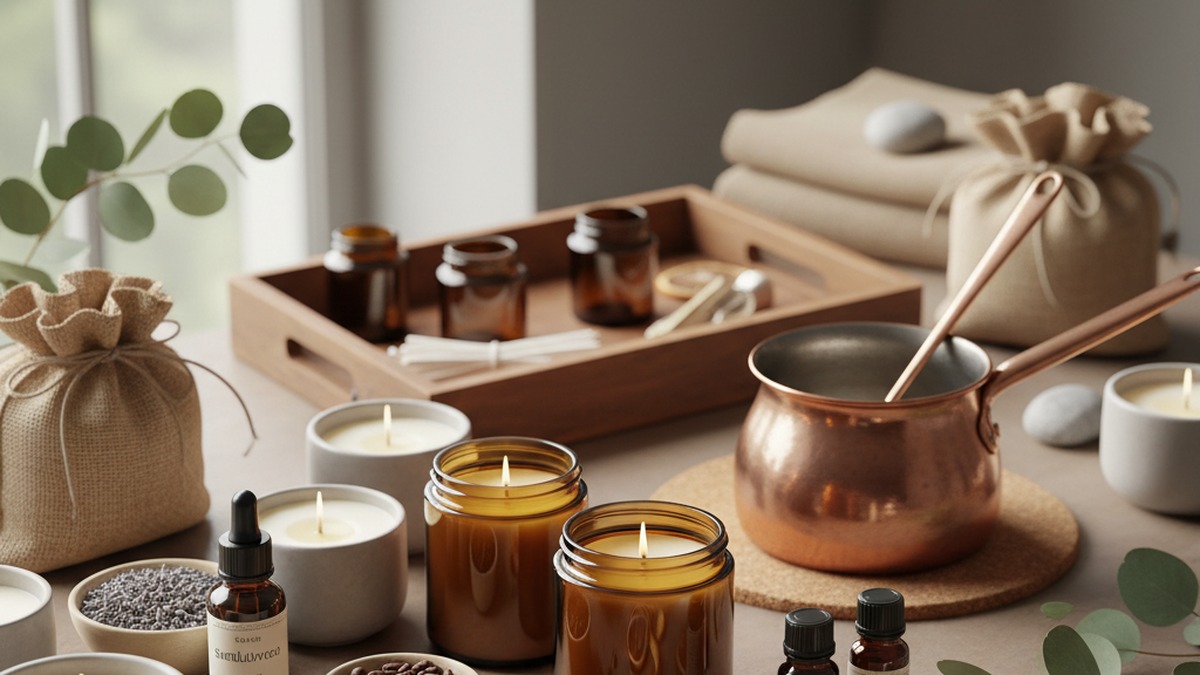
Why Your DIY Candles Have No Scent (And How to Fix It)
There’s little in the world of DIY crafts more satisfying than pouring your own beautiful, fragrant candle. You meticulously measure, melt, and mix, envisioning the cozy ambiance and delightful aroma that will soon fill your home. But then, the moment of truth arrives. You light your creation, watch the flame dance, and wait… and wait… only to be met with a disappointing lack of scent. The dreaded “no scent throw” issue.
If you’ve ever experienced this common frustration, you’re not alone. Achieving a strong, consistent scent throw in homemade candles, especially with natural waxes like soy, is often the biggest hurdle for new and even experienced candlemakers. It’s a delicate balance of science and art, where several factors can conspire against your aromatic ambitions.
But don’t despair! This comprehensive guide will walk you through the seven most common reasons why your DIY candles might be lacking fragrance, in order of their frequency, and—most importantly—provide clear, actionable fixes. Get ready to transform your scent-less candles into aromatic masterpieces.
The 7 Reasons Your DIY Candles Have No Scent (And How to Fix Them)
1. Your Wick Is Too Small (The Biggest Single Cause)
The Problem: This is, without a doubt, the most frequent culprit behind a weak-smelling candle. A candle’s scent is released from the melt pool – the liquid wax created by the burning wick. If your wick is too small for the wax and container, it won’t generate a large enough melt pool. A tiny melt pool means less surface area for the fragrance oil to evaporate from, resulting in a barely perceptible scent. Think of it like trying to heat a large room with a single tea light; it just won’t generate enough warmth or, in this case, enough fragrance.
The Fix: The solution here is to upsize your wick. This requires some dedicated testing, but it’s crucial for optimal scent throw and a clean burn.
- Consult Wick Charts: Reputable suppliers like CandleScience and Wooden Wick Co. provide detailed wick charts that recommend wick sizes based on wax type, container diameter, and fragrance load. These are excellent starting points.
- Test, Test, Test: There’s no universal “perfect” wick. You’ll need to conduct burn tests with different wick sizes, starting with a size up from your current one.
- Goal: Aim for a full melt pool that reaches the edges of your container within 2-4 hours of burning. The melt pool depth should be approximately 1/4 to 1/2 inch.
- Observe: If the melt pool is too small and tunnels down the center, your wick is too small. If the flame is too large, flickers excessively, or produces a lot of soot, your wick might be too large.
- Learn from the Pros: Brands like Stahl Candles are renowned for their perfectly wicked candles, achieving excellent scent throw and clean burns. Their success is a testament to meticulous wicking.
- Adjust: Once you find a wick that creates a proper melt pool, you’ve unlocked a significant part of your candle’s scent potential.
2. Your Fragrance Load Is Too Low
The Problem: Many beginners are hesitant to add “too much” fragrance oil (FO), fearing it might be overpowering or cause issues. As a result, they often err on the side of caution, leading to an insufficient fragrance load. If there simply isn’t enough fragrance oil in the wax, no matter how perfectly you wick or cure, the scent will be weak.
The Fix: Increase your fragrance load to 8-10% by weight.
- Calculation: For soy wax, an 8-10% fragrance load is generally ideal. This means for every 100 grams of wax, you should add 8-10 grams of fragrance oil.
- Example: If your candle uses 200g of wax, you’d add 16-20g of fragrance oil (200g wax * 0.08 = 16g FO; 200g wax * 0.10 = 20g FO).
- Weigh, Don’t Measure by Volume: Always use a digital scale to weigh your fragrance oil. Volume measurements (like teaspoons or milliliters) are inaccurate for fragrance oils due to varying densities.
- Don’t Exceed 12%: While increasing your fragrance load is key, avoid going above 10-12% with most soy waxes. Too much fragrance oil can lead to problems like sweating (fragrance leaching out), poor burn performance, larger flames, and increased soot. Stick within the recommended 8-10% range for optimal results.
3. Fragrance Added at the Wrong Temperature
The Problem: The temperature at which you add your fragrance oil to the melted wax is critical, especially for natural waxes like soy. If the wax is too hot, the volatile fragrance molecules can “flash off” or evaporate excessively before they have a chance to bind properly with the wax. If the wax is too cool, the fragrance oil won’t fully incorporate or disperse evenly, leading to an inconsistent or weak scent throw.
The Fix: Add your fragrance oil to soy wax when the temperature is between 175-185°F (80-85°C).
- Use a Reliable Thermometer: This is non-negotiable. Monitor your wax temperature precisely. Once your wax is fully melted, let it cool down to the ideal range before adding your FO.
- Why This Range? This temperature window is the sweet spot for most soy waxes. It’s hot enough to ensure the fragrance oil fully dissolves and binds with the wax molecules, but not so hot that the fragrance evaporates prematurely.
- Stir Gently and Thoroughly: After adding the fragrance oil, stir the wax gently but consistently for 1-2 minutes. This ensures the fragrance is evenly distributed throughout the wax, preventing “hot spots” or areas with less fragrance. Avoid vigorous stirring, which can introduce air bubbles.
4. Your Wax Hasn’t Cured Long Enough
The Problem: This is a common oversight, particularly for those new to soy wax. “Curing” (sometimes called “aging”) is a vital process where the fragrance molecules bond and integrate with the wax molecules over time. It’s like aging a fine wine or cheese – the flavors deepen and develop with time. If you burn your candle too soon after pouring, the fragrance hasn’t had enough time to fully bind, resulting in a weak or non-existent scent throw. Soy wax, in particular, is known for needing a longer cure time than paraffin.
The Fix: Give your soy candles a minimum of 2 weeks to cure, with 3-4 weeks often being ideal for maximum scent throw.
- Patience is a Virtue: This is perhaps the hardest fix for eager candlemakers! Resist the urge to light your freshly poured candles.
- Label and Store: As soon as you pour your candles, label them with the fragrance name and the pour date. Store your curing candles in a cool, dark, and dry place. A cupboard or shelf away from direct sunlight and extreme temperature fluctuations is perfect.
- Plan Ahead: If you’re making candles for gifts or a specific event, factor in the cure time. A candle poured today won’t be ready to perform its best for at least two weeks. Many find the scent throw significantly improves even between weeks two and four.
5. You’re Using the Wrong Fragrance for Soy Wax
The Problem: Not all fragrance oils are created equal, and not all perform well in soy wax. A fragrance oil might smell absolutely divine out of the bottle (strong “cold throw”), but once it’s incorporated into soy wax and burned, it might completely disappear (poor “hot throw”). Some fragrance oils are formulated specifically for paraffin wax, gel wax, or other applications, and simply don’t have the molecular structure or stability to deliver a strong scent in soy wax.
The Fix: Purchase fragrance oils specifically tested and recommended for soy wax by reputable suppliers.
- Supplier Recommendations: Always check the product descriptions from your fragrance oil vendors. Leading suppliers like CandleScience and Wooden Wick Co. will often specify if an FO is suitable for soy wax, provide recommended fragrance loads, and even offer testing notes on its hot throw performance.
- Read Reviews: Look at customer reviews for specific fragrance oils. Other candlemakers often share their experiences with hot throw in different waxes.
- Test New FOs: When trying a new fragrance oil, always make a small test candle first. Don’t commit to a large batch until you’ve confirmed its performance in your specific wax and wick combination.
- Understand Hot vs. Cold Throw: Remember that a strong cold throw (how it smells unlit) doesn’t guarantee a strong hot throw (how it smells when burning). Prioritize hot throw for your candles.
6. Your Jar Diameter Is Too Wide for Your Wick Size
The Problem: This issue is closely related to reason #1, but focuses on the container’s role in the equation. Even if you’ve selected a wick that seems appropriate, if your jar’s diameter is too wide for that wick to effectively pull wax and create a full melt pool, you’ll still end up with weak scent. A wide jar requires a wick with a larger “reach” to melt wax all the way to the edges. If the wick can’t achieve this, you’ll get tunneling and a small, inefficient melt pool.
The Fix: Ensure your wick size is matched to your jar diameter to achieve a full melt pool.
- Measure Accurately: Precisely measure the inner diameter of your candle jars.
- Consult Wick Charts Again: Use your jar diameter as the primary factor when consulting wick charts from your wax and wick suppliers. These charts typically provide wick recommendations based on jar size for specific wax types.
- Aim for the “Inch in 4 Hours” Rule: A good rule of thumb for melt pool development is to aim for the melt pool to expand by approximately 1 inch in diameter for every 4 hours of burn time. This indicates efficient wicking and will maximize scent throw.
- Consider Double Wicking: For very wide jars (e.g., 4 inches or more), a single wick may not be sufficient to create a full melt pool. In such cases, consider using two or even three smaller wicks strategically placed to ensure even wax consumption and a strong scent throw.
7. Air Movement / Room Size
The Problem: Sometimes, the candle itself isn’t the problem – it’s the environment it’s burning in. Fragrance molecules, once released into the air, can be quickly diffused and diluted by air movement or simply spread too thin in a large space. A candle that smells fantastic in a small bathroom might be barely noticeable in a large, open-plan living room with high ceilings or near an open window or fan.
The Fix: Manage expectations and adjust candle usage based on room size and air circulation.
- Understand Limitations: A single 8-ounce candle, no matter how perfectly made, is unlikely to fill an entire open-concept home with fragrance.
- Use Multiple Candles: For larger rooms, consider burning two or more candles of the same scent, or complementary scents, to achieve a stronger overall fragrance presence.
- Minimize Drafts: When burning your candles, try to minimize strong drafts from open windows, fans, or air conditioning vents. These can cause the flame to flicker erratically, leading to an uneven burn and faster dissipation of scent.
- Match Candle Size to Room: For small spaces like bathrooms or bedrooms, a smaller candle might be perfectly adequate. For larger living areas, opt for larger candles or multiple smaller ones.
Related Reading
- Best Hot Glue Guns for Crafters in 2026: Full-Size to Mini
- DIY Candle Making: Your First Homemade Candle
- DIY Natural Gels: Flaxseed, Aloe & Herbal Recipes
Frequently Asked Questions (FAQ)
1. What is “hot throw” vs. “cold throw”? Cold throw is the scent strength of a candle when it’s unlit. Hot throw is the scent strength released when the candle is burning. A strong cold throw doesn’t always guarantee a strong hot throw.
2. Can I add essential oils instead of fragrance oils? Yes, but essential oils (EOs) are typically more volatile, less potent in candles, and significantly more expensive per use. They require extensive testing, as their flash points and performance differ greatly from fragrance oils.
3. My candle smells strong unlit but weak when lit. Why? This is a classic sign of insufficient cure time, using a fragrance oil not suited for soy wax, or a wick that’s too small and not creating a large enough melt pool.
4. How do I know if my wick is the right size? A properly wicked candle will produce a full melt pool (reaching the jar edges) within 2-4 hours of burning, with a depth of about 1/4 to 1/2 inch. The flame should be steady, not too large, and there should be minimal mushrooming or soot.
5. Is it okay to use more than 10% fragrance oil? While some waxes can handle up to 12%, going above 10% (especially for soy) can lead to issues like sweating (fragrance oil seeping out), poor burn performance, excessive flame, and increased soot. It’s generally not recommended.
6. Does the type of wax affect scent throw? Yes. Different waxes have different scent throw capabilities. Paraffin wax, for instance, is known for its strong scent throw, while natural waxes like soy often require longer cure times and careful formulation to achieve comparable results. Wax blends can offer a compromise.
7. My candle has a “wet spot” or “frosting.” Does this affect scent? No, “wet spots” (areas where the wax has pulled away from the jar) and “frosting” (white, crystalline patches on the wax surface) are cosmetic issues. They do not typically impact the candle’s scent throw or burn performance.
8. How long does a candle last once cured? A properly made and cured candle, stored in a cool, dark place, can retain its scent throw for many months, often up to a year or even longer. Over very long periods (12+ months), some fragrance oils may begin to degrade or fade slightly.
Crafting candles with excellent scent throw is a journey of continuous learning and refinement. It involves understanding the science behind your ingredients, meticulous testing, and a dash of patience. By systematically addressing the common issues outlined in this guide – from optimizing your wick size and fragrance load to mastering cure times and environmental factors – you’ll be well on your way to creating beautifully scented candles that fill your space with the delightful aromas you envisioned. Keep experimenting, keep testing, and soon your DIY candles will be the envy of every nose!