What Is a French Drain and Why Would You Need One?
A french drain is a simple but effective drainage system: a gravel-filled trench with a perforated pipe that collects and redirects water away from problem areas. Despite the name, it has nothing to do with France — it was popularized by Henry French, a Massachusetts farmer, in the 1850s. The concept has not changed much since then because it works.
You need a french drain when water is collecting where you do not want it. That might look like:
- Standing water in your yard after every rain that takes days to drain
- A soggy, mushy area near your foundation that never fully dries
- Water seeping into your basement or crawl space through the walls or floor
- A retaining wall with hydrostatic pressure building behind it
- A low spot in your yard that turns into a pond every spring
If any of these describe your property, a french drain is likely the right solution. It intercepts water underground and redirects it to a safe discharge point — a storm drain, dry well, rain garden, or lower area of your yard.
Planning Your French Drain Route
Before you dig anything, you need to understand where the water is coming from, where you want it to go, and what is in the way.
Identify the Water Source
Walk your property during and after a heavy rain. Where is the water coming from? Is it surface runoff flowing across the yard? Is it groundwater seeping up through the soil? Is it roof runoff overwhelming a downspout area? The source determines where your drain starts.
Choose Your Discharge Point
Water has to go somewhere. Your options include:
- A storm drain or ditch — the ideal endpoint if one is available and local codes allow it
- A dry well — a buried pit filled with gravel that lets water percolate slowly into the surrounding soil
- A rain garden — a shallow planted depression designed to absorb runoff
- A lower area of your yard — if the natural grade carries water away from structures
- A pop-up emitter — a valve at the end of the pipe that opens under pressure and releases water at ground level
Do not discharge onto a neighbor’s property or into the sanitary sewer system. Both can create legal problems and the sewer discharge may actually be illegal in your municipality.
Check for Utilities
This is critical. Call 811 (the national “Call Before You Dig” number) at least 48 hours before you start. They will send utility locators to mark any buried gas, electric, water, sewer, cable, or telecom lines in your yard. This service is free and skipping it is both dangerous and, in most states, illegal.
Map the Route
With your start point, end point, and utility locations known, plan the route. Key principles:
- Maintain a minimum slope of 1% (1 inch of drop per 8 feet of run). Steeper is better — 2% is ideal. Without adequate slope, water sits in the pipe instead of flowing to the outlet.
- Keep the drain at least 3 feet from the foundation for perimeter drains. Digging too close can undermine your foundation.
- Avoid trees if possible. Roots will eventually find and invade your drain, clogging the pipe. If you cannot avoid trees, use solid (non-perforated) pipe through those sections.
- Straighter is better. Every bend slows water flow and creates a potential clog point. If you must turn, use gradual sweeps rather than sharp 90-degree elbows.
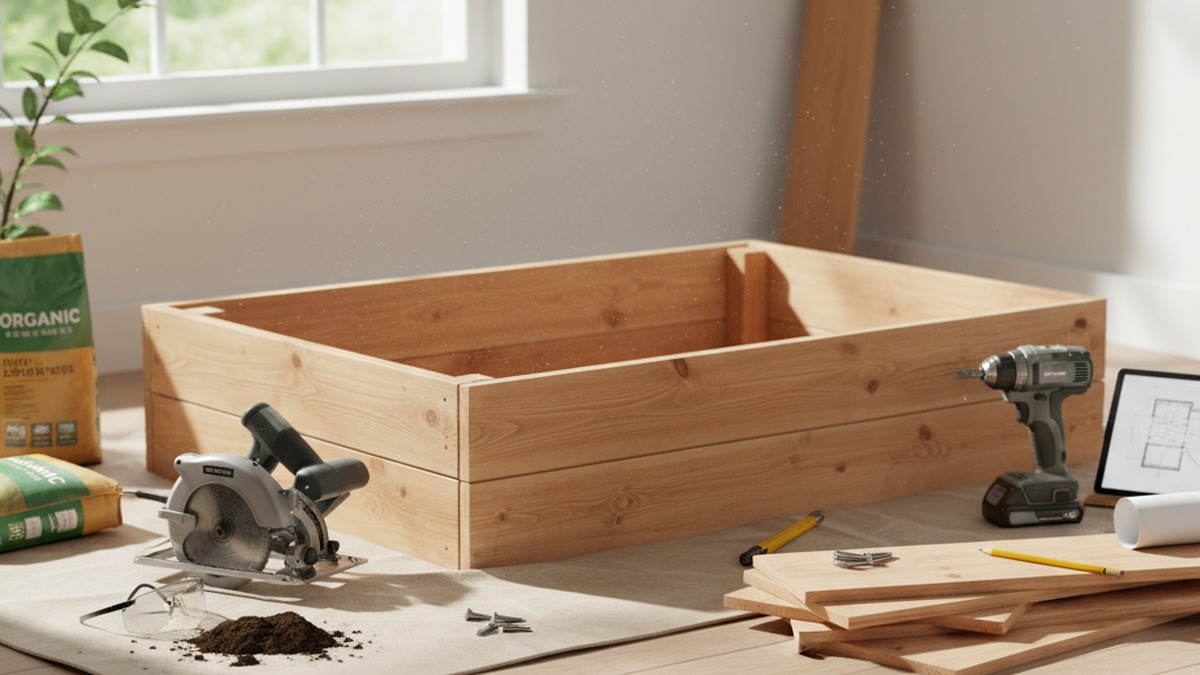
Tools and Materials
Tools
- Shovel (a trenching shovel with a narrow blade is ideal)
- Level or laser level
- String and stakes for marking
- Tape measure
- Utility knife (for cutting landscape fabric)
- Hacksaw or PVC pipe cutter
- Wheelbarrow
- Tamper or compactor
- Work gloves
Materials
- Perforated corrugated drain pipe (4-inch diameter is standard for residential) or rigid PVC perforated pipe (better longevity but harder to work with)
- Washed drainage gravel (3/4-inch crushed stone — not pea gravel, which is too round and compacts poorly)
- Landscape fabric (non-woven geotextile — this is different from the thin weed barrier fabric)
- Pipe fittings (couplings, elbows, end caps as needed)
- Discharge fitting (pop-up emitter, pipe-to-drain adapter, or dry well kit)
- Optional: drain sock — a fabric sleeve that wraps the pipe to keep fine sediment out of the perforations
Step-by-Step Installation
Step 1: Mark the Trench
Use stakes and string to mark the path of your drain. Mark both the start point (where you want to collect water) and the discharge point. Verify the slope by measuring the elevation difference between the two points.
If your yard is relatively flat, you may need to make the trench deeper at the collection point and shallower at the discharge point to create the necessary slope. A laser level makes this much easier to verify as you dig.
Step 2: Dig the Trench
This is the hardest part of the project. There is no shortcut — it is manual labor. The trench should be:
- 12-18 inches wide (12 inches is sufficient for most residential drains)
- 18-24 inches deep at the starting point, maintaining your target slope throughout
- Flat-bottomed — the pipe needs to rest evenly on the bottom of the trench
For long runs (50 feet or more), renting a trencher ($150-250 per day) saves hours of digging. For shorter runs, a trenching shovel and determination will get you there.
Pile the excavated soil on tarps next to the trench. You will need some of it later for backfilling, and keeping it contained makes cleanup much easier.
Tip: Dig the trench in sections if the project spans multiple days. Open trenches are trip hazards and fill with water in rain. Cover open sections with plywood overnight.
Step 3: Check the Slope
Before going further, verify your slope. Place a level on a straight board laid in the bottom of the trench. You need at least 1 inch of drop per 8 feet. If any section is flat or running uphill, correct it now. Adjusting the trench depth is much easier before you start lining and filling.
Some people use the “water test” — pour water at the high end and watch if it flows to the low end. This works, but a level is more precise.
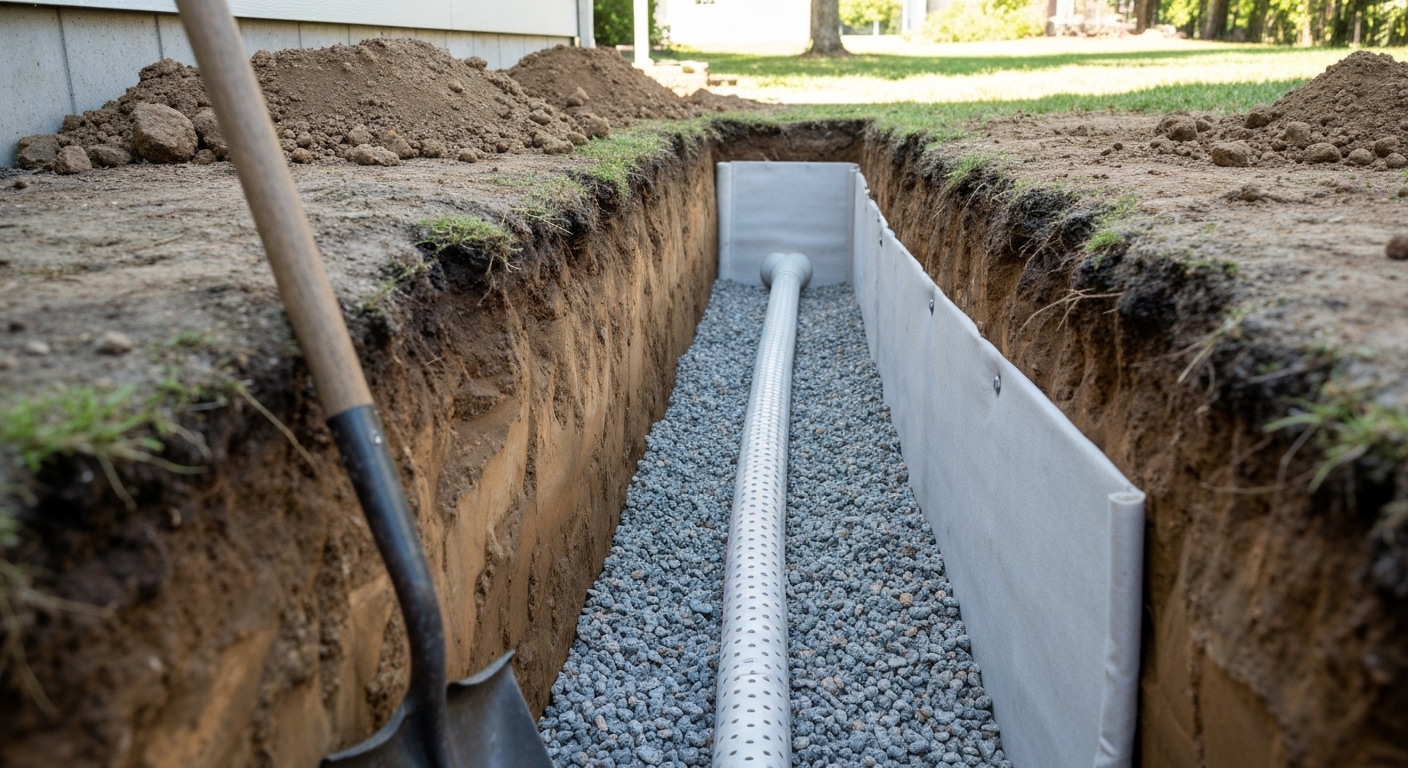
Step 4: Line the Trench with Landscape Fabric
Lay non-woven geotextile landscape fabric along the entire length of the trench. Leave enough excess on each side to fold over the top later — typically 12-18 inches of overhang on each side.
The fabric serves a critical purpose: it prevents fine soil particles from migrating into the gravel and pipe, which would eventually clog the system. This is the step that separates french drains that last 20 years from ones that fail in 5.
Do not use woven landscape fabric. Woven fabric has a tighter weave that can clog with fine soil over time. Non-woven geotextile is specifically designed for drainage applications and allows water to pass through while blocking sediment.
Step 5: Add the First Layer of Gravel
Pour 2-3 inches of washed 3/4-inch crushed stone into the lined trench. Spread it evenly and check that the slope is maintained. This gravel bed cushions the pipe and provides drainage area below it.
Why crushed stone and not pea gravel? Crushed stone has angular edges that lock together and create stable void spaces for water flow. Pea gravel is rounded and shifts under pressure, reducing drainage capacity over time.
Step 6: Lay the Pipe
Place your perforated pipe on top of the gravel bed with the holes facing down. This might seem counterintuitive — why would you point the holes away from the water? The answer is that water rises from below as the gravel surrounding the pipe fills up, entering through the bottom perforations. Holes facing up tend to let in sediment and debris from above, clogging the pipe faster.
Corrugated vs. rigid PVC:
- Corrugated flexible pipe is easier to work with, bends around obstacles, and costs less. It is fine for most residential applications. Get the kind with a filter sock pre-installed if available.
- Rigid PVC perforated pipe lasts longer, flows better (the smooth interior has less friction), and is harder for roots to penetrate. It is worth the extra effort for long runs or permanent installations.
Connect pipe sections with appropriate couplings. For corrugated pipe, snap-in couplings work. For rigid PVC, use PVC cement and primer on the fittings.
Step 7: Fill with Gravel
Cover the pipe with gravel until the gravel level is 2-4 inches below the ground surface. The pipe should be completely surrounded by at least 2-3 inches of gravel on all sides.
This gravel envelope is the working heart of your french drain. Water from the surrounding soil enters the gravel, flows down to the pipe, and follows the pipe to the discharge point.
Step 8: Fold the Landscape Fabric
Fold the excess landscape fabric over the top of the gravel, creating a complete fabric envelope around the gravel and pipe. Overlap the edges by at least 6 inches. This prevents soil from filtering down into the gravel from above.
Step 9: Backfill
Cover the folded landscape fabric with the remaining excavated soil, bringing the trench back up to grade. Compact the soil lightly to prevent settling. You can top it with topsoil and seed it with grass if you want the drain to disappear completely.
Some people cover the last few inches with decorative gravel instead of soil, which looks clean and makes the drain easy to locate for future maintenance.
Step 10: Install the Discharge End
At the low end of your drain, install your chosen discharge method:
- Pop-up emitter: Connect to the pipe and bury at ground level. It opens when water pressure builds and closes when the flow stops, keeping debris out.
- Dry well: Dig a hole 3-4 feet deep and 3-4 feet in diameter at the end of the pipe. Line with landscape fabric, fill with large crushed stone, and connect the pipe. Cover with fabric and soil.
- Daylight outlet: If the pipe exits on a slope or into a ditch, install a grate or rodent guard over the open end to prevent animals from entering.
Step 11: Test the System
Before you finish backfilling and landscaping, test the drain. Run a garden hose at the collection end for 10-15 minutes and verify that water exits at the discharge point. Check for leaks at pipe connections and any low spots where water pools in the trench.
Cost Breakdown
For a typical 50-foot residential french drain:
| Item | Cost |
|---|---|
| Perforated pipe (50 ft) | $30-75 |
| Crushed gravel (2-3 tons) | $100-250 |
| Landscape fabric (50 ft roll) | $20-40 |
| Fittings and discharge | $20-50 |
| Trencher rental (optional) | $150-250/day |
| Total DIY | $200-650 |
| Professional installation | $1,500-5,000+ |
The gravel is typically the biggest expense. Call local landscape supply yards for bulk pricing — buying by the ton instead of by the bag saves significantly. Most yards will deliver for a reasonable fee.
Common Mistakes That Cause French Drains to Fail
-
Insufficient slope. This is the number one reason french drains fail. If the pipe does not slope consistently toward the discharge point, water sits in the pipe and the drain does not work. Check and recheck your slope before laying pipe.
-
Skipping the landscape fabric. Without fabric, fine soil migrates into the gravel over time, filling the void spaces and turning your drainage gravel into regular dirt. Within 3-5 years, the drain stops functioning.
-
Using the wrong gravel. Round pea gravel, river rock, or unwashed stone will not perform as well as angular washed crushed stone. The “washed” part matters — clay and fine sediment in the stone will clog the system.
-
Placing pipe holes up. Perforations should face down. Water rises from below into the pipe. Holes facing up collect sediment and debris dropping in from the gravel above.
-
Not calling 811. Hitting a gas line while digging is a genuine emergency. Hitting a fiber optic cable is an expensive mistake. Hitting a water main creates a mess. All of these are entirely preventable with a free phone call.
-
Discharging too close to the foundation. If your discharge point sends water back toward the house, you have moved the problem rather than solved it. Discharge at least 10 feet from any foundation.
-
Running the pipe too close to trees. Tree roots seek out water sources and will eventually penetrate perforated pipe. Keep at least 10 feet from large trees, or use solid pipe through root zones.
-
Trench too shallow. If your trench is only 12 inches deep, the pipe sits just below the surface and does not intercept groundwater effectively. Eighteen to twenty-four inches is the minimum for most applications.
Maintenance
A properly installed french drain requires very little maintenance, but it is not zero:
- Inspect the discharge point seasonally. Make sure it is not blocked by debris, dirt, or animal nesting.
- Check for sinkholes. If the soil over the drain settles or sinks, it may indicate a section of pipe that has collapsed or a void in the gravel fill.
- Flush the pipe annually. If your discharge point is accessible, insert a garden hose and run water backward through the pipe at full pressure. This clears any minor sediment buildup inside the pipe.
- Monitor performance during heavy rain. If the drain handled water well when first installed but now overflows, sediment buildup is likely. Early intervention prevents full replacement.
When to Call a Professional
Install a french drain yourself if you have a straightforward route, reasonable soil conditions, and the physical stamina for the digging. Most homeowners with basic tool skills can handle this project.
Call a professional if:
- The drain runs near the foundation and requires precise depth control. An improperly dug trench near the foundation can cause structural problems.
- You have high clay content soil. Clay is extremely difficult to dig by hand and may require special drainage considerations.
- You need an interior french drain (inside the basement perimeter). This involves cutting concrete, installing a sump pump, and working in a confined space — not a beginner project.
- The drain needs to connect to the municipal storm sewer. This usually requires permits and must be done to code.
- Utility lines run through your planned route and you are not confident working around them.
The Bottom Line
A french drain is one of the most effective solutions for persistent water problems on residential property. The concept is simple, the materials are affordable, and the installation — while labor-intensive — is straightforward. The key to a long-lasting french drain is proper slope, quality materials, and that landscape fabric envelope that keeps soil out of the gravel. Do those three things right and your drain will quietly move water away from where it does not belong for decades.
Related Reading
- DIY vs Hire: When to Call a Pro — the decision framework for any home improvement project with safety or permit implications
- How to Install Gutter Guards: The Complete DIY Guide — keep debris out of your downspouts so water actually reaches your french drain
- Water Heater Maintenance Checklist for Longevity — another annual maintenance task to bundle with your exterior water-management work
- 10 Patio Ideas on a Budget That Actually Look Good — once the drainage problem is solved, these patio upgrades transform the same area