How to Build an Epoxy River Table (Beginner’s First Pour)
Welcome to the captivating world of epoxy river tables! This project, while visually stunning, can seem intimidating to a beginner. But with the right guidance, patience, and attention to detail, you absolutely can create a beautiful, functional piece of art for your home. This comprehensive tutorial is designed to walk you through every critical step, demystifying the process and equipping you with the knowledge to make your first epoxy river table a resounding success.
Let’s dive in and transform some raw wood into a masterpiece.
Realistic Budget for Your First River Table
Before you even think about wood, let’s talk budget. Building an epoxy river table, especially your first, isn’t a cheap endeavor, but it’s a rewarding investment. For a beginner, you should realistically expect to spend anywhere from $600 to $1500, depending on the size of your table, the type of wood, and whether you already own essential tools.
Here’s a rough breakdown of where your money will go:
- Wood Slabs: $100-$400+ (depending on species, size, and supplier)
- Deep Pour Epoxy Resin: $150-$500+ (this is often the largest single expense)
- Melamine for Mold: $30-$60
- Tuck Tape & Dam Silicone: $20-$40
- Pigments: $10-$50
- Sanding Supplies: $20-$50
- Finishing Oil/Polyurethane: $30-$80
- Table Legs: $50-$300+
- Miscellaneous (mixing buckets, stir sticks, PPE, heat gun, clamps): $50-$150
While some costs can be mitigated by using existing tools or finding cheaper materials, it’s best to budget generously to avoid cutting corners on critical components.
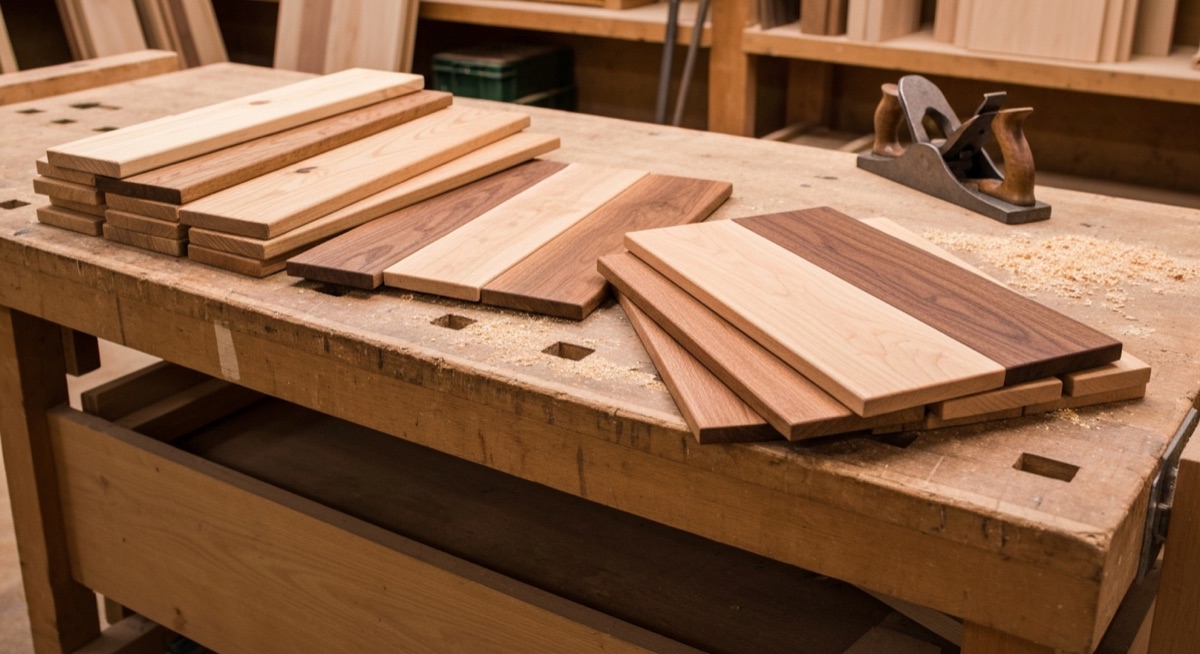
Slab Selection: The Heart of Your Table
The wood you choose will define the aesthetic of your river table. For a beginner, selecting the right slabs is paramount for a smooth build process.
Recommended Wood Species:
- Walnut: A classic choice, highly prized for its rich, dark color and beautiful grain patterns. It contrasts beautifully with lighter epoxies. It’s often more expensive.
- Ash: A lighter wood with a prominent, open grain, similar to oak. It’s durable and takes finishes well, offering a more contemporary feel.
- Oak: Known for its strength and distinctive open grain. Red oak has reddish tones, while white oak is lighter and more water-resistant. Its robust character makes for a sturdy table.
Key Slab Characteristics:
- Kiln-Dried: This is NON-NEGOTIABLE. Wood must be thoroughly dried (typically to 6-8% moisture content) to prevent future warping, cracking, or off-gassing that can ruin your epoxy. If you’re unsure, ask your supplier for moisture content readings or invest in a moisture meter. Air-dried wood is risky for epoxy projects.
- Two Matched Live Edges: The “river” effect comes from the natural, irregular edges of the wood slabs. Look for two pieces that complement each other, with interesting curves and character. They don’t need to be identical, but they should generally flow together.
- Rough Sawn or Planed: You can start with rough-sawn slabs, but be prepared for more flattening work. If you can find slabs that are already surfaced on one side, it will save you significant time.
- Size & Thickness: Ensure your slabs are thick enough for your desired table height, typically 1.5-2 inches (3.8-5 cm) finished. This allows for material removal during flattening and sanding.
When selecting, visualize how the two pieces will sit together, forming the river channel. Consider any voids, knots, or bark inclusions – these can add character but might require additional epoxy work or stabilization.
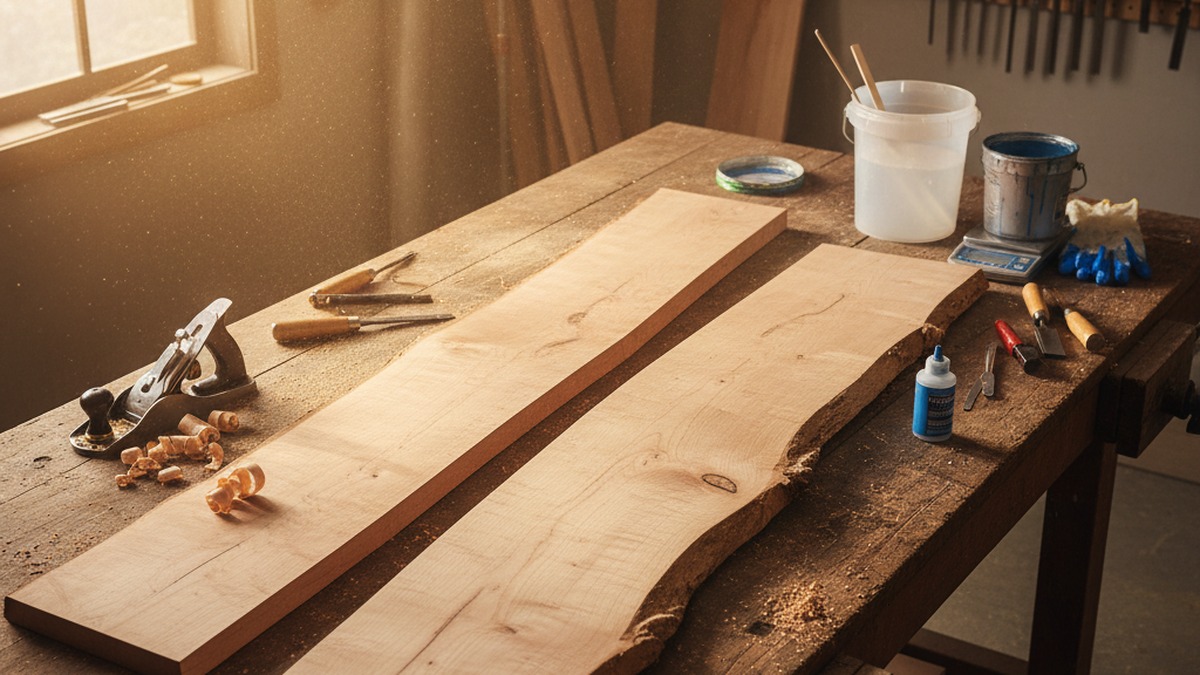
Flattening the Slabs: A Critical First Step
Before any epoxy touches wood, your slabs must be perfectly flat and level. This ensures a stable base and prevents issues during the pour.
Methods for Flattening:
-
Router Sled (DIY or Purchased):
- How it works: This is the most common and accessible method for hobbyists. You build a jig (or buy one) that holds your router at a fixed height, allowing it to traverse over the slab, gradually removing material until flat.
- Pros: Highly effective, precise, relatively inexpensive to build, good for beginners.
- Cons: Time-consuming, creates a lot of dust, requires a good quality router and a large bit.
- Process: Secure your slabs to a flat workbench. Build a sled that rides on rails above the slabs. Pass the router back and forth, taking shallow passes (1/16” - 1/8” at a time) until both sides are flat and parallel. This is often done before the river pour, and then again after the pour.
-
Hand Plane:
- How it works: Using traditional hand planes (jointer, fore, or smoothing plane) to remove material manually.
- Pros: Extremely satisfying, quiet, no dust (chips instead), develops woodworking skill.
- Cons: Requires significant skill, physical effort, and specific planes. Not ideal for significantly warped or very large slabs for a beginner.
- Process: Use winding sticks and a straightedge to identify high spots and systematically plane them down.
-
Paid CNC or Wide Belt Sander Service:
- How it works: You take your slabs to a professional shop that has a large CNC router or a wide belt sander capable of handling slab dimensions.
- Pros: Fastest, most precise, perfectly flat results with minimal effort on your part.
- Cons: Can be expensive ($50-$150+ per slab), requires transporting large wood.
- Recommendation: If budget allows, this is the easiest option for a beginner to ensure perfectly flat slabs before starting.
Pre-Flattening Considerations: Once your slabs are flattened, clean any loose bark from the live edges. Use a wire brush or even a pressure washer (allow to fully dry for weeks if wet) to remove debris. This ensures the epoxy adheres properly to the wood. You can also seal the live edges with a thin coat of epoxy (or denatured alcohol, then epoxy after drying) to prevent air bubbles from escaping the wood during the main pour.
Building the Dam/Mold: Contain Your River
The mold is crucial for containing your liquid epoxy. A poorly constructed mold can lead to leaks, wasted epoxy, and a ruined project.
Materials You’ll Need:
- Melamine Boards: This is the best choice for your mold sides and bottom. Its smooth, non-porous surface prevents epoxy from sticking, making demolding much easier. Get sheets thick enough to prevent bowing (e.g., 3/4 inch or 18mm).
- Tuck Tape (Sheathing Tape): This is a specific type of construction tape, usually blue or red, known for its strong adhesion and smooth surface. It acts as a release agent.
- Dam Silicone (RTV Silicone): This is a high-quality, non-acetic (low odor) silicone designed for mold making or sealing. It cures to a rubbery consistency and is easily removable from cured epoxy.
- Clamps: Plenty of F-clamps or parallel clamps to secure the mold sides.
- Hot Glue Gun: For temporarily holding strips of wood or battens.
DO NOT Use Regular Silicone Caulk! Standard bathroom or window silicone caulk often contains acetic acid, which can inhibit epoxy cure, causing sticky spots. It also typically adheres too strongly to epoxy, making demolding incredibly difficult and potentially damaging your project. Always opt for “dam silicone,” “RTV silicone,” or a silicone specifically labeled as “epoxy release.”
Step-by-Step Mold Construction:
- Prepare the Base: Cut a piece of melamine larger than your final table dimensions (e.g., 2-3 inches larger on all sides). Clean it thoroughly.
- Tape the Base: Cover the entire top surface of your melamine base with Tuck Tape. Overlap the tape slightly (1/4 inch or 5mm) and ensure there are no air bubbles or wrinkles. This creates a release layer.
- Position Your Slabs: Place your flattened wood slabs on the taped melamine base, arranging them to form your desired river channel. Use spacers (e.g., small shims or offcuts) to maintain a consistent river width.
- Build the Sides: Cut melamine strips for the mold sides, ensuring they are at least 1-2 inches taller than your thickest slab. This accounts for epoxy overflow and allows for post-pour flattening.
- Tape the Sides: Apply Tuck Tape to the inside faces of your melamine side pieces, just as you did for the base.
- Assemble the Mold:
- Place the taped side pieces around your slabs on the taped base.
- Use hot glue to temporarily attach small wooden battens to the outside of the mold sides and base, creating a sturdy box. This prevents the sides from bowing outwards under the weight of the epoxy.
- Apply liberal amounts of dam silicone to all internal seams where the side pieces meet the base, and where the side pieces meet each other. Smooth it out with a gloved finger or an epoxy spreader tool. This creates a watertight seal.
- Let the silicone cure fully according to the manufacturer’s instructions (usually 24 hours).
- Secure with Clamps: Once the silicone is cured, remove the hot-glued battens and replace them with clamps, tightening them firmly around the entire mold perimeter. This provides robust pressure to prevent leaks during the pour.
- Seal the Wood Edges: If you didn’t do this during pre-flattening, apply a thin layer of epoxy (or a dedicated wood sealer) to the live edges of your slabs where they will meet the main pour. This helps to seal the wood and prevent air bubbles from escaping into your river during the main pour. Let this cure fully.
Deep-Pour vs. Table-Top Epoxy: Choose Wisely
This is one of the most critical decisions for a river table. Using the wrong type of epoxy will lead to disaster.
-
Deep-Pour Epoxy (Casting Resin):
- Use for: Any pour thicker than 0.5 inches (1.25 cm). This is almost always what you need for a river table.
- Characteristics: Designed to be poured in thick layers (often up to 2-4 inches per layer, sometimes more). It has a very long pot life (working time) and a low exotherm (heat generation) during curing. This slow cure allows air bubbles to rise and dissipate naturally.
- Pot Life: 30-60+ minutes.
- Cure Time: Slower, often 24-72 hours to touch, 7+ days to full hardness.
-
Table-Top Epoxy (Coating Resin):
- Use for: Thin layers, typically 1/8 inch (0.3 cm) or less. Ideal for clear topcoats on finished surfaces, bar tops, or encapsulating thin objects.
- Characteristics: Designed to self-level in thin layers and cure quickly. It generates a significant amount of heat (high exotherm) when poured too thick, which can lead to cracking, yellowing, boiling, or even smoking.
- Pot Life: 15-30 minutes.
- Cure Time: Faster, often 6-12 hours to touch, 24-48 hours to full hardness.
Recommendation: For a river table, you must use deep-pour epoxy. If your river channel is significantly deeper than 0.5 inches (which it almost certainly will be), table-top epoxy will overheat and ruin your project.
Brand Recommendations (No Affiliate Links):
- Total Boat Deep Pour Epoxy: A popular choice known for its clarity, low exotherm, and ease of use for deep pours.
- Ecopoxy Liquid Plastic: Another excellent deep-pour option, often favored for its eco-friendly claims and good performance.
- Pro Marine Supplies Deep Pour Epoxy: A reliable, cost-effective option that performs well for river tables.
Always follow the specific mixing ratios and instructions provided by your chosen epoxy manufacturer.
Pigments: Giving Your River Life
Pigments allow you to customize the color and opacity of your epoxy river.
-
Mica Powders:
- Effect: Creates pearlescent, shimmery, or metallic effects. Available in a vast array of colors.
- Application: Mix directly into the epoxy. Start with a small amount and add more until you achieve the desired opacity and shimmer.
- Tip: Layering different mica colors can create depth and unique effects.
-
Alcohol Inks:
- Effect: Creates translucent, vibrant colors. Can be used to achieve “cells” or “lacing” effects when dropped into epoxy (though this is more advanced).
- Application: Mix sparingly into the epoxy. A little goes a long way. Be careful not to add too much, as excessive alcohol can interfere with the epoxy’s cure.
-
Liquid Pigment Dispersions:
- Effect: Opaque, solid colors. Highly concentrated, so only a few drops are needed.
- Application: Mix thoroughly into the epoxy. Ideal for creating a solid, uniform color in your river.
Important Pigment Rules:
- Less is More: Always start with a tiny amount of pigment and add gradually. You can always add more, but you can’t take it away.
- Mix Thoroughly: Ensure pigments are fully dispersed into the epoxy for uniform color.
- Epoxy-Specific Pigments: Use pigments designed for epoxy resin. Craft store acrylic paints or water-based dyes can cause curing issues.
The Pour: Patience is a Virtue
This is the moment of truth! Ensure your workspace is clean, dust-free, and at the ideal temperature specified by your epoxy manufacturer (typically 70-75°F / 21-24°C).
Before You Pour:
- Calculate Volume: Measure the length, width, and average depth of your river channel. Use an online epoxy calculator or the formula (L x W x D) to determine the cubic inches/cm, then convert to the required fluid ounces/liters of mixed epoxy. Add 10-20% extra to account for absorption and error.
- Prepare Your Area: Lay down plastic sheeting to protect your floor. Have all tools ready: mixing buckets (two sets are good for multi-stage mixing), stir sticks, heat gun, paper towels, and personal protective equipment (PPE: gloves, safety glasses, respirator if working in an enclosed space).
- Ensure Levelness: Double-check that your mold is perfectly level in all directions using a spirit level.
Mixing the Epoxy:
- Read Instructions: Seriously, read your specific epoxy’s instructions for mixing ratios (e.g., 2:1, 3:1 by volume or weight).
- Measure Accurately: Measure Part A (resin) and Part B (hardener) precisely into separate, clean mixing buckets. Accuracy is paramount for proper curing.
- Combine & Mix: Pour Part B into Part A. Scrape all of Part B into Part A.
- Slow & Thorough Mixing: Stir slowly and continuously for 5-7 minutes. Scrape the sides and bottom of the bucket frequently to ensure all components are fully incorporated. An unmixed area will result in sticky, uncured epoxy.
- Two-Bucket Method (Recommended): After the initial mix, pour the entire contents into a second clean mixing bucket and stir for another 2-3 minutes. This ensures no unmixed resin from the sides/bottom of the first bucket makes it into your pour.
- Add Pigments: If using pigments, add them after the epoxy is fully mixed, then stir for another minute to ensure even distribution.
The Pour:
-
One Shot (If Possible): For a river table, aim for a single pour if your deep-pour epoxy allows the full depth in one go (e.g., 2-inch maximum pour depth). Multiple layers introduce more risk of dust, lines, and trapped air.
-
Slow, Controlled Stream: Pour the epoxy slowly into the river channel. Don’t dump it all at once. A slow stream helps to minimize air bubbles. Work your way along the length of the river.
-
Self-Leveling: Deep-pour epoxy is designed to self-level. Don’t overwork it with a spreader.
-
Eliminate Bubbles (Heat Gun Pass):
- Wait 5-10 minutes after the pour to allow initial bubbles to rise.
- Hold a heat gun (NOT a torch, which can scorch the epoxy and leave residue) about 6-12 inches (15-30 cm) above the epoxy surface.
- Move the heat gun in a slow, sweeping motion across the entire surface. You’ll see bubbles pop almost instantly.
- Repeat this process every 15-30 minutes for the first 1-2 hours of the cure, or until no more bubbles appear.
- Caution: Do not hold the heat gun in one spot for too long, as this can overheat the epoxy and cause issues.
-
Cover Your Project: Once you’ve done your final bubble pass, cover your entire mold with a plastic sheet or cardboard box to protect it from dust, pet hair, and insects during the long cure.
Cure Time: The Waiting Game
Patience is crucial during the curing process. Rushing it can ruin hours of work.
- Touch Dry (Tacky): Typically 24-72 hours. At this stage, the epoxy will be firm but might still feel slightly tacky. You can usually touch it without leaving a fingerprint.
- Hardness for Demolding/Light Handling: Approximately 7 days. The epoxy will be hard enough to safely demold and handle without fear of denting or marring.
- Full Cure for Sanding/Heavy Use: 14 days. For optimal hardness, chemical resistance, and to prevent gumming up sandpaper, wait the full two weeks before extensive sanding or placing heavy objects on the table.
Always refer to your specific epoxy manufacturer’s guidelines, as cure times can vary by product and environmental conditions (temperature, humidity).
Flattening the Cured Pour: Leveling the Landscape
Even with a perfectly level mold, the epoxy and wood might not be perfectly flush after curing due to slight bowing or epoxy overflow. This step ensures a perfectly flat surface for your finished table.
Methods:
- Router Sled: This is again the most practical method for DIYers. Use the same router sled setup you used for the wood slabs. Take very shallow passes (1/32” or 1mm at a time) across the entire surface until both the wood and epoxy are perfectly flush and flat. This is usually done on both sides of the table.
- Wide Belt Sander or CNC: If you have access or budget, this is the fastest and most efficient way to achieve a perfectly flat surface.
- Hand Planing (Advanced): While possible, planing epoxy requires very sharp blades and can be challenging due to the difference in material hardness between wood and epoxy. Not recommended for beginners.
Important: After flattening, you’ll expose a fresh, unsealed surface of both wood and epoxy. This is normal and prepares the surface for sanding and finishing.
Sanding: The Path to Clarity and Smoothness
Sanding is where your river table truly begins to shine. It’s a laborious but essential step that determines the final look and feel.
Always use a random orbital sander for this process.
Grit Progression (Wet or Dry Sanding):
- 80 Grit: Start here to remove router marks, flatten any minor imperfections, and establish a uniform surface. Don’t skip this or try to jump grits. Sand until all visible marks from the flattening process are gone.
- 120 Grit: Removes the 80-grit scratches.
- 220 Grit: Removes the 120-grit scratches. At this point, the surface should feel smooth to the touch, and scratches will be much less visible.
- 320 Grit: Refines the surface further, making it even smoother.
- 400 Grit: The final sanding step before finishing, producing a very fine, smooth surface. For a glass-like finish, some may go up to 600 or even 800 grit.
Sanding Best Practices:
- Cleanliness: After each grit, thoroughly clean the surface with a vacuum and a tack cloth to remove all dust. Remaining dust from a coarser grit will create scratches with the next finer grit.
- Even Pressure: Apply even pressure with your sander and move it in a consistent, overlapping pattern.
- Edge Work: Pay extra attention to the edges and corners. Hand sanding might be required in tight spots or around live edges to ensure consistency.
- Wet Sanding (Optional for Epoxy): For the finer grits (320, 400+), wet sanding with water can help reduce dust, keep sandpaper from loading up, and produce a finer scratch pattern on the epoxy. If wet sanding, allow the wood to dry thoroughly before moving to the next step.
Finish Options: Protecting Your Investment
The finish protects your table and enhances its beauty. Your choice depends on your desired look and durability.
-
Polyurethane (Oil-Based or Water-Based):
- Effect: Creates a durable, protective layer. Oil-based polyurethanes offer a warmer, amber tone, while water-based options are clearer and dry faster.
- Application: Apply multiple thin coats, sanding lightly with 320-400 grit between coats.
- Pros: Excellent scratch and water resistance, durable.
- Cons: Can look “plastic-y” if applied too thick; repairs can be difficult.
-
Hard Wax Oil (e.g., Osmo Polyx-Oil, Rubio Monocoat):
- Effect: Penetrates the wood, enhancing its natural color and grain, while leaving a very thin, natural-feeling protective layer. The epoxy will retain its polished look.
- Application: Apply according to manufacturer’s instructions, typically one or two thin coats.
- Pros: Natural look and feel, easy to repair, environmentally friendly.
- Cons: Less durable than polyurethane against deep scratches, requires occasional reapplication.
-
Polishing Compound for Glass Shine (Epoxy Only):
- Effect: If you want a mirror-like, glass-smooth finish specifically on the epoxy river, you can sand the epoxy up to 1000-2000 grit (or higher) and then use a polishing compound with a buffing pad on a polisher.
- Application: Apply compound to the epoxy, then buff with a rotary or orbital polisher.
- Pros: Achieves an incredibly clear, high-gloss finish on the epoxy.
- Cons: Time-consuming, requires additional tools, only affects the epoxy. You’d typically combine this with a hard wax oil for the wood.
Legs: Supporting Your Masterpiece
The legs complete your table’s aesthetic and provide crucial support.
-
Welded Steel Legs:
- Styles: Box section, U-shape, X-frame, trapezoid.
- Pros: Modern, industrial look; extremely strong and stable.
- Cons: Can be expensive if custom-made; heavy.
-
Hairpin Legs:
- Styles: Two-rod or three-rod designs.
- Pros: Mid-century modern aesthetic, lightweight, relatively inexpensive, easy to install.
- Cons: Can sometimes feel less sturdy for very large or heavy tables.
-
Classic A-Frame Wooden Legs:
- Styles: Traditional A-frame, trestle, or slab legs.
- Pros: Timeless design, can be custom-made to match wood species.
- Cons: Requires more woodworking skill if building yourself.
Ensure the legs are securely attached to the underside of the table using appropriate fasteners (e.g., threaded inserts and machine screws, or lag screws).
First-Time Mistakes to Avoid
Learning from others’ mistakes is a smart way to ensure your first pour is a success.
- Pouring Too Deep with Table-Top Epoxy: As stressed earlier, this is a surefire way to ruin your project. Always use deep-pour epoxy for pours thicker than 0.5 inches. Overheating will cause cracking, yellowing, and bubbling.
- Wet Wood: If your wood isn’t kiln-dried to 6-8% moisture content, it will continue to release moisture and gasses over time. This can cause bubbles to constantly rise into your epoxy, or even lead to warping and cracking of the wood after the epoxy has cured.
- Inaccurate Mixing Ratios: Epoxy is a chemical reaction. If Part A and Part B aren’t measured precisely according to the manufacturer’s instructions, your epoxy won’t cure properly. It will remain sticky, soft, or have uncured spots. Always use measuring cups with clear markings or a scale for weight-based ratios.
- Overheating with a Torch: While torches quickly pop bubbles, they can also scorch the epoxy, leaving yellowing or hazy spots. A heat gun is a safer option for beginners as it provides more controlled heat.
- Demolding Too Early: Patience is key. Demolding before the epoxy is fully cured (especially before 7 days) can lead to dents, scratches, or even cracking as the epoxy is still relatively soft.
- Insufficient Clamping/Sealing of the Mold: Leaks are a common and frustrating beginner mistake. Ensure your melamine mold is heavily clamped and every seam is perfectly sealed with dam silicone. Even a small leak can drain a significant amount of expensive epoxy.
- Ignoring Temperature and Humidity: Epoxy cures best within a specific temperature range (typically 70-75°F / 21-24°C). Curing in a too-cold environment can lead to a soft cure or longer cure times. High humidity can also affect the cure, especially with some brands.
- Not Wearing PPE: Epoxy is a sensitizer. Always wear nitrile gloves, safety glasses, and a respirator in a well-ventilated area to protect yourself from fumes and skin contact.
FAQ: Common Beginner Questions
Q1: How much epoxy do I need for my river table? A1: Measure the length, average width, and average depth of your river channel in inches. Multiply these three numbers (L x W x D) to get the cubic inches. Divide that number by 231 to get gallons, or multiply by 0.554 to get fluid ounces. Always add 10-20% extra for waste, absorption, and errors. Many epoxy brand websites also have calculators.
Q2: Can I use different types of wood for the slabs? A2: Yes, absolutely! You can mix and match different wood species to create unique contrasts. Just ensure both pieces are kiln-dried and stable.
Q3: What if I get bubbles after the initial heat gun passes? A3: Small, persistent bubbles often come from air escaping the wood itself, especially if the live edge wasn’t sealed properly. Continue to pass the heat gun over the surface every 15-30 minutes for the first few hours of the cure. For very stubborn bubbles, you might need to use a toothpick to manually pop them. A “seal coat” on the wood’s live edge before the main pour is the best prevention.
Q4: My epoxy is sticky or soft after curing. What went wrong? A4: This is almost always due to improper mixing ratios or insufficient mixing. The epoxy components were not fully combined, preventing a complete chemical reaction. The only fix is usually to scrape off the soft/sticky epoxy and re-pour, or apply a thin “seal coat” of properly mixed epoxy over the top if it’s only slightly tacky.
Q5: How do I clean my tools after working with epoxy? A5: For wet epoxy, use denatured alcohol, acetone, or lacquer thinner to clean tools immediately. Once epoxy cures, it’s very difficult to remove, so clean up promptly. Plastic mixing buckets can sometimes be reused by letting the epoxy cure and then flexing the bucket to pop out the hardened epoxy.
Q6: Can I pour my river in multiple layers? A6: Yes, if your deep-pour epoxy has a maximum pour depth less than your river’s total depth. Pour subsequent layers once the previous layer is touch-dry (tacky) but not fully cured, usually within 24-48 hours. This allows for a chemical bond between layers. If you wait too long, you’ll need to sand the previous layer with 80-120 grit to create a mechanical bond.
Q7: How do I prevent dust from getting into my curing epoxy? A7: A clean workspace is crucial. Before pouring, vacuum thoroughly. After your final bubble pass, immediately cover your entire mold with a plastic sheet, cardboard box, or even a tarp suspended above the table. Ensure the cover doesn’t touch the wet epoxy.
Q8: What if my epoxy yellowed during curing? A8: Yellowing can occur if the epoxy overheated (poured too thick with the wrong type of epoxy), was exposed to too much UV light during cure, or if the resin itself is old or of lower quality. Some epoxies also naturally have a slight amber tint. Unfortunately, yellowing from overheating is usually irreversible.
Building an epoxy river table is a fantastic project that combines woodworking, chemistry, and artistry. By following these detailed steps and heeding the advice for beginners, you’ll gain valuable skills and create a stunning piece of furniture you’ll be proud to showcase. Happy building!