Epoxy Resin Troubleshooting: Solving Common Project Mishaps
Epoxy resin projects offer a fantastic blend of creativity and durability, allowing you to craft stunning countertops, encapsulate cherished items, create mesmerizing river tables, or add a protective, glossy finish to artwork. However, even with the best intentions and careful planning, working with epoxy resin can sometimes present a unique set of challenges. From sticky surfaces to stubborn bubbles, encountering a hiccup in your project is a common rite of passage for both beginners and seasoned crafters alike.
This comprehensive troubleshooting guide from build-coded.com is designed to help you diagnose and resolve the most frequent issues encountered when working with epoxy resin. We’ll delve into the root causes of these problems and provide actionable solutions, empowering you to rescue your current project or prevent future mishaps. For a foundational understanding of working with this versatile material, we recommend checking out our [/epoxy-resin-beginners-guide/].
Before diving into specific problems, remember that epoxy resin is a two-part chemical system – a resin and a hardener – that undergoes an exothermic reaction when mixed. This reaction is highly sensitive to factors like temperature, humidity, and precise measurement. Understanding these fundamentals is key to successful resin work and effective troubleshooting.
Common Failure Modes, Causes, and Solutions
1. Won’t Cure / Sticky Surface
This is arguably the most frustrating and common issue. You’ve waited the recommended cure time, but your resin is still tacky, soft, or completely liquid in spots.
Causes:
- Incorrect Mix Ratio: This is the primary culprit. Epoxy resins are formulated with very specific resin-to-hardener ratios (e.g., 1:1, 2:1, 3:1 by volume or weight). Deviating from this, even slightly, means there aren’t enough chemical agents to complete the hardening reaction. Too much resin or too much hardener will both result in a sticky, uncured mess.
- Insufficient Mixing: Even with the correct ratio, if the resin and hardener aren’t thoroughly combined, the chemical reaction won’t occur evenly. Unmixed pockets will remain liquid or tacky. Scraping the sides and bottom of your mixing container is crucial.
- Cold Temperature: Epoxy resin cures best within a specific temperature range, typically 70-80°F (21-27°C). Colder temperatures significantly slow down the chemical reaction, leading to prolonged cure times or an incomplete cure, resulting in a perpetually sticky surface.
- Inaccurate Measuring: Using imprecise tools like household spoons or guessing rather than accurate measuring cups or a digital scale (especially for weight-based ratios) can lead to an incorrect mix ratio.
- Contamination: Water, solvents, dust, or other foreign substances introduced during mixing or pouring can interfere with the curing process, particularly if they dilute the hardener or disrupt the chemical bonds.
- Expired or Degraded Resin: While less common, resin components can degrade over time, especially if stored improperly (e.g., exposed to extreme temperatures or humidity). This can impair their ability to cure properly.
Fixes:
- For Small Sticky Areas: If only small patches are sticky, try to gently scrape away the uncured resin with a craft stick or plastic scraper. Then, clean the area with denatured alcohol or acetone to remove any residue. Once dry, you can prepare a small, accurately measured and thoroughly mixed fresh batch of resin and pour a thin layer over the affected spot, ensuring it blends with the cured resin.
- For Widespread Stickiness: If the entire piece or a large section is sticky, the best approach is often to scrape off as much of the uncured resin as possible. Use a plastic scraper to avoid damaging the underlying surface. Clean the surface thoroughly with denatured alcohol or acetone. Once completely clean and dry, sand the surface lightly with 220-grit sandpaper to create a mechanical bond for the new layer. Then, re-pour a fresh, perfectly measured and mixed layer of resin. Ensure your working environment is warm.
- Increase Temperature: If the issue is due to cold, move the piece to a warmer room (75-80°F / 24-27°C) and allow extra time for the cure. Sometimes, simply warming the environment can kickstart a stalled cure.
- Prevention is Key: Always measure precisely according to the manufacturer’s instructions (by volume or by weight, using dedicated measuring cups or a digital scale). Mix thoroughly for the recommended time (typically 3-5 minutes), scraping the sides and bottom of the container frequently. Ensure your workspace and resin components are at the optimal temperature before mixing.
2. Bubbles
Bubbles are a classic epoxy resin frustration, ranging from tiny pinpricks to large, unsightly air pockets.
Causes:
- Air Entrapment During Mixing: Vigorous or fast mixing introduces air into the resin mixture.
- Porous Surfaces: Wood, concrete, or other porous materials can release trapped air into the resin as it warms during curing, leading to a continuous stream of bubbles.
- High Ambient Temperature / Rapid Curing: A warmer environment or a fast-curing resin can accelerate the exothermic reaction, making the resin thicker faster and trapping bubbles before they can rise and escape.
- Pouring Technique: Pouring from a high distance or too quickly can introduce air.
- Resin Temperature: Cold resin is thicker and holds onto bubbles more readily.
Fixes:
- Warm Your Resin: Before mixing, gently warm both the resin and hardener bottles in a warm water bath (not hot, around 80-90°F / 27-32°C) for 10-15 minutes. This reduces viscosity, allowing bubbles to escape more easily.
- Mix Slowly and Deliberately: Stir gently and steadily, avoiding aggressive whipping motions. Scrape the sides and bottom of your mixing container thoroughly.
- Degassing (Optional): For professional results, a vacuum chamber can be used to degas the mixed resin before pouring, pulling all air bubbles out. This is usually overkill for hobbyists.
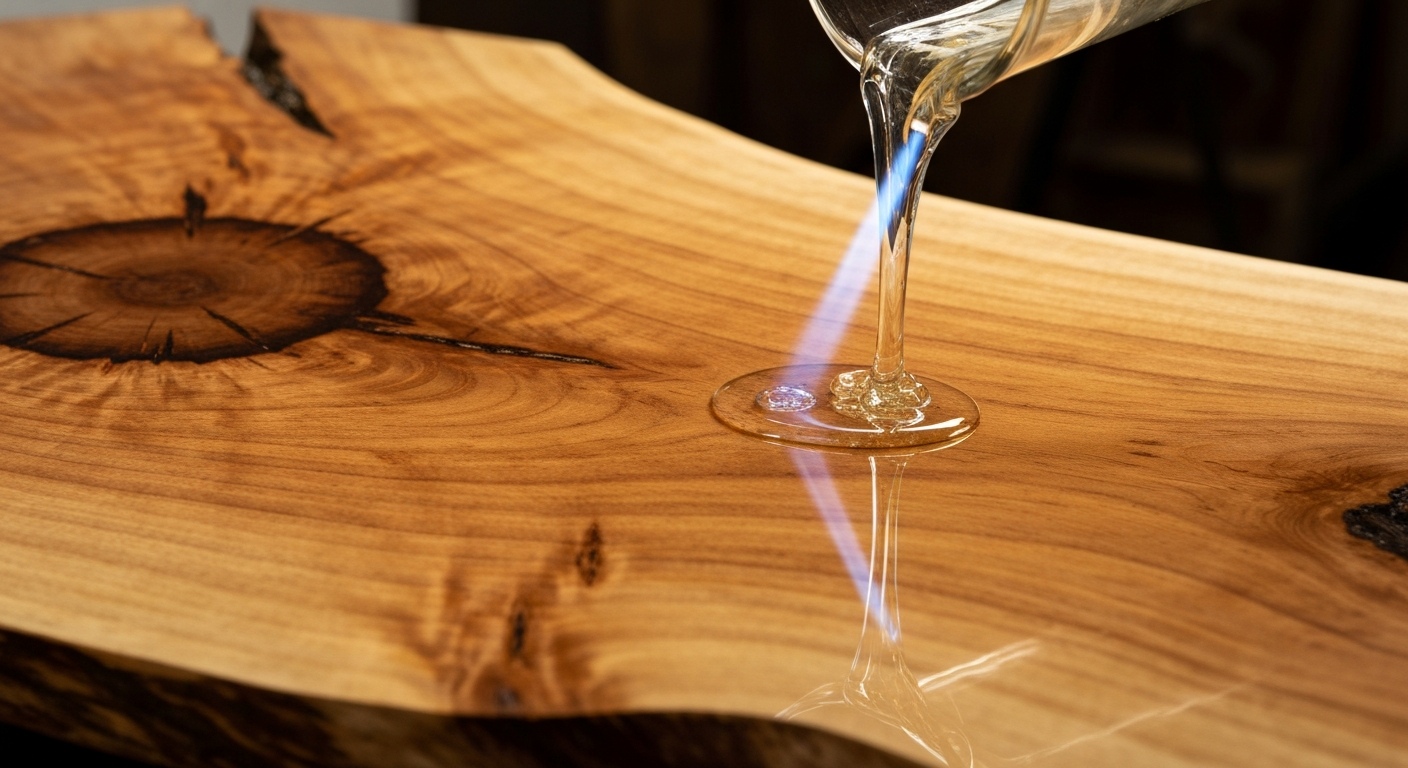
- Heat Gun or Propane Torch: Immediately after pouring, and for the first 15-30 minutes of curing, pass a heat gun or small propane torch (briefly and quickly, keeping it moving) over the surface. The heat thins the resin, allowing trapped bubbles to rise and pop. Be careful not to scorch the resin or hold the heat in one spot for too long.
- Alcohol Spray: A light mist of 91% isopropyl alcohol can also help pop surface bubbles, but use sparingly as it can sometimes affect the finish.
- Seal Porous Surfaces: For wood or other porous materials, apply a thin “seal coat” of resin first. Allow it to cure to a tacky state or fully cure before applying your main flood coat. This traps air within the substrate, preventing it from bubbling into your final layer. For projects like river tables, this is critical. See our [/epoxy-resin-river-table-tutorial/] for detailed guidance on preparing wood.
- Pouring Technique: Pour slowly and steadily, as close to the surface as possible.
3. Cloudy or Cratered Surface
A cloudy, hazy, or unevenly cratered surface can detract from the intended clear, glossy finish.
Causes:
- Moisture Contamination: Water or high humidity during mixing or curing can react with the hardener, causing cloudiness or a milky appearance. This is particularly true for amine blush (covered next).
- Unmixed Components: If the resin and hardener aren’t completely homogenous, pockets of unreacted material can cause cloudy streaks or patches.
- Temperature Shock: Pouring warm resin onto a very cold surface, or exposing the curing resin to a sudden drop in temperature, can lead to thermal shock and cloudiness.
- Contaminants: Dust, debris, or other airborne particles settling on the wet resin can create surface imperfections and a less-than-clear finish.
- Over-Pigmentation: Adding too much pigment or mica powder can make the resin opaque and dull its clarity, sometimes giving a “cloudy” impression if not fully mixed.
Fixes:
- Ensure Dryness: Work in a low-humidity environment. Ensure your substrate and tools are completely dry. Avoid pouring resin on a rainy or very humid day.
- Thorough Mixing: Reiterate the importance of mixing slowly and thoroughly, scraping the sides and bottom of the container. Consider using the “double-cup” method (mix in one cup, then pour into a second clean cup and mix again) to ensure complete homogeneity.
- Temperature Control: Bring all components (resin, hardener, substrate) to room temperature before mixing and pouring. Maintain a consistent room temperature during the initial cure.
- Clean Workspace: Work in a dust-free environment. Cover your project with a dust tent or box immediately after pouring to prevent airborne particles from settling.
- Wet Sanding and Polishing: For light cloudiness or minor craters, you might be able to wet sand the cured surface with progressively finer grits (e.g., 400, 800, 1500, 2000, 3000 grit) and then polish with a plastic polish compound to restore clarity and shine.
- Re-pour: For severe cloudiness or deep craters, the most effective solution is often to sand down the affected area (220-320 grit) and pour a fresh, thin flood coat of properly mixed resin.
4. Fish-Eyes / Craters / Dimples (Surface Contamination)
These are circular depressions in the cured resin surface where the resin has pulled away from a specific spot, resembling the eye of a fish.
Causes:
- Surface Contamination: This is the overwhelming cause. Tiny amounts of oil, grease, wax, silicone (from sprays, polishes, or even hand lotions), dust, or other foreign substances on the substrate or tools can prevent the resin from adhering, causing it to “fish-eye” or pull away.
- Low Surface Tension: Some contaminants significantly lower the surface tension of the resin in localized areas, causing it to recede.
- Dirty Tools: Mixing sticks, spreaders, or containers that aren’t perfectly clean can transfer contaminants.
Fixes:
- Thorough Surface Preparation: Before pouring, meticulously clean your substrate. Wipe down surfaces with denatured alcohol or acetone. For wood, ensure it’s free of sawdust, oils, or waxes.
- Dedicated Tools: Use clean, dedicated mixing cups, sticks, and spreaders for your resin projects. Avoid using tools that have been in contact with silicone sprays or oily substances.
- Barrier Coat: For very stubborn surfaces or those known to have contamination issues, a very thin “seal coat” of resin applied first can sometimes help create a barrier. Allow it to cure before applying the main flood coat.
- Sand and Re-pour: Once fish-eyes appear, they are difficult to fix without re-coating. Sand down the affected area to remove the contaminated layer (start with 120-180 grit if deep, then 220-320 grit for smoothness). Clean thoroughly with denatured alcohol, ensure it’s completely dry, and then pour a fresh, thin layer of properly mixed resin.
- Clean Environment: Maintain a clean, dust-free workspace to prevent airborne contaminants from settling.
5. Amine Blush / Surface Stickiness / Waxy Film
Amine blush manifests as a hazy, greasy, waxy, or cloudy film on the surface of cured epoxy. It often feels slightly sticky or slippery, even if the resin beneath is hard.
Causes:
- High Humidity: This is the most common cause. When epoxy hardener (which often contains amines) reacts with moisture and carbon dioxide in the air, it forms a carbamate compound on the surface.
- Low Temperatures: Curing in a cool environment can slow the reaction, making the resin more susceptible to blush formation.
- Insufficient Airflow: A lack of air circulation in a humid, cool environment can exacerbate the problem.
Fixes:
- Clean with Warm Soapy Water: For fresh blush, often within the first 24-48 hours, you can usually remove it by washing the surface with warm water and a mild detergent or dish soap. Use a soft cloth or sponge, scrubbing gently. Rinse thoroughly with clean water and dry completely.
- Denatured Alcohol or Acetone: For more stubborn blush, wipe the surface with denatured alcohol or acetone. This will dissolve the waxy film. Ensure good ventilation.
- Light Sanding and Re-pour: If the blush is severe or has been left for a long time, it might require light sanding with 220-320 grit sandpaper to ensure complete removal and create a mechanical bond, followed by a thorough cleaning and a new flood coat of resin.
- Prevention:
- Work in a controlled environment with low humidity (ideally below 50%).
- Maintain an optimal room temperature (70-80°F / 21-27°C) throughout the curing process.
- Use a dehumidifier if humidity is a consistent issue.
- Ensure good air circulation, but avoid direct drafts that can introduce dust.
6. Yellowing
Over time, clear epoxy resin can develop a yellowish tint, diminishing its crystal-clear appearance.
Causes:
- UV Exposure: The most significant cause. Sunlight and other UV light sources break down the chemical bonds in the resin, leading to discoloration.
- Heat Exposure: Prolonged exposure to heat can also accelerate the yellowing process.
- Age: All epoxy resins will eventually yellow to some degree over a very long period, even without significant UV exposure, as part of their natural aging process.
- Cheap Resin: Lower quality resins often contain fewer or no UV stabilizers, making them more prone to yellowing quickly.
- Chemical Reactions: Certain chemicals or pigments mixed into the resin can sometimes react with the resin components, contributing to discoloration.
Fixes:
- Prevention is Primary: Once yellowing occurs, it is very difficult, if not impossible, to reverse.
- Use UV-Stable Resin: Invest in high-quality epoxy resin specifically formulated with UV inhibitors for projects exposed to sunlight (e.g., outdoor pieces, countertops near windows).
- Avoid Direct Sunlight: Keep finished projects out of direct, prolonged sunlight whenever possible.
- Tinting: For projects where yellowing would be problematic, you can proactively add a very small amount of blue or purple tint to the resin. This counteracts the yellow tones, making the resin appear clearer for longer.
- Protective Topcoats: For outdoor applications, consider applying a UV-resistant clear coat or varnish over the cured epoxy.
- For Existing Yellowing:
- Tinting a New Layer: If possible, you can sand the yellowed surface and pour a new layer of resin that has been slightly tinted with blue/purple to optically counteract the yellow beneath. This won’t remove the yellowing but can mask it.
- Painting/Staining: If the yellowing is severe and the piece is suitable, you might consider painting over the epoxy surface or incorporating it into a new design.
7. Overheating / Cracking / Exothermic Reaction
Epoxy resin curing is an exothermic process, meaning it generates heat. If too much heat builds up, it can lead to dangerous overheating, smoking, cracking, or even melting of the substrate.
Causes:
- Mass Concentration / Deep Pours: Mixing large volumes of resin in one container or pouring very thick layers (deeper than the resin’s recommended pour depth) concentrates the heat, leading to a rapid and intense exothermic reaction.
- High Ambient Temperature: A warm environment combined with a deep pour can significantly accelerate the reaction and heat buildup.
- Fast-Curing Hardener: Using a hardener designed for a fast cure will naturally generate more heat faster.
- Insulation: Pouring resin into an insulated mold (e.g., thick silicone or wood) can trap heat, preventing it from dissipating.
Fixes:
- Pour in Thinner Layers: Always adhere to the manufacturer’s maximum pour depth per layer. For deep pours (like river tables), pour in multiple, thinner layers, allowing each layer to cool or partially cure before adding the next. This is crucial for projects detailed in our [/epoxy-resin-river-table-tutorial/].
- Mix Smaller Batches: If your project requires a large volume, mix several smaller batches rather than one large one. This helps control the exothermic reaction.
- Cooler Environment: Work in a cooler room, especially for deep pours. A temperature on the lower end of the recommended range (e.g., 70°F / 21°C) can help slow the reaction.
- Spread Out Immediately: Once mixed, pour the resin onto your project surface as quickly as possible. Spreading it out allows the heat to dissipate over a larger area. Do not leave large volumes of mixed resin sitting in the mixing cup for extended periods.
- Use Slower Hardener: If you frequently experience overheating, consider using a resin system with a slower-curing hardener, which generates heat more gradually.
- Monitor Temperature: For very large pours, you can use an infrared thermometer to monitor the surface temperature of the resin. If it’s getting too hot, you may need to try to cool the environment or even stop the pour if it’s becoming dangerous.
- Salvage: If cracking has occurred, there’s little to do but sand down the affected area and re-pour, if feasible. For severe damage or scorched resin, the piece might be unsalvageable.
8. Uneven Self-Leveling / Sagging
Epoxy resin is prized for its self-leveling properties, but sometimes it cures with an uneven surface, dips, or sags.
Causes:
- Uneven Substrate: If the surface you’re pouring on isn’t perfectly level, the resin will flow to the lowest points, resulting in an uneven thickness and surface.
- Insufficient Resin: Not enough resin poured to cover the entire surface with the recommended thickness will result in thin spots or areas where it hasn’t fully leveled.
- Temperature Gradients: Uneven temperatures across the surface can affect the resin’s viscosity and flow, leading to uneven leveling.
- Movement During Cure: Bumps or vibrations during the initial cure can cause the resin to shift before it sets.
- Edges and Walls: Resin can sometimes pull away from vertical edges or form a thicker bead around the perimeter if not properly contained or if the surface tension is disrupted.
Fixes:
- Level Your Workspace and Substrate: This is paramount. Use a level tool to ensure your workbench, mold, or project surface is perfectly horizontal before you start pouring. Shims can be used to adjust uneven tables.
- Adequate Resin Volume: Calculate the precise amount of resin needed for your project (length x width x desired thickness). It’s always better to mix slightly more than you think you’ll need.
- Consistent Temperature: Maintain a stable, consistent room temperature throughout the initial curing phase. Avoid drafts or direct heat sources on one side of the project.
- Secure Environment: Place your project in a stable location where it won’t be bumped or vibrated during the critical initial cure time.
- Seal Edges: For projects with open edges, use painter’s tape or a barrier to create a dam that prevents the resin from flowing over until it’s set. For projects like river tables, ensure your mold is perfectly sealed.
- Spread Evenly: While resin self-levels, gently spreading it with a clean spreader or squeegee immediately after pouring can help ensure even distribution, especially for larger surfaces.
9. Dents After Cure / Soft Spots
You’ve waited the full cure time, and the resin feels hard, but pressure leaves a dent, or there are specific soft, gummy areas.
Causes:
- Incomplete Cure: This is closely related to the “won’t cure” issue. The resin hasn’t fully cross-linked and hardened, often due to an incorrect mix ratio, insufficient mixing, or cold temperatures. While it feels solid, it lacks full hardness.
- Insufficient Hardener: Similar to an incorrect ratio, if there’s not enough hardener for the amount of resin, the reaction cannot complete, leaving the resin soft.
- Cold Temperature: As mentioned, cold significantly slows the cure, potentially leading to a resin that feels cured but hasn’t achieved its full hardness.
- Too Much Pigment/Additive: Overloading the resin with liquid pigments, mica powder, or other additives can interfere with the chemical reaction, preventing a full cure and resulting in soft spots or a generally softer final product.
- High Humidity (less common for dents, more for blush): While more associated with amine blush, extreme humidity can sometimes contribute to a softer surface cure.
Fixes:
- Extend Cure Time / Warm Environment: If the resin is mostly hard but slightly soft or dentable, move the piece to a warmer environment (75-80°F / 24-27°C) and allow it to cure for an extended period, sometimes several days or even a week. The warmth can often help complete the reaction.
- Scrape, Sand, and Re-pour: For distinct soft spots or if the entire surface is significantly soft, the most reliable solution is to scrape away the soft resin. Clean the area with denatured alcohol or acetone, sand the surrounding cured resin (220-320 grit) to create adhesion, and then pour a new, perfectly measured and mixed layer of resin.
- Check Pigment Ratios: Always use pigments specifically designed for epoxy resin and adhere to the manufacturer’s recommended maximum addition rates (usually a small percentage by weight). Too much can inhibit the cure.
- Prevention: Reiterate the importance of accurate measurement, thorough mixing, and maintaining optimal temperature and humidity throughout the entire curing process.
Prevention Checklist: Your Guide to Flawless Epoxy Projects
The best fix is prevention. By following these guidelines, you can significantly reduce the likelihood of encountering common epoxy resin problems.
- Read Manufacturer Instructions: Every resin system is different. Always read and strictly follow the specific mix ratio, pot life, cure time, and temperature recommendations provided by your resin manufacturer.
- Measure Accurately: This is non-negotiable. Use a digital scale for weight-based ratios and dedicated, marked measuring cups for volume-based ratios. Do not guess or use imprecise household tools.
- Mix Thoroughly: Stir slowly and consistently for the recommended duration (typically 3-5 minutes). Scrape the sides and bottom of your mixing container frequently to ensure all resin and hardener are fully incorporated. Consider the “double-cup” method for extra assurance.
- Control Temperature: Ensure your resin, hardener, substrate, and workspace are all within the optimal temperature range (typically 70-80°F / 21-27°C) before mixing and throughout the initial cure. Use a space heater or air conditioner as needed.
- Manage Humidity: Work in a low-humidity environment (ideally below 50%). Use a dehumidifier if necessary. High humidity can lead to amine blush and affect cure.
- Cleanliness is Key: Prepare your workspace by ensuring it’s dust-free. Clean your substrate meticulously with denatured alcohol or acetone to remove any oils, waxes, or contaminants. Use clean, dedicated tools.
- Seal Porous Surfaces: For wood, concrete, or other porous materials, apply a thin “seal coat” first to prevent air release and achieve a smooth finish.
- Pour in Layers for Depth: For deep pours, adhere to the resin’s maximum pour depth per layer. Pour in multiple, thinner layers, allowing each to cool or partially cure before adding the next.
- Level Your Surface: Always use a level to ensure your project surface or mold is perfectly horizontal before pouring.
- Use Appropriate Resin Type: Choose a resin formulated for your specific application (e.g., casting resin for deep pours, coating resin for thin flood coats, UV-stable resin for outdoor items).
- Avoid Over-Pigmentation: Adhere to pigment manufacturer recommendations. Too much pigment can inhibit cure or cause discoloration.
- Patience During Cure: Resist the urge to touch or disturb your project during the critical initial cure phase. Allow ample time for full cure before handling or sanding.
- Test Batches: If you’re using a new resin, working in a new environment, or trying a new technique, consider doing a small test batch first to verify cure and results.
## Frequently Asked Questions
Q1: Can I fix a sticky spot on an otherwise cured piece without re-pouring the whole thing? A1: Yes, often. For small, isolated sticky spots, gently scrape away as much of the uncured resin as possible using a plastic scraper. Clean the area thoroughly with denatured alcohol or acetone. Once dry, you can prepare a very small, fresh batch of resin (ensuring accurate measurement and thorough mixing) and carefully dab or brush it onto the sticky spot. Allow it to cure fully, potentially in a warmer environment. For larger areas, a light sanding of the surrounding cured resin and a thin re-pour over the entire affected section might be necessary to ensure a smooth, seamless finish.
Q2: How do I remove cured epoxy resin if I’ve made a major mistake? A2: Follow the resin manufacturer’s removal instructions and safety data sheet for your exact resin and the surface underneath it. For WEST SYSTEM products, start with the manufacturer’s user manual and exposure-prevention guidance. Do not substitute a generic paint-stripper recommendation for product-specific instructions.
Q3: What’s the absolute best way to get rid of bubbles in my epoxy? A3: The “best” way depends on your setup and project. For most hobbyists, a combination of prevention (warming resin, slow mixing, sealing porous surfaces) and surface treatment is key. After pouring, passing a heat gun or small propane torch (moving quickly and lightly, not lingering) over the surface is highly effective for popping surface bubbles. For professional or very detailed work, a pressure pot (which compresses bubbles to microscopic size) or a vacuum chamber (which pulls air out before pouring) offers the most pristine, bubble-free results.
Q4: My resin is cloudy in the bottle before I even mix it. Is it still good? A4: If your resin component (Part A) appears cloudy or crystallized in the bottle, it’s often due to exposure to cold temperatures. This is similar to honey crystallizing. It’s usually still good! You can typically reverse this by gently warming the sealed bottle in a warm water bath (around 120-140°F / 49-60°C) for 10-20 minutes. The cloudiness should disappear, and the resin will return to its clear state. Allow it to cool back down to room temperature before mixing. If it remains cloudy after warming, or if the hardener (Part B) is cloudy or discolored, it might be compromised and should be discarded.
Q5: How long does epoxy resin take to fully cure and reach maximum hardness? A5: The “full cure” time for epoxy resin is significantly longer than its “tack-free” or “demold” time. While many resins are tack-free in 12-24 hours and can be handled or demolded in 24-72 hours, they typically reach their full hardness, chemical resistance, and physical properties in 3 to 7 days, and sometimes even up to 30 days for some formulations or very deep pours. Always refer to your specific resin manufacturer’s guidelines. It’s best to avoid heavy use, sanding, or polishing until the full cure time has passed to ensure optimal durability.
By understanding these common pitfalls and implementing the suggested solutions and preventative measures, you’ll be well on your way to mastering epoxy resin and creating beautiful, durable projects. Happy crafting!