Polymer Clay Earrings: A Beginner’s Step-by-Step Tutorial
Welcome, aspiring makers, to the wonderful world of polymer clay! If you’ve been searching for a creative outlet that’s both rewarding and surprisingly accessible, you’ve found it. Polymer clay earrings have exploded in popularity, and for good reason: they’re lightweight, endlessly customizable, and relatively simple to make, even for complete beginners. Imagine crafting unique, stylish accessories that perfectly match your outfits or make thoughtful, handmade gifts. This comprehensive tutorial will guide you through every essential step, transforming raw clay into beautiful, wearable art. Get ready to unleash your inner artisan and discover the joy of creating with your own hands!
The Magic of Polymer Clay: Why It’s Perfect for Beginners
Polymer clay is a versatile, oven-bake modeling material that remains soft and pliable until cured by heat. Unlike air-dry clays, it doesn’t harden until you bake it, giving you ample time to perfect your designs without worrying about it drying out. Its durability, vibrant color options, and ability to be sanded, glazed, and even painted make it an ideal medium for jewelry making. For beginners, it’s incredibly forgiving – mistakes can often be re-worked, and the learning curve is gentle. You don’t need a huge investment in specialized tools to get started, and the satisfaction of wearing something you made yourself is truly unparalleled.
Gather Your Arsenal: Essential Tools and Materials
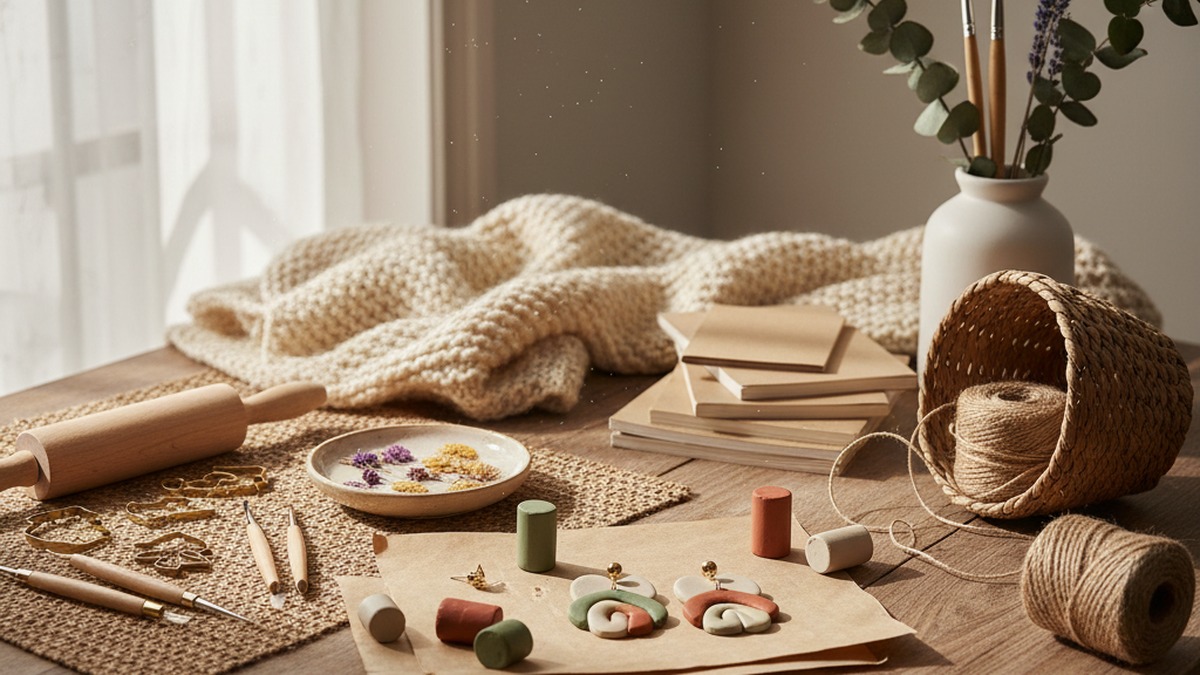
Before we dive into the creative process, let’s make sure you have all the necessary tools and materials at hand. Having everything ready will make your crafting session smooth and enjoyable.
- Polymer Clay: The star of our show! I highly recommend starting with Sculpey Premo or Cernit brands. These are professional-grade clays known for their excellent workability, strength after baking, and vibrant colors. Choose a few colors to start – perhaps a neutral, a bright pop, and a contrasting shade for marbling.
- Acrylic Roller or Pasta Machine: An acrylic roller is perfect for beginners, allowing you to manually roll your clay to an even thickness. If you plan to make a lot of earrings, a pasta machine (dedicated only to clay, never for food again!) is a fantastic investment. It makes conditioning and rolling incredibly fast and consistent.
- X-Acto Knife or Craft Blade: A sharp blade is crucial for clean cuts. An X-Acto knife or a dedicated polymer clay blade will give you precise edges. Always use caution when handling sharp tools.
- Ceramic Tile (for baking): A simple, unglazed ceramic tile is ideal for baking your clay pieces. It provides a flat, rigid surface that prevents your clay from warping and helps to absorb heat evenly, preventing those dreaded shiny spots on the bottom of your pieces.
- Wet Sandpaper (1000-grit and 2000-grit): Essential for achieving a professional, smooth finish. We’ll start with 1000-grit to remove imperfections and then move to 2000-grit for a beautiful, subtle matte glow.
- Jump Rings: Small metal rings used to connect your clay pieces to ear hooks and other components. You’ll need an assortment of sizes, typically 5mm or 6mm.
- Ear Hooks: The part that goes through your ear! Choose hypoallergenic options if you have sensitive skin (e.g., sterling silver, surgical steel).
- Flat-Nose Pliers: Your go-to tool for opening and closing jump rings. A pair of round-nose pliers can also be helpful for forming loops, but flat-nose are essential for this project.
- Needle Tool or Thin Skewer: For piercing holes in your clay before baking. A simple sewing needle, a toothpick, or a dedicated clay needle tool will work.
- Oven: A standard home oven is perfectly fine for baking polymer clay. You’ll need an accurate oven thermometer to ensure precise temperature control.
- Work Surface: A clean, non-porous surface like a glass mat, ceramic tile, or parchment paper over a cutting board.
- Optional: Clay Cutters: While you can cut freehand with your blade, a set of geometric clay cutters (circles, squares, arches, teardrops) will make creating uniform shapes much easier and faster.
- Optional: Sculpey Glaze or Varnish: For adding a glossy finish if desired.
Step 1: The Foundation – Conditioning Your Clay
This is arguably the most important step, as properly conditioned clay is easier to work with, less prone to cracking, and bakes stronger. Polymer clay right out of the package can be stiff and crumbly.
- The Process: Take a piece of clay and begin to knead it with your hands. Roll it between your palms, squish it, and fold it. The warmth from your hands will help soften it. If you have an acrylic roller, roll it into a thick slab, fold it, and roll again. Repeat this process for at least 5 minutes, or until the clay is noticeably softer, pliable, and no longer crumbly. When you bend it, it should flex smoothly without breaking or showing cracks.
- Using a Pasta Machine: If using a pasta machine, start with a thick setting, pass the clay through, fold it in half, and pass it through again. Repeat this several times, gradually decreasing the thickness setting until the clay is smooth and flexible. This is much faster and more efficient than hand conditioning.
- Why it Matters: Well-conditioned clay is less likely to break during or after baking, is easier to cut cleanly, and holds its shape better. Don’t skip this step!
Step 2: Rolling to Perfection – Achieving the Right Thickness
Once your clay is conditioned, it’s time to roll it out to an even thickness. This consistency is key for professional-looking earrings.
- Using an Acrylic Roller: Place your conditioned clay on your work surface. Use your acrylic roller to roll it out, applying even pressure. To ensure consistent thickness, you can use playing cards or specialized clay guides placed on either side of your clay. Roll from the center outwards, turning your clay occasionally.
- Using a Pasta Machine: If using a pasta machine, pass your conditioned clay through the desired setting. For earrings, a thickness of 3mm is ideal for medium-weight, sturdy pieces, while 2mm creates more delicate, lightweight designs. Experiment to find your preference.
- Tips for Consistency: Avoid rolling too thin, as delicate pieces can become brittle. Conversely, too thick can make your earrings heavy. Aim for uniform thickness across your entire sheet of clay to ensure even baking and a polished look.
Step 3: Unleash Your Creativity – Designing and Cutting Your Shapes
Now for the fun part – transforming your flat sheet of clay into unique earring components!
Geometric Shapes with Cutters
This is the easiest way to start. Place your chosen clay cutters (circles, arches, teardrops, squares) firmly onto your rolled-out clay. Press down evenly to ensure a clean cut. Wiggle the cutter slightly before lifting to release the shape. Use your X-Acto knife or a thin blade to carefully remove any excess clay around the edges.
Marbling Technique
Marbling creates beautiful, organic patterns.
- Choose Colors: Select 2-3 contrasting or complementary colors of conditioned clay.
- Form Snakes: Roll each color into a long, thin snake.
- Twist & Fold: Twist the snakes together, then gently fold and twist again. Don’t overmix, or your colors will blend into a single muddy shade.
- Roll Out: Roll the twisted clay into a ball, then flatten it into a slab using your roller or pasta machine. The more you roll and fold, the more intricate your marble pattern will become.
- Cut Shapes: Once you’re happy with the pattern, use your cutters to cut out your earring shapes.
Slabbing Technique (Layering for Unique Designs)
Slabbing involves creating a larger, patterned sheet of clay from which you then cut your earring shapes. This can involve:
- Color Blocking: Roll out different colored sheets of clay to desired thickness. Cut them into strips or geometric shapes and arrange them closely together on a single sheet of clay. Gently roll over the top to fuse them without distorting the pattern.
- Texturing: Before cutting, press a texture sheet, lace, or even a leaf onto your rolled-out clay to impart a unique texture.
- Inlay/Appliqué: Cut out a base shape, then cut smaller shapes from a contrasting color and gently press them onto the base.
Tips for Clean Cuts:
- Always use a sharp blade or cutter.
- For cutters, press straight down, don’t twist too much, and lift carefully.
- If your clay is sticking, lightly dust your work surface or cutter with cornstarch (but wipe it off before baking!).
Step 4: The Crucial Hole – Piercing for Assembly
This step is vital and often overlooked by beginners. You must pierce the hanging holes BEFORE baking. Attempting to drill holes in baked clay can cause it to crack or chip, and it’s generally much harder.
- Using a Needle Tool: Take your needle tool, toothpick, or thin skewer. Gently but firmly push it through the clay where you want your jump ring to connect.
- Placement: Consider where your earring components will hang. For a single dangle, place the hole at the top center. For multi-part earrings, you’ll need holes at the top and bottom of connecting pieces.
- Size: Make sure the hole is large enough for your jump ring to pass through comfortably, but not so large that it looks unsightly. You can gently twist the needle tool to widen the hole slightly.
- Smooth Edges: After piercing, gently smooth any raised edges around the hole with your fingertip.
Step 5: The Heat Treatment – Baking Your Clay
Baking is where your soft, pliable clay transforms into a durable, wearable piece of art. Precise temperature and time are critical.
- Preheat Your Oven: Always preheat your oven to the correct temperature. For Sculpey Premo, this is 275°F (135°C). If using Cernit, check the manufacturer’s instructions, but it’s typically around 265°F (130°C). Use an oven thermometer to verify your oven’s accuracy, as many home ovens can fluctuate.
- Prepare for Baking: Carefully transfer your unbaked clay pieces onto your ceramic tile. The tile is essential as it provides a flat, stable surface that helps distribute heat evenly and prevents the bottom of your pieces from becoming shiny or scorched.
- Bake Time: Bake your Sculpey Premo pieces for 30 minutes. The clay will not look significantly different after baking, so don’t be tempted to bake longer unless your pieces are exceptionally thick. Under-baked clay will be brittle; over-baked clay can scorch or become discolored.
- Cool Down: Once the baking time is complete, turn off your oven and allow the ceramic tile with your earrings to cool down completely inside the oven, or remove it and let it cool on a heat-safe surface. Do not handle hot clay, as it will be soft and fragile until it has fully cooled and hardened.
Step 6: The Finishing Touch – Wet Sanding for a Professional Look
Sanding is what truly elevates your polymer clay earrings from handmade to professional. It smooths rough edges, removes fingerprints and imperfections, and creates a lovely finish.
- Wet Sanding: Fill a shallow bowl with water. Take your 1000-grit wet sandpaper and submerge it, along with your cooled clay pieces, in the water. Sanding wet prevents dust, keeps the sandpaper from clogging, and creates a smoother finish.
- Sanding Technique: Gently sand all edges and surfaces of your clay pieces in a circular motion. Apply light to medium pressure. You’ll feel the rough spots smoothing out under your fingers. Rinse your pieces and the sandpaper frequently to remove clay particles.
- Gradual Refinement: Once you’ve thoroughly sanded with 1000-grit and feel all major imperfections are gone, switch to 2000-grit wet sandpaper. This finer grit will further refine the surface, creating a beautiful, subtle matte glow that feels incredibly smooth to the touch.
- Clean Up: After sanding, thoroughly rinse your pieces under running water to remove all sanding dust. Pat them dry with a lint-free cloth.
Step 7: To Glaze or Not to Glaze – Sealing Your Earrings
Sealing is an optional step that can protect your earrings and alter their finish.
- For Shine: If you want a glossy, vibrant finish, apply a thin, even coat of Sculpey Glaze (or a similar polymer clay specific varnish). Use a soft brush and apply in a well-ventilated area. Allow each coat to dry completely (check product instructions) before applying a second coat if desired.
- For Matte: If you prefer the sophisticated matte glow achieved through wet sanding, you can simply leave your earrings matte. This is a popular choice and often highlights the natural beauty of the clay.
- Protection: Even if left matte, a very thin coat of a matte varnish can add a layer of protection against dirt and wear, though it’s not strictly necessary for durability with well-baked clay.
Step 8: Bringing It All Together – Assembly
You’re almost there! Now it’s time to assemble your beautiful clay components into wearable earrings.
- Open Jump Rings the Right Way: This is a crucial technique. Never pull a jump ring directly apart from side to side, as this distorts its shape and weakens it.
- Hold the jump ring with your flat-nose pliers on one side of the opening.
- With your other hand (or another pair of pliers), grasp the other side of the opening.
- Twist one side of the jump ring away from you and the other side towards you, creating an opening.
- Attach Components:
- Slide your clay piece onto the opened jump ring.
- If you have multiple clay pieces, connect them using jump rings in the same manner.
- Finally, slide your ear hook onto the jump ring (or the last jump ring in your chain of components). Ensure the opening of the ear hook faces the correct direction when worn.
- Close Jump Rings: Using your pliers, reverse the twisting motion to bring the ends of the jump ring back together, ensuring they meet perfectly with no gap. A tightly closed jump ring is key to secure earrings.
Congratulations! You’ve just created your very own pair of polymer clay earrings. Take a moment to admire your handiwork.
Related Reading
- Best Hot Glue Guns for Crafters in 2026: Full-Size to Mini
- DIY Candle Making: Your First Homemade Candle
- DIY Natural Gels: Flaxseed, Aloe & Herbal Recipes
Frequently Asked Questions (FAQ)
Q1: Why is my clay cracking or crumbling when I try to condition it? A1: This usually means your clay is very stiff or cold. Try warming it up slightly in your hands or by placing it near a warm (not hot!) spot for a few minutes. Persevere with conditioning; it will eventually soften. For very hard clay, you can also try chopping it into small pieces with a blade before kneading.
Q2: My earrings are breaking after baking. What went wrong? A2: Most likely, your clay was under-baked. Ensure your oven temperature is accurate with an oven thermometer and that you’re baking for the full recommended time (e.g., 30 minutes for Sculpey Premo). Under-conditioned clay can also be brittle, so ensure you knead it thoroughly.
Q3: Why did my earrings get shiny spots after baking? A3: Shiny spots, especially on the bottom, are often caused by baking directly on a metal baking sheet or parchment paper. The ceramic tile helps prevent this by absorbing heat and providing an even surface. Over-baking can also sometimes cause a slight sheen.
Q4: Can I use regular sandpaper instead of wet sandpaper? A4: You can, but wet sanding is highly recommended. Dry sanding creates a lot of fine dust, which can be irritating to inhale. Wet sanding keeps the dust contained, prevents the sandpaper from clogging as quickly, and generally produces a smoother, more refined finish.
Q5: How do I clean my polymer clay earrings? A5: For most polymer clay earrings, a gentle wipe with a soft, damp cloth is sufficient. Avoid harsh chemicals or abrasive cleaners, especially on glazed pieces, as they can damage the finish.
Q6: Can I paint my polymer clay earrings? A6: Yes, absolutely! Acrylic paints work wonderfully on baked polymer clay. Make sure your clay is clean and dry before painting. You can then seal your painted earrings with a glaze or varnish to protect the paint.
Q7: My jump rings keep opening. What am I doing wrong? A7: This is usually because they weren’t closed properly. Remember to twist the ends back together until they meet perfectly, with no visible gap. If you pulled them apart instead of twisting, they might be weakened and won’t close as securely.
Q8: How do I store my polymer clay earrings? A8: Store your earrings in a way that prevents them from being scratched or tangled. A jewelry box with compartments, a jewelry stand, or even small plastic bags can work well. Keep them out of direct sunlight for prolonged periods, as some colors can fade over time.
Conclusion
You’ve now completed your journey through the creation of polymer clay earrings, from a block of clay to a beautiful, wearable accessory. This tutorial has equipped you with the fundamental skills and knowledge to confidently create your own unique designs. Remember that practice makes perfect, and every piece you make will teach you something new. Don’t be afraid to experiment with different colors, textures, and shapes. The world of polymer clay is vast and full of creative possibilities. So, gather your tools, unleash your imagination, and start crafting your next masterpiece. Happy making!
Related Reading
- How to Make Resin Jewelry: Complete Beginner’s Guide — the natural next step once you are comfortable with clay, using UV and casting resin for glossy pendants and bezels
- Macrame Basics: 7 Essential Knots for Beginners — add rope wrapping and knot-work to your jewelry and accessory making repertoire