Why Make Your Own Candles?
A decent candle from a boutique brand runs $25-45 for 8-10 ounces. That same 8 ounces of candle can be made at home for about $3-4 in materials, and you get to pick the fragrance, the wax, the vessel, and the character of the burn. The gap between “my first candle looks like my kid made it” and “people ask where I buy my candles” is shorter than you would expect — maybe three batches, if you read a guide before you start.
I have been making candles for years, and the mistakes that trip up beginners are almost always the same: wrong wick size, wrong pour temperature, wrong fragrance ratio, or not enough patience during the cure. This guide covers all of them. It also covers the big picture question most beginner tutorials skip: which wax should you even use?
If you already know you want to work with soy specifically, my how to make soy candles guide is a deeper dive into that one wax. This article is the broader entry point — wax type comparison, the core process that works for all of them, and the troubleshooting skills that will save you a wasted batch when things go sideways.
Choosing a Wax: The Four Main Types
Every candle starts with a wax. Each type has its own personality, and the wax you pick determines almost everything else about your candle — the fragrance throw, the burn behavior, the appearance, the cost, and how forgiving the process is.
Soy Wax
Soy is the go-to beginner wax for good reason. It melts at a low temperature (around 120-135 degrees Fahrenheit), pours cleanly into vessels, holds fragrance well, and burns cleanly. It is made from hydrogenated soybean oil, which is renewable and biodegradable. A pound of good soy wax runs around $5-8 and makes roughly one 8-ounce candle plus a little left over.
Pros:
- Forgiving pour temperatures
- Clean, slow burn
- Holds fragrance beautifully
- Affordable and widely available
- Natural and renewable
Cons:
- Prone to frosting (a crystalline white surface bloom)
- Can have uneven tops and cracks if poured wrong
- Fragrance throw can be subtle compared to paraffin
- Soft — not suitable for pillars or free-standing candles
Best for: Container candles in glass jars or tins. Absolute beginners.
A good starter wax is Golden Brands 464 Soy Wax, which is the industry standard for container soy candles.
Beeswax
Beeswax is the premium natural option. It has a natural honey fragrance, a warm golden color, and the longest burn time of any common candle wax. It also happens to be the most expensive — a pound runs $12-20 depending on grade. Beeswax candles have one more benefit: they actually ionize the air as they burn, which is why some people swear by them for air quality.
Pros:
- Longest burn time of any wax
- Naturally honey-scented even unscented
- Beautiful warm glow and natural color
- Does not require added fragrance to smell pleasant
- Ionizes air as it burns
Cons:
- Very expensive compared to other waxes
- Melts at high temperature (145-147 degrees Fahrenheit), making mixing harder
- Fragrance throw is weak — the natural beeswax scent competes with added fragrance
- Can stick to molds without release agents
- Natural color interferes with dye work
Best for: Pure, unscented or lightly scented candles. Pillar candles. People who want an all-natural premium product.
Look for Pure Filtered Beeswax Pellets for the easiest starting experience.
Paraffin Wax
Paraffin is the classic commercial candle wax. It is a petroleum byproduct, which puts some people off, but technically it is the purest and most processed wax available. Paraffin produces the strongest fragrance throw of any wax, the most vibrant colors, and the smoothest finish. Most store-bought candles are paraffin or a paraffin blend, whatever the marketing says.
Pros:
- Best fragrance throw of any wax
- Takes dye brilliantly for vivid colors
- Smooth, clean tops every time
- Widely available and cheap
- Many grades for different applications (container, pillar, votive)
Cons:
- Petroleum-derived, which bothers some crafters
- Produces more soot than natural waxes
- Higher melting point requires more careful temperature control
- Has fallen out of fashion with the eco-conscious market
Best for: Crafters who prioritize fragrance throw and appearance over natural origin. Candles where a clean finish matters most.
IGI 4630 Paraffin Container Wax is a professional-grade container paraffin worth trying.
Coconut Blend Wax
Coconut wax is the newer darling of the candle world. On its own, pure coconut wax is too soft and too expensive, so it is almost always sold as a blend — coconut soy, coconut apricot, coconut paraffin. These blends combine the natural story of soy with the fragrance throw of paraffin and the smooth tops of coconut. Coconut blends are what most premium candle brands use now.
Pros:
- Best of both worlds — natural origin with strong fragrance throw
- Smooth, creamy appearance
- Excellent hot and cold throw
- Lower melting point than soy for easier pouring
- Resists frosting better than pure soy
Cons:
- More expensive than pure soy ($8-15/lb)
- Varies significantly by brand and blend ratio
- Can be soft — needs the right vessel
- Blend quality is inconsistent between suppliers
Best for: Crafters who want a premium natural candle with strong fragrance. Second or third candle, once you have the basics down.
A reliable option is CocoSoy Candle Wax.
Which Wax Should You Start With?
For an absolute first candle, start with soy. The low pour temperature and forgiving nature will get you a decent result on batch one. Once you have made 3-5 soy candles successfully, branch out into a coconut soy blend for better fragrance throw, or try paraffin if you want to see what a truly smooth top looks like.
Wick Selection: The Part Everyone Gets Wrong
Wick sizing is where 80% of bad candles come from. The wrong wick gives you tunneling (the flame burns a narrow hole down the middle while leaving a ring of unused wax), mushrooming (ugly carbon clumps on the wick tip), or black soot streaks on the vessel. None of these are the candle’s fault — they are wick mismatches.
The Three Main Wick Types
CD wicks — Cotton-paper hybrid, performs well in soy and coconut blends. Self-trimming with minimal mushrooming. My default choice for container soy candles.
ECO wicks — All-cotton wicks, flat braid. Excellent in soy, very clean burn, pre-tabbed for easy mounting. Another great choice for beginners. ECO Series Cotton Wicks come in a wide size range.
HTP wicks — Cotton with paper threads for structure. Designed for harder waxes and high-fragrance candles. Good for paraffin and dense coconut blends where you want strong throw.
Sizing the Wick
The larger the diameter of your vessel, the larger the wick you need. Here is a rough guide for soy container candles using ECO wicks:
- Vessel diameter under 2.5 inches: ECO 4 or ECO 6
- Vessel diameter 2.5-3 inches: ECO 10 or ECO 12
- Vessel diameter 3-3.5 inches: ECO 14 or ECO 16
- Vessel diameter 3.5-4 inches: ECO 18
These are starting points. The only way to know for sure is to test burn — light the candle for 3-4 hours and measure whether the melt pool reaches the edges of the vessel. If it does, the wick is sized correctly. If there is a wall of unmelted wax, size up. If the candle is sooty or the flame is huge, size down.
Fragrance: Oils vs Essential Oils
You have two main options for scent.
Fragrance oils are synthetic blends designed specifically for candles. They give strong, stable throw and come in every scent imaginable — from vanilla to ocean breeze to campfire. Candle-grade fragrance oils are required — cosmetic or perfume oils are not designed for the heat of a burning candle and may not throw well or may discolor the wax.
Essential oils are pure plant extracts. They smell wonderful in a bottle but most do not throw well when added to a candle. The heat of the melt destroys many volatile aromatic compounds. If you are committed to essential oils, stick to dense oils like patchouli, cedarwood, cinnamon leaf, and clove — they survive the heat better than lavender, citrus, or mint, which tend to vanish entirely.
Fragrance load is the percentage of fragrance in your finished candle by weight. Most waxes hold 6-10% fragrance without bleeding, but the sweet spot is usually 8%. So a 1-pound batch of wax takes about 1.3 ounces of fragrance oil. More than 10% and the oil will separate out and pool on top of the cured candle — a problem called “fragrance bleed.”
Vessel Choices
Pick a vessel that is heat-safe, does not have painted or decorated interiors, and has a stable, flat bottom. Glass jars, metal tins, and ceramic vessels all work. Mason jars are a classic beginner choice and are genuinely good — they are heat-safe, hold about 8-12 ounces, and the straight sides give predictable burn behavior.
Avoid: wine glasses (most are not heat-safe), thin decorative glass, anything with a narrow neck, and anything painted on the inside.
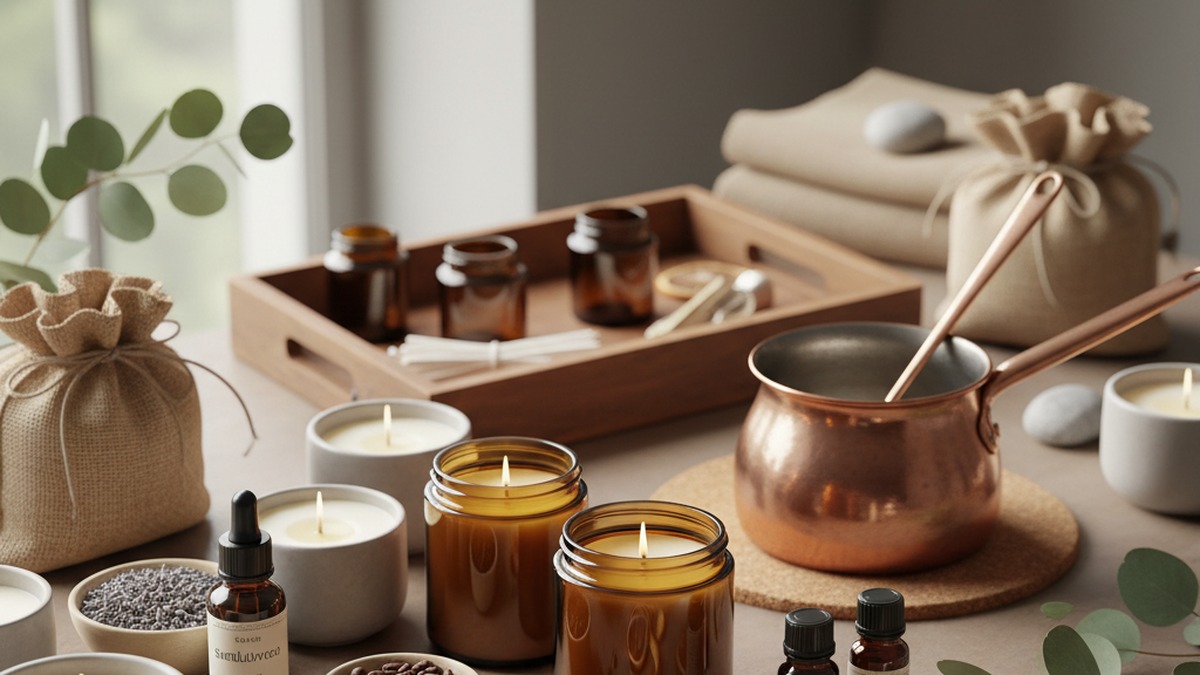
What You Will Need
Materials
- Wax — one pound to start, in your chosen type
- Wicks — pre-tabbed, sized to your vessel
- Fragrance oil — 1-2 ounces for a 1-pound batch
- Vessels — 2-3 to start
- Wick stickers or hot glue — to anchor wicks
- Dye — optional
Tools
- Pouring pitcher — a Candle Making Pouring Pitcher with a spout, 4 cup minimum
- Thermometer — candy or infrared
- Scale — digital, accurate to 0.1 oz
- Double boiler or saucepan — for melting wax
- Stir stick — wooden
- Wick centering tool — or chopsticks across the top of the vessel
A complete candle making starter kit packages the essentials for $30-50 and is the easiest way to start if you do not already own most of these items.
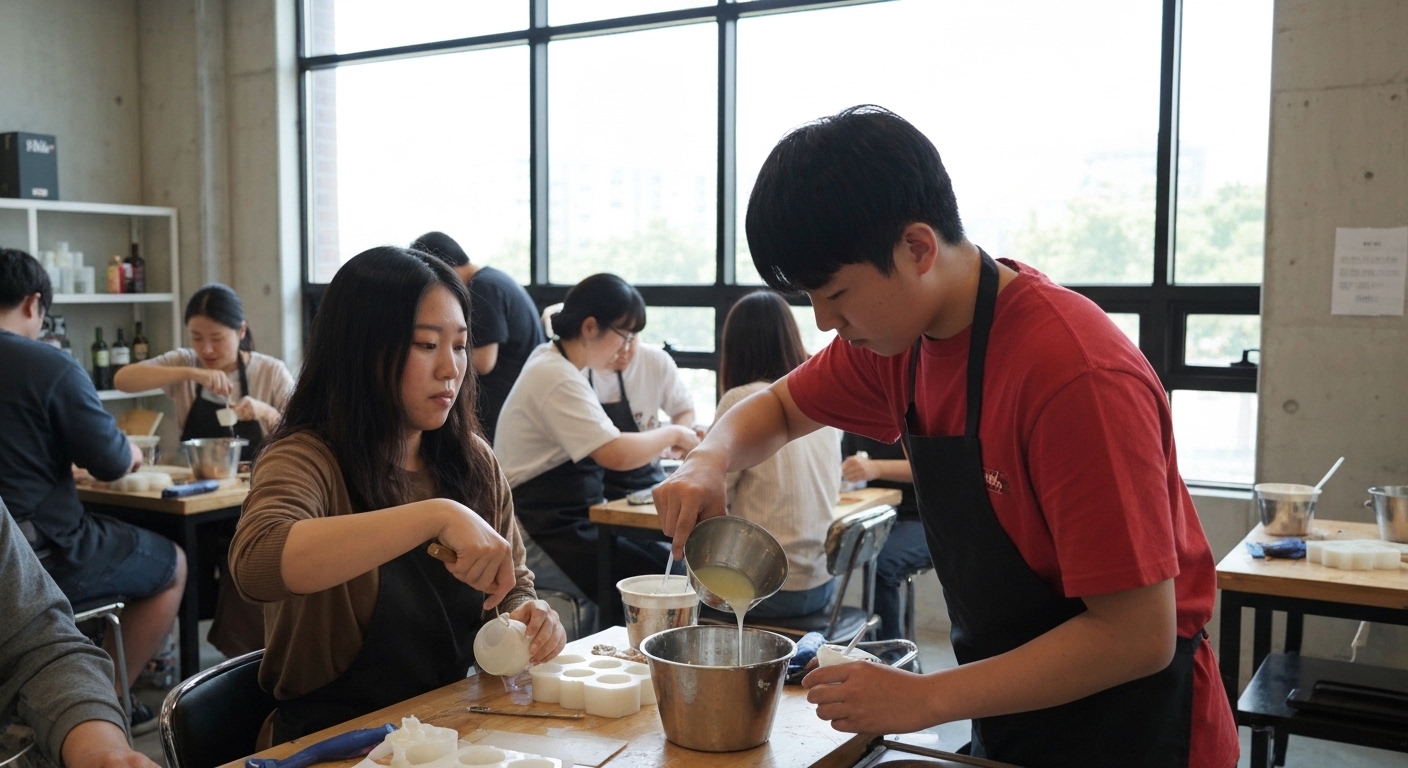
The Core Process
Here is the complete step-by-step for a 1-pound soy container candle. This same process adapts to other waxes by adjusting temperatures.
Step 1: Prep the Vessel
Clean the vessel and dry it completely. Any moisture at the bottom will cause wet spots or popping during the pour. Anchor the wick to the bottom center with a wick sticker or a dab of hot glue, pressing firmly for 10-15 seconds. Center the wick and hold it straight with a centering tool or two chopsticks laid across the top of the vessel.
Pre-warm the vessels for 5 minutes in a 170-degree oven, or by setting them on a heating pad. Cold vessels are a major cause of wet spots and poor adhesion.
Step 2: Melt the Wax
Weigh out your wax — 1 pound (16 ounces) for a standard batch. Place it in your pouring pitcher. Set the pitcher in a few inches of simmering water (double boiler method) or use a dedicated wax melter. Heat slowly, stirring occasionally, until all the wax is fully melted and clear.
For soy: target 170-185 degrees Fahrenheit for melting.
Never heat wax over an open flame or in a microwave. Both are fire hazards.
Step 3: Add Fragrance at the Right Temperature
This is where people make mistakes. Fragrance needs to be added at a specific temperature — hot enough to bond with the wax, cool enough not to burn off the top notes.
For soy wax: 185 degrees Fahrenheit.
Remove the pitcher from the heat. Weigh your fragrance oil — 8% load means 1.3 ounces for a 1-pound batch. Pour it in and stir gently but thoroughly for 2 minutes. Stirring distributes the fragrance and bonds it to the wax molecules — undermixing is another common cause of weak fragrance throw and bleeding.
If adding dye, this is the moment. Start with tiny amounts — a candle dye block chip or a drop of liquid dye. Stir in completely before deciding whether to add more.
Step 4: Pour at the Right Temperature
Every wax has a pour temperature window. Pour too hot and you get deep cracks and frosting. Pour too cold and you get wet spots, poor adhesion to the vessel, and lumpy tops.
Soy wax pour temperature: 130-140 degrees Fahrenheit.
Stir the wax gently while it cools to prevent separation. When the thermometer reads your target, pour slowly into the prepped vessels. Leave about 1/4 inch of headspace at the top — you will use this for a second pour to fix any sink holes.
Step 5: Cool Undisturbed
This is not negotiable — leave the candles completely still while they cool. Vibrations, temperature changes, drafts, and moving the vessels all cause cosmetic issues. Set them on a flat surface out of direct airflow and walk away for 4-6 hours.
Do not put them in the fridge or freezer to speed cooling. Rapid cooling causes cracks, frosting, and separation.
Step 6: Trim the Wick and Cure
Once the candle is fully set and at room temperature, trim the wick to 1/4 inch above the wax surface. A pair of wick trimmers is nice but scissors are fine.
Now comes the hardest part: cure time. The candle needs to cure for 1-2 weeks before you burn it. Curing lets the fragrance oil fully bond with the wax molecules — a candle burned immediately after pouring will throw far less scent than the same candle burned two weeks later. Resist the temptation to light it.
Troubleshooting: The Five Problems You Will Have
Tunneling
The flame burns a narrow hole down the middle of the candle while the outer ring of wax stays solid. This is almost always a wick sizing issue — the wick is too small to produce a full melt pool. Solution: size up the wick on your next batch. For the current candle, try wrapping foil around the top of the vessel to reflect heat inward for a few burns.
Frosting
A white crystalline bloom on the surface or sides of the candle. It is harmless and only affects appearance. It is most common in soy and is caused by the wax crystallizing in irregular shapes. Minor frosting is unavoidable with soy — total elimination is impossible without blending in another wax type. Reduce it by pouring at a higher temperature, pre-warming the vessel, and avoiding temperature shocks during cure.
Cracked Tops
Deep cracks running across the surface of the candle. Caused by the wax cooling unevenly — usually because it was poured too hot or cooled too fast. Solution: pour at the lower end of your target temperature, and cool at room temperature without drafts.
Wet Spots
Little round or crescent-shaped spots where the wax pulled away from the vessel. The vessel was too cold, or there was moisture in the jar. Pre-warm your vessels and make sure they are completely dry. These are cosmetic — the candle still burns fine.
Sink Holes
Dimples or craters around the wick where the wax shrank during cure. Normal with soy wax. Fix with a second pour: reheat a small amount of leftover wax to around 150 degrees, and pour a thin layer to fill the holes. This is why you leave headspace in your first pour.
Scaling Up
Once you can make one candle reliably, scaling to batches of 4-8 is straightforward. The process is identical — just bigger pitcher, bigger batches of wax, more vessels lined up ready to pour. A batch of 6 candles takes about the same time as a single candle because the melt and pour are the slow parts.
Once you are making batches regularly, consider a dedicated electric wax melter — they maintain steady temperatures without babysitting the stove.
For truly serious scaling, invest in a proper presto pot or a professional wax melter with temperature control. These are the tools that separate hobbyists from small business makers.
Related Reading
- Why Your DIY Candles Have No Scent (And How to Fix It)
- DIY Natural Gels: Flaxseed, Aloe & Herbal Recipes
- Polymer Clay Earrings: A Beginner’s Step-by-Step Tutorial
- Macrame Basics: 7 Essential Knots for Beginners — combine with candle making to create rope-wrapped candle holders and macrame gift packaging
- How to Make Soy Candles at Home: Step-by-Step Guide — a dedicated soy candle walkthrough covering fragrance ratios and wick selection in more detail
Final Thoughts
Candle making rewards attention to the boring details. Temperature, weight, wait time — these are the three variables that determine whether your candle is a beginner mess or looks store-bought. Get a thermometer, get a scale, and commit to the full cure time. Those three changes alone will put you ahead of most first-time candle makers.
Start with one pound of good soy wax, a vessel or two, and a single fragrance you love. Make one candle. Note what went right and what went wrong. Then make the next one. By your third or fourth candle, you will have the process dialed in — and you will be giving candles as gifts for every birthday, holiday, and housewarming for the next year.