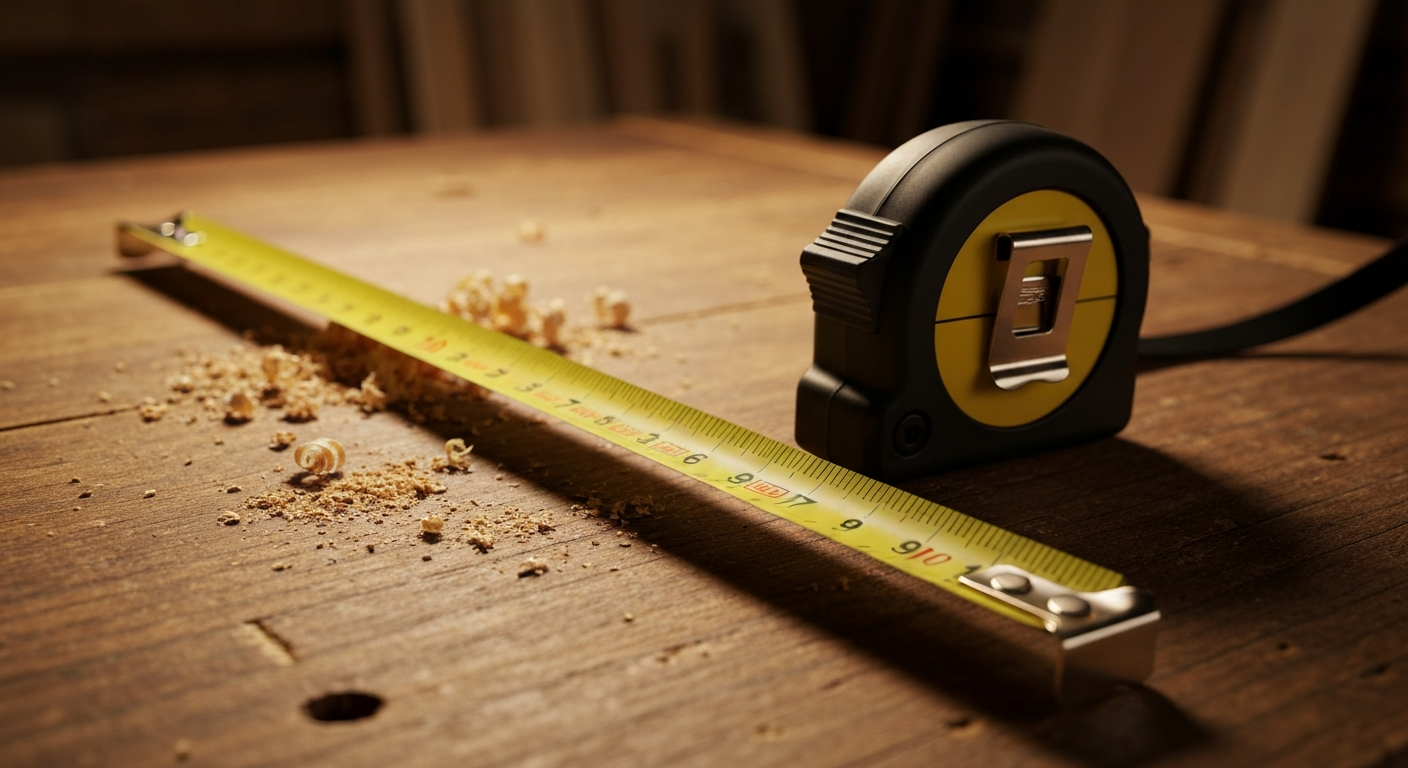
Tape measures are one of the most fundamental tools in any DIYer’s or professional’s toolbox, yet for something so ubiquitous, truly understanding every mark and feature can feel like cracking a secret code. If you’ve ever stared at a tape measure, squinting at the tiny lines, trying to decipher 7/16 from 3/8, or wondering why some numbers are red, you’re in the right place. This guide is designed to transform you from a tape measure novice into someone who can read and use this essential tool with confidence and precision.
We’re going to break down every aspect of the tape measure, from the smallest fractions to the clever design elements and professional tricks. By the end of this, you won’t just be able to read a measurement; you’ll understand why it’s marked the way it is and how to get the most accurate results every time.
The Inch and Its Fractions
Let’s start with the absolute basics: the inch. On a standard imperial tape measure, the inch is the largest unit you’ll see marked with a number. It’s the foundation of all your measurements, and understanding how it’s divided is the key to mastering the tape.
Think of an inch as a whole pie. To make it easier to measure smaller pieces, we cut that pie into progressively smaller, equal slices. Each slice represents a fraction of an inch. The tape measure uses lines of different lengths to help you quickly identify these fractions. The longer the line, the larger the fraction it represents.
The Half-Inch (1/2) After a full inch mark, the very next longest line you’ll encounter is the half-inch. It sits right in the middle of two full inch marks.
- Visual Cue: This is usually the second longest mark on the tape, shorter than the full inch marks (which are often numbered) but longer than all other fraction marks.
- How to Read: If you see the pointer align with this mark, it’s “X and a half inches.” For example, if it’s past the 5-inch mark and at this long line, it’s 5 1/2 inches.
The Quarter-Inch (1/4) Between a full inch and a half-inch, and between a half-inch and the next full inch, you’ll find the quarter-inch marks. The quarter-inch positions are 1/4 and 3/4 within each inch; 2/4 is the longer half-inch mark.
- Visual Cue: These marks are shorter than the half-inch mark but longer than the eighth-inch and sixteenth-inch marks.
- How to Read:
- The first quarter-inch mark after a full inch is 1/4 (e.g., 5 1/4 inches).
- The second quarter-inch mark is 2/4, which simplifies to 1/2 (and is represented by the longer half-inch mark).
- The third quarter-inch mark is 3/4 (e.g., 5 3/4 inches).
- The fourth quarter-inch mark is 4/4, which simplifies to a full inch.
The Eighth-Inch (1/8) Now we’re dividing the quarter-inches. Each quarter-inch segment is further divided in half by an eighth-inch mark.
- Visual Cue: These marks are shorter than the quarter-inch marks but longer than the sixteenth-inch marks.
- How to Read: You can count these marks from the previous full inch, simplifying the fraction as you go.
- 1/8
- 2/8 (simplifies to 1/4)
- 3/8
- 4/8 (simplifies to 1/2)
- 5/8
- 6/8 (simplifies to 3/4)
- 7/8
- 8/8 (simplifies to a full inch)
The Sixteenth-Inch (1/16) This is where most standard tape measures stop in terms of labeled divisions. Each eighth-inch segment is divided in half by a sixteenth-inch mark. These are typically the shortest lines on your tape measure.
- Visual Cue: These are the shortest marks, often appearing as tiny, uniform lines between the eighth-inch marks.
- How to Read: This is the most detailed reading, and it requires careful counting. You’ll count the number of sixteenth-inch marks from the previous full inch or half-inch. Remember to always simplify your fraction if possible (e.g., 4/16 is 1/4).
Why Marks Get Shorter: The Visual Hierarchy The varying lengths of the marks aren’t just arbitrary; they’re a brilliant design choice to help you read the tape measure quickly and accurately.
- Full Inch Marks: Longest, often numbered, sometimes with foot indicators. These are your primary reference points.
- Half-Inch Marks: Second longest, clearly indicating the halfway point within an inch.
- Quarter-Inch Marks: Shorter than half, showing major subdivisions.
- Eighth-Inch Marks: Shorter still, providing finer detail.
- Sixteenth-Inch Marks: Shortest, representing the smallest common division.
This visual hierarchy allows your eye to quickly jump to the appropriate level of precision. You don’t have to count every single tiny mark if you only need a rough measurement to the nearest half-inch.
How to Read 11/16 at a Glance This is where practice comes in, but there’s a systematic way to approach it. Let’s say you need to read 5 11/16 inches.
- Find the Full Inch: Locate the 5-inch mark. This is your starting point.
- Identify the Half-Inch: Move past the 5-inch mark to the 5 1/2-inch mark. That’s 8/16. You know you need to go further.
- Count from the Half-Inch: From the 5 1/2-inch mark (which is 8/16), count the smaller 1/16th marks.
- The first small mark after 5 1/2 is 9/16.
- The next is 10/16 (which is 5/8).
- The next is 11/16.
- The next is 12/16 (which is 3/4).
- The next is 13/16.
- The next is 14/16 (which is 7/8).
- The next is 15/16.
- The next is 16/16 (which is the next full inch, 6 inches).
The Trick: Instead of counting every single 1/16th mark from the previous full inch, use the longer marks as mental shortcuts.
- If your measurement is less than 1/2, count 1/16ths from the full inch.
- If your measurement is greater than 1/2, count 1/16ths from the 1/2-inch mark and add 8/16 to your count.
- Example: You see a mark that’s 3 small marks past the 1/2-inch mark. That’s 3/16 past 8/16, so it’s 11/16.
- Example: You see a mark that’s 1 small mark past the 1/4-inch mark. That’s 1/16 past 4/16, so it’s 5/16.
With practice, your eye will start to recognize the patterns of these smaller marks. You’ll instinctively know that a mark just before the 3/4-inch mark is 11/16, or a mark just after the 1/4-inch mark is 5/16. It’s all about recognizing the position relative to the longer, more easily identifiable fraction marks.
A quick note on finer divisions: Some specialized tape measures (or machinist’s rules) might go down to 1/32nds or even 1/64ths of an inch. For the vast majority of DIY and construction tasks, 1/16th of an inch is the standard level of precision you’ll work with, and what most general-purpose tape measures display. Trying to read beyond 1/16th on a standard tape measure is often an exercise in guesswork due to the width of the marks themselves and the limitations of human vision.
The Numbers and Color Coding
Beyond the fractional marks, tape measures have a lot of other visual cues designed to help you measure efficiently, especially in construction. The numbers themselves have layers of meaning, and the color coding often points to specific industry standards.
Full Inch Numbers: These are the largest and most obvious numbers, simply indicating the number of full inches from the start of the tape.
Foot Marks: On most tapes, every 12 inches (which is one foot) will be highlighted in some way.
- Common Marking: The foot number might be in a different color (often red), or it might be accompanied by a specific symbol (like a small box or a ‘F’ for foot) or a hyphen (e.g., ‘1F’ for 1 foot, ‘2F’ for 2 feet).
- Inch Markings within Feet: Immediately after a foot mark, the inch numbering often resets or changes style. For example, after ‘1F’, you might see ‘1’, ‘2’, ‘3’ again, but these inches will typically be followed by a small ‘F’ or a dash to indicate they are inches within that foot (e.g., ‘1F1’, ‘1F2’, ‘1F3’ for 1 foot, 1 inch; 1 foot, 2 inches; 1 foot, 3 inches). This prevents confusion when you’re measuring something like 13 inches (which is 1 foot, 1 inch) or 25 inches (2 feet, 1 inch). It helps you quickly identify the total length in feet and inches without doing mental math.
Red Numbers: 16-Inch Stud Spacing This is one of the most common and useful color codes you’ll find on an imperial tape measure, especially if you’re doing any framing or drywall work.
- What they are: You’ll notice certain inch marks are highlighted in red, or sometimes with a red box or arrow. These red marks appear every 16 inches (16”, 32”, 48”, 64”, 80”, etc.).
- Why 16 inches? This spacing is a standard in residential construction in many parts of the world, particularly North America, for framing walls. Plywood and drywall sheets are typically 4 feet (48 inches) wide. If your wall studs are spaced 16 inches on center (meaning from the center of one stud to the center of the next), then a 48-inch sheet will span exactly three stud bays and its edges will land perfectly in the center of the studs.
- Calculation: 48 inches / 16 inches = 3 stud bays. This means the edge of your sheet will land on a stud at 16 inches, then another at 32 inches, and finally the end of the sheet will land on a stud at 48 inches (which is also 4 feet).
- How to use them: When you’re framing a wall, you’ll simply mark your first stud, then use the red numbers on your tape to quickly mark the center points for all subsequent studs. This ensures your sheathing and drywall will have solid backing to attach to.
Black Diamonds: 19.2-Inch Truss Layout Less common than the red 16-inch marks, but equally important for specific construction tasks, are the black diamond symbols.
- What they are: These small black diamonds appear at 19.2-inch intervals (19.2”, 38.4”, 57.6”, 76.8”, 96”, etc.).
- Why 19.2 inches? This spacing is used for ceiling joists or trusses, particularly when you’re working with an 8-foot (96-inch) span.
- Calculation: 96 inches / 19.2 inches = 5 equal sections.
- This means that if you space your joists or trusses 19.2 inches on center, an 8-foot sheet of plywood or OSB will span exactly five joist bays. The edges of the sheet will land perfectly on the center of the joists, providing consistent support across the entire span.
- How to use them: Similar to the 16-inch marks, these diamonds provide quick reference points for laying out joists or trusses over an 8-foot span, ensuring proper support for decking or ceiling materials.
Understanding these color codes and special markings is a huge time-saver and accuracy booster. They’re not just random decorations; they’re built-in guides for common construction standards, helping you work smarter, not harder.
The Hooks, Slots, and Nail Grab
The end of your tape measure, often overlooked, is a marvel of simple engineering. It’s not just a piece of metal; it’s designed with specific features to enhance accuracy and make measuring easier, especially when you’re working alone.
The End Hook Movement: True Zero, Not Broken! This is perhaps the most misunderstood feature of a tape measure. Pick up almost any tape measure, and you’ll notice the metal hook at the very end has a slight amount of play – it can slide in and out a tiny bit. Many beginners assume this means the tape measure is broken or inaccurate. This couldn’t be further from the truth! This movement is a deliberate design feature, crucial for achieving what’s called “true zero.”
- Why it moves: The movement compensates for the thickness of the hook itself, ensuring accurate measurements whether you’re measuring an inside dimension (pushing the hook against a surface) or an outside dimension (hooking it over an edge).
- Inside Measurement (Pushing): When you push the hook against an inside corner (like the inside of a box), the hook slides inward. The measurement is taken from the inside face of the hook, providing an exact reading from the true zero point.
- Outside Measurement (Hooking): When you hook the end over an edge (like the end of a board), the hook slides outward. The measurement is taken from the outside face of the hook, again providing an exact reading from the true zero point.
- The result: This ingenious design means that regardless of how you start your measurement – by pushing or pulling – the first inch mark (and all subsequent marks) will always be precisely one inch from the actual starting point. If the hook didn’t move, your measurements would always be off by the thickness of the hook itself, which could be 1/32” or 1/16”, enough to compromise precision.
So, if your tape measure hook wiggles, rejoice! It means it’s working exactly as intended, ensuring you get accurate measurements every time.
The Nail/Screw Slot (or Hole) Many tape measures feature a small slot or hole near the end of the hook.
- Purpose: This simple feature is incredibly useful for solo measuring over long distances. You can hook this slot onto a nail or screw head that you’ve temporarily driven into a surface. This securely anchors the end of your tape, freeing up both of your hands to extend the tape, mark your measurement, or even cut a piece of material. It’s much more reliable than trying to hold the hook with one hand while pulling the tape with the other.
The Slight Curve of the Blade While not a “hook” or “slot,” it’s worth noting that tape measure blades are almost never perfectly flat. They have a slight concave curve.
- Purpose: This curve provides rigidity. Without it, a thin metal tape would flop and bend uncontrollably as you extend it, making it impossible to measure anything accurately, especially over long distances. The curve allows the tape to remain stiff and straight when extended horizontally or even vertically for a short distance, making single-person measurements much more feasible.
These seemingly small details on the end of your tape measure are critical to its functionality and your ability to get accurate readings in a variety of situations. Don’t underestimate their importance!
Reading Metric Tapes
While imperial measurements (inches, feet) are common in many DIY and construction contexts, particularly in the United States, metric measurements (millimeters, centimeters, meters) are the global standard and are increasingly encountered in DIY, especially with imported goods or specific projects. Reading a metric tape measure is often simpler than an imperial one because it’s based on the decimal system (base-10), eliminating fractions.
The Basic Units:
- Millimeter (mm): The smallest common unit you’ll see marked.
- Centimeter (cm): 10 millimeters make 1 centimeter.
- Meter (m): 100 centimeters (or 1000 millimeters) make 1 meter.
How to Read a Metric Tape Measure:
-
Identify Centimeters (cm): These are typically the numbered marks on the tape, often the most prominent. They usually have longer lines. Every 10 centimeters might be highlighted or have a larger number (e.g., 10, 20, 30 cm), sometimes followed by a ‘cm’ or ‘m’ indicator.
- Example: You’ll see ‘1’, ‘2’, ‘3’, up to ‘10’ (which is 10 cm).
-
Identify Millimeters (mm): Between each centimeter mark, you’ll find 9 smaller, unnumbered marks. Each of these represents 1 millimeter.
- Visual Cue: The 5mm mark (halfway between two centimeter marks) is often slightly longer than the other millimeter marks, similar to how the 1/2-inch mark is longer than other fractions. This helps you quickly orient yourself.
- Example: Between the ‘1’ cm mark and the ‘2’ cm mark, you’ll count 10 small lines. The first is 1.1 cm (or 11 mm), the second is 1.2 cm (or 12 mm), and so on.
-
Reading a Measurement:
- Method 1 (All mm): You can read the entire measurement in millimeters. For example, if you’re past the 5 cm mark and on the 3rd small mark after it, that’s 50 mm + 3 mm = 53 mm.
- Method 2 (cm and mm): You can read it as centimeters and millimeters. Using the previous example, it would be 5 cm and 3 mm.
- Method 3 (Decimal cm): You can read it as a decimal of a centimeter. The example would be 5.3 cm. This is often the most convenient way to record and work with metric measurements.
Example Reading: Let’s say your tape measure lands on a mark that is past the ‘12’ cm mark, and then 7 small marks beyond that.
- In millimeters: 120 mm + 7 mm = 127 mm.
- In centimeters and millimeters: 12 cm, 7 mm.
- In decimal centimeters: 12.7 cm.
Meter Marks: For longer tapes, you’ll also see meter marks. These are usually clearly indicated, often with a large ‘M’ or a number followed by ‘m’ (e.g., ‘1M’, ‘2M’). Every 100 cm is 1 meter. So, the ‘100’ cm mark would also be ‘1M’.
Why Metric is Often Simpler: The decimal nature of the metric system means you don’t have to deal with complex fractions (like 11/16ths). Everything is based on tens, making addition, subtraction, and conversions much more straightforward. If you need to add 2.5 cm to 12.7 cm, it’s a simple decimal addition: 15.2 cm. No finding common denominators!
Many tape measures, especially those sold internationally, are “dual scale,” meaning they have both imperial (inches/feet) on one edge and metric (mm/cm) on the other. This gives you the flexibility to work with whichever system your project requires.
Pro Techniques
Once you’ve mastered reading the tape measure, there are several “pro” techniques that can significantly improve your accuracy, efficiency, and ability to work alone. These aren’t secrets, but they’re habits that experienced builders and makers adopt to avoid common pitfalls.
1. Burning an Inch (or “Hooking an Inch”) This is a fundamental technique for achieving highly accurate measurements, especially when the end of your material isn’t perfectly square or when you’re measuring from an inside corner.
- What it is: Instead of starting your measurement at the very end of the tape (the zero point), you start it at the 1-inch mark (or sometimes 10-inch or even 1-foot mark). You “burn” that first inch.
- Why it’s done:
- Avoids Hook Play: While the end hook is designed for accuracy, it can still introduce slight variations if it’s worn, bent, or if you apply inconsistent pressure. By starting at a fixed, clearly defined line on the blade (like the 1-inch mark), you eliminate any potential inaccuracy from the hook.
- Damaged Ends: If the end of your material is splintered, rounded, or not perfectly square, measuring from the true end can lead to inaccuracies. Starting at 1 inch allows you to measure from a pristine, precise point on your material.
- Inside Measurements: When measuring an inside dimension where the hook can’t quite get a solid purchase, you can butt the 1-inch mark against the inside corner.
- How to do it:
- Align the 1-inch mark of your tape measure precisely with the starting edge or point of your material.
- Take your measurement at the desired length.
- Crucially, subtract 1 inch from your final reading. For example, if you align the 1-inch mark at the start, and your desired mark is at 15 1/2 inches on the tape, your actual measurement is 14 1/2 inches (15 1/2 - 1 = 14 1/2).
- When to use it: Anytime precision is paramount, or when you’re dealing with material ends that aren’t perfectly clean.
2. Marking with a “V” (or Knife Line, or Triangle) A common beginner mistake is to make a thick pencil line to mark a measurement. While sufficient for rough work, a thick line introduces uncertainty.
- The Problem with Lines: A standard pencil line has width. Is your measurement to the left edge, the right edge, or the center of that line? Even a fine pencil line can be 1/32” or wider, which can add up to significant error in precision work.
- The “V” Solution: Instead of a single line, make a small “V” or triangle mark with the point of the V directly on your measurement. The precise point of the V is your exact measurement.
- Knife Line/Scriber: For ultimate precision, professionals often use a sharp utility knife or a dedicated scriber to make a tiny, almost invisible score mark on the material. This leaves no ambiguity about the exact measurement point.
- Why it works: These methods create a single, unambiguous point of reference, eliminating the “line width” error. When you cut, you cut to that point.
3. Inside Measurements (Using the Case) Measuring the inside dimension of a box, cabinet, or frame can be tricky because the tape measure itself has a bulky case. Trying to bend the tape into the corner is inaccurate.
- The Solution: Most tape measure cases have their exact length (or the length from the end of the tape to the back of the case) printed on the side or bottom. This is typically around 3 inches for smaller tapes and 3.5 inches for larger ones.
- How to do it:
- Extend the tape measure and butt the end of the tape case firmly against one inside wall.
- Read the measurement where the tape blade meets the opposite inside wall.
- Add the length of the tape measure case (the number printed on the case) to your reading.
- Example: If the case length is 3 inches, and you read 10 inches on the tape where it meets the other wall, your total inside measurement is 10 inches + 3 inches = 13 inches.
- Why it works: This method allows you to get an accurate measurement without bending the tape, which can introduce error. It leverages a known, fixed dimension of your tool.
4. Marking with the Tape Itself For repetitive marking, or when transferring a measurement, you can use the tape measure as a straightedge.
- How to do it: Hook the tape measure on one end of your material. Extend it to your desired measurement. Instead of just marking, hold the tape firmly against the material and use the edge of the tape itself as a guide to draw a straight line across the material at your mark. This is especially useful for cutting lines.
These professional techniques are not difficult to learn but require conscious effort to implement until they become second nature. They are invaluable for improving the accuracy and quality of your work.
Common Mistakes
Even with a thorough understanding of how to read a tape measure, it’s easy to fall into common traps that lead to inaccurate measurements. Being aware of these pitfalls is the first step to avoiding them.
-
Reading the Wrong Fraction: This is perhaps the most frequent mistake for beginners. Misidentifying 1/4” for 1/8”, or 3/8” for 5/16” is common.
- How to Avoid: Take your time. Use the visual hierarchy of the marks (longer for larger fractions). Count from the nearest full inch or half-inch. With practice, you’ll develop a “feel” for where each fraction should be. Double-check important measurements.
-
Forgetting to Account for the Hook’s Movement (Believing it’s Broken): As discussed, the wiggling hook is a feature, not a flaw. If you don’t understand its purpose, you might misinterpret your readings.
- How to Avoid: Remember: when pulling, the hook extends; when pushing, it compresses. The “true zero” is always maintained. If you’re consistently getting odd readings, ensure your hook isn’t actually bent or damaged beyond its intended play.
-
Using a Dull Pencil or a Thick Marking Tool: A wide mark creates ambiguity. Where exactly is the measurement?
- How to Avoid: Always use a sharp pencil, a fine-tip marker, or ideally, a utility knife or scriber for precision work. Make a V-mark or a knife line right on the measurement point.
-
Measuring from the Wrong End/Side: Accidentally starting from the wrong edge of a board, or misaligning the tape.
- How to Avoid: Establish a clear starting point. For critical cuts, mark the “waste” side of your line to ensure you cut on the correct side of your measurement. Always double-check your starting alignment.
-
Sagging Tape on Long Measurements: When extending the tape over a long distance without support, gravity will cause it to sag in the middle, leading to a shorter (and thus inaccurate) reading.
- How to Avoid: For long measurements, work with a helper who can hold the far end. If working alone, try to support the tape at intervals, or use the “nail grab” feature if possible. For very long distances, a laser measure might be more appropriate.
-
Forgetting to Add/Subtract for “Burning an Inch”: If you use the “burn an inch” technique but forget to adjust your final reading, you’ll be off by exactly one inch.
- How to Avoid: Make it a habit. If you start at 1 inch, you always subtract 1 inch from the reading. If you start at 10 inches, you always subtract 10 inches. Write it down, or say it out loud until it’s ingrained.
-
Reading at an Angle (Parallax Error): If you read the tape measure from an angle, rather than directly perpendicular to the mark, your eye can perceive the mark to be in a slightly different place, leading to error.
- How to Avoid: Always position your eye directly above the mark you are reading. Crouch down if necessary to get a straight-on view.
-
Damaged or Worn Tape: Over time, the numbers and marks on a tape measure can wear off, or the blade itself can get kinked or bent. A damaged tape is an inaccurate tape.
- How to Avoid: Inspect your tape measure regularly. If it’s too worn or damaged to read clearly or pull straight, it’s time for a replacement. A cheap tape measure is a false economy if it leads to wasted materials.
By being mindful of these common mistakes, you can significantly improve the accuracy and reliability of your measurements, leading to better project outcomes and less frustration.
Frequently Asked Questions
Here are some common questions beginners often have about tape measures:
Q1: Why are there different colors on my tape measure, like red numbers or black diamonds? A1: These color codes are industry standards designed to help with common construction layouts. The red numbers (typically at 16”, 32”, 48”, etc.) indicate standard 16-inch on-center stud spacing for walls, which aligns perfectly with 4-foot wide sheets of plywood or drywall. The black diamonds (at 19.2”, 38.4”, 57.6”, etc.) indicate 19.2-inch on-center spacing, which is used for laying out joists or trusses over an 8-foot span, ensuring even support for 8-foot sheets of material. They’re quick visual guides for these specific spacing requirements.
Q2: My tape measure hook wiggles and has a small gap, is it broken? A2: No, it’s not broken! This slight movement in the end hook is a deliberate design feature known as “true zero.” It allows the tape measure to compensate for the thickness of the hook itself. When you push the hook against an inside surface, it slides inward. When you hook it over an outside edge, it slides outward. In both cases, the measurement starts from the exact zero point, ensuring consistent and accurate readings regardless of whether you’re taking an inside or outside measurement.
Q3: How do I measure something that’s longer than my tape measure? A3: If you’re working alone, you can use the “mark and move” technique. Hook the tape on one end, extend it to its full length, and make a clear mark. Then, unhook the tape, move it so the hook is now on your first mark, and continue measuring from there. Add the two measurements together. For even longer distances or when working with a helper, you can use the small slot or hole in the end hook to secure it onto a nail or screw head, allowing you to pull the tape further without needing to hold the end.
Q4: What’s the fundamental difference between a standard imperial tape measure and a metric tape measure? A4: The primary difference is the system of measurement. An imperial tape uses feet and inches, with inches divided into fractions like 1/2, 1/4, 1/8, and 1/16. A metric tape uses meters, centimeters, and millimeters, which are based on the decimal system (base-10). This means 10 millimeters make a centimeter, and 100 centimeters make a meter. Metric tapes are often considered simpler to read and calculate with due to their decimal nature, avoiding the need for fractional arithmetic. Many tapes are dual-scale, showing both systems.
Q5: Is it better to use a metal or fabric tape measure for DIY projects? A5: For most DIY and construction projects, a metal (steel) tape measure is almost always preferred. Metal tapes offer rigidity, allowing you to extend them without them flopping, which is crucial for accurate straight-line measurements. They are also more durable and resistant to stretching. Fabric (or fiberglass) tape measures, while flexible and useful for measuring curved surfaces (like around a pipe or for sewing), lack the rigidity and precision needed for most building tasks, and they can stretch over time, leading to inaccuracies.