Wood Movement Explained: Why Your Projects Crack (and How to Prevent It)
For the serious woodworker, few concepts are as fundamental, yet as frequently underestimated, as wood movement. It is the silent, relentless force that dictates the longevity and structural integrity of every solid wood project. Ignore it, and your masterpieces will inevitably crack, warp, and fall apart. Embrace it, understand its mechanisms, and design around its inevitability, and your work will stand the test of time, a testament to true craftsmanship.
This guide delves into the deep science and practical application of wood movement, offering the knowledge required to transform frustration into foresight. We will explore why wood moves, how it moves in different directions, how various species behave, and most critically, the design strategies that allow wood to move gracefully, rather than destructively.
Why Wood Moves
Wood is a remarkable natural material, a complex organic composite primarily composed of cellulose, hemicellulose, and lignin. Its structure is a network of elongated cells, akin to microscopic straws, bound together. These cells, particularly their walls, are hygroscopic – meaning they have an inherent affinity for water. This hygroscopic nature is the fundamental reason wood moves.
When a tree is alive, its cells are saturated with water. After harvesting and milling, the wood begins to dry. This drying process involves two types of water:
- Free Water: This water resides within the cell cavities (lumens). As wood dries, free water evaporates first. The removal of free water does not cause the wood to shrink or swell; it merely reduces its weight.
- Bound Water: This water is chemically and physically adsorbed into the cell walls themselves. Once all the free water has evaporated, and the wood continues to dry, bound water begins to leave the cell walls. This is the critical point: the removal or absorption of bound water directly causes the cell walls to shrink or swell, respectively, leading to changes in the wood’s dimensions.
The point at which all free water has left the cell lumens, but the cell walls are still saturated with bound water, is called the Fiber Saturation Point (FSP). For most wood species, FSP occurs at a moisture content (MC) of approximately 25% to 30%. Below FSP, every percentage point change in moisture content results in a corresponding change in the wood’s dimensions. Above FSP, wood does not shrink or swell with changes in moisture content.
Equilibrium Moisture Content (EMC) and Seasonal Humidity Swings
Wood is constantly striving for Equilibrium Moisture Content (EMC) with its surrounding environment. EMC is the moisture content at which wood neither gains nor loses moisture when exposed to air at a specific relative humidity (RH) and temperature. If the ambient air is humid, the wood will absorb moisture until its MC matches the EMC for that RH. If the air is dry, the wood will release moisture until it reaches the lower EMC.
This constant quest for equilibrium is why wood movement is an ongoing phenomenon. Our homes and workshops are rarely static environments. Relative humidity fluctuates significantly throughout the year:
- Summer: High outdoor humidity often translates to higher indoor humidity (e.g., 60-80% RH), leading to wood swelling as it absorbs moisture to reach a higher EMC (e.g., 11-16% MC).
- Winter: Heating systems dry out indoor air, causing relative humidity to plummet (e.g., 20-40% RH). This forces wood to release moisture, shrinking as it seeks a lower EMC (e.g., 5-8% MC).
These seasonal humidity swings are the primary drivers of wood movement in finished projects. A tabletop perfectly flat and dimensionally stable in summer might develop gaps or stress cracks in winter, only to swell back and potentially cup or buckle as summer returns. Understanding and anticipating these cyclical changes is paramount to designing durable woodworking.
The Three Directions of Movement
Wood does not move uniformly in all directions. Its anisotropic nature – meaning its properties vary with direction – is a direct consequence of its cellular structure. Imagine wood as a bundle of microscopic, elongated tubes (the wood fibers) running parallel to each other. These tubes are bound together, and their arrangement dictates how the wood will expand and contract.
There are three principal directions of movement relative to the wood grain: longitudinal, radial, and tangential.
-
Longitudinal Movement:
- Direction: Along the length of the grain, parallel to the wood fibers.
- Magnitude: This is by far the least significant direction of movement. Longitudinal shrinkage or swelling is typically negligible, ranging from 0.1% to 0.2% from FSP to oven-dry (0% MC).
- Implication: For practical woodworking, longitudinal movement is almost always ignored. A 4-foot board might change length by only a hundredth of an inch over its entire moisture content range.
-
Radial Movement:
- Direction: Across the growth rings, perpendicular to the grain, from the pith (center of the tree) towards the bark.
- Magnitude: Radial movement is moderate, typically ranging from 3% to 5% shrinkage from FSP to oven-dry (0% MC).
- Implication: While less than tangential movement, radial movement is still substantial and must be accounted for in design.
-
Tangential Movement:
- Direction: Parallel to the growth rings, perpendicular to the grain, along the circumference of the tree.
- Magnitude: This is the most significant direction of movement, typically ranging from 6% to 10% shrinkage from FSP to oven-dry (0% MC).
- Implication: Tangential movement is the primary culprit behind most woodworking failures. A board’s width will change most dramatically in this direction.
Why Tangential Movement is Greater Than Radial Movement
The difference in radial and tangential movement is due to the arrangement and structure of the wood cells and the presence of wood rays.
- Cellular Structure: Wood cells shrink primarily across their width, not along their length. In the tangential direction, there are fewer rigid structures (like the wood rays) resisting this shrinkage. The cells are effectively shrinking side-by-side along the growth ring.
- Wood Rays: These are thin sheets of cells that run radially, perpendicular to the growth rings. They act like internal stiffeners, resisting shrinkage in the radial direction. In essence, the rays help hold the wood cells together more tightly radially, while tangentially, there’s less resistance.
This differential movement (tangential being roughly twice that of radial) is often expressed as the T/R ratio. A higher T/R ratio indicates a greater difference between tangential and radial movement, suggesting a species that is more prone to warping and distortion.
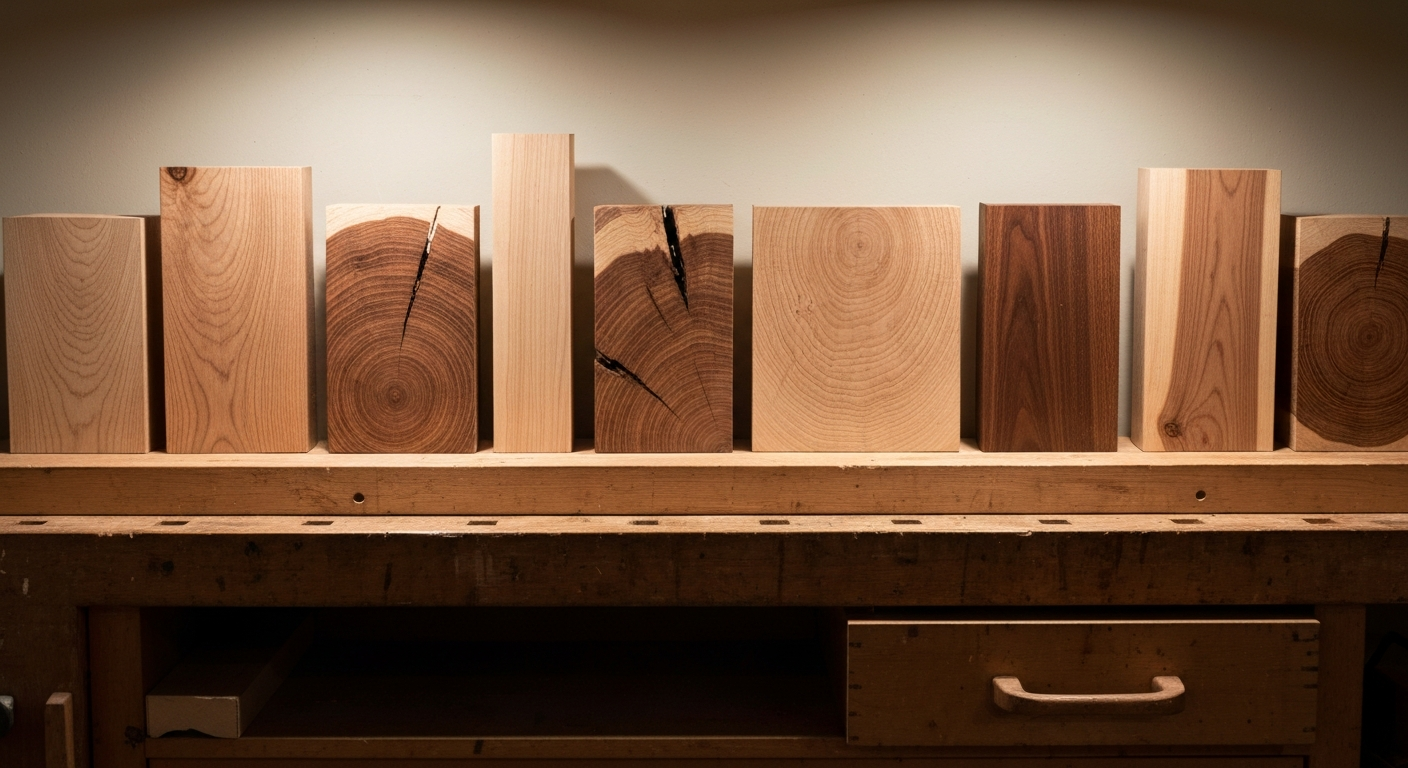
Quartersawn vs. Flatsawn (Plainsawn): Stability Explained
The way a board is cut from a log dramatically influences how its inherent movement will manifest. This is where the concepts of tangential and radial movement become critically important.
-
Flatsawn (Plainsawn) Lumber:
- Description: The most common and economical way to cut lumber. The growth rings run roughly parallel to the wide faces of the board.
- Movement Manifestation: Because the wide face of a flatsawn board is predominantly tangential to the growth rings, it will exhibit the greatest amount of width change. When it dries, the outer (tangential) portion of the board shrinks more than the inner (radial) portion, causing the board to cup (the wide face becomes concave or convex). This is a direct result of the differential tangential shrinkage across its width.
- Appearance: Distinctive “cathedral” or flame-like grain patterns.
-
Quartersawn Lumber:
- Description: Achieved by cutting the log radially, with the growth rings running roughly perpendicular (60-90 degrees) to the wide faces of the board.
- Movement Manifestation: The wide face of a quartersawn board is predominantly radial to the growth rings. Since radial movement is significantly less than tangential movement, quartersawn lumber exhibits much less apparent width change and is far more dimensionally stable. It is also less prone to cupping and twisting. Any movement it does exhibit tends to be in thickness rather than width.
- Appearance: Straight, parallel grain lines, often with prominent ray fleck (medullary rays) in species like oak.
- Riftsawn Lumber: A variation where the growth rings are between 30-60 degrees to the face, offering stability somewhere between flatsawn and quartersawn, with a straight grain appearance but without the prominent ray fleck.
-
Practical Implications:
- For tabletops, wide panels, or any application where dimensional stability and flatness are critical, quartersawn lumber is often preferred despite its higher cost.
- Flatsawn lumber is suitable for many applications, but its movement must be carefully managed through design.
- Understanding the cut allows a woodworker to predict how a board will behave and orient it accordingly within a project. For instance, orienting flatsawn boards with alternating growth ring patterns when gluing up a panel can help balance cupping forces.
Movement by Species
While the principles of wood movement apply universally, the magnitude of movement varies significantly between species. This variation is due to differences in cell structure, density, and chemical composition, which affect how much bound water the cell walls can hold and how they shrink or swell. Denser woods generally exhibit more movement, but there are exceptions.
The following table provides approximate tangential and radial shrinkage values (from FSP to 0% MC) for common woodworking species, along with a general stability comment. Remember, these are averages, and individual boards can vary.
| Species | Tangential Shrinkage (%) | Radial Shrinkage (%) | T/R Ratio (Approx.) | Stability Comment |
|---|---|---|---|---|
| Oak (Red) | 10.5 | 4.0 | 2.6 | Moderate-High movement; relatively stable if quartersawn. |
| Oak (White) | 10.7 | 5.6 | 1.9 | Moderate-High movement; slightly more stable than Red Oak. |
| Maple (Hard) | 9.9 | 4.8 | 2.1 | Moderate movement; good stability for a dense wood. |
| Maple (Soft) | 8.2 | 4.1 | 2.0 | Moderate movement; slightly more stable than Hard Maple. |
| Walnut (Black) | 7.8 | 5.5 | 1.4 | Very good stability; lower T/R ratio. |
| Cherry | 7.1 | 3.7 | 1.9 | Very good stability; often preferred for its movement. |
| Pine (White) | 6.1 | 2.4 | 2.5 | Good stability for a softwood; less dense. |
| Pine (Yellow) | 7.6 | 5.0 | 1.5 | Moderate stability for a softwood; denser. |
| Poplar | 8.2 | 4.1 | 2.0 | Moderate movement. |
| Ash | 7.8 | 4.5 | 1.7 | Good stability. |
| Mahogany (African) | 6.4 | 4.3 | 1.5 | Excellent stability; low movement overall. |
| Teak | 4.0 | 2.2 | 1.8 | Exceptionally stable; very low movement. |
Interpretation:
- Lower Tangential/Radial values: Indicate less overall movement. Teak and Mahogany are excellent examples of highly stable woods.
- Lower T/R Ratio: Indicates more uniform movement between the radial and tangential directions, meaning less cupping and distortion. Walnut and Teak stand out here.
- Higher values/ratios: Species like Oak, while beautiful, require more careful design to accommodate their significant movement.
When selecting wood for a project, consider not only its aesthetic qualities and workability but also its inherent stability. For critical components like wide tabletops or cabinet doors, opting for a species with lower movement (e.g., Cherry, Walnut, African Mahogany) or utilizing quartersawn stock can significantly reduce potential issues.
Design Rules That Account for Movement
The essence of successful woodworking with solid wood lies not in fighting movement, but in designing to accommodate it. This means creating structures that allow wood to expand and contract freely without building up destructive internal stresses. Here are the fundamental design rules:
1. Breadboard Ends
Purpose: To prevent cupping and warping in wide solid wood panels, typically tabletops, while allowing the panel to expand and contract across its width.
Mechanism: A breadboard end is a board attached to the end of a wide panel, with its grain running perpendicular to the panel’s grain. If glued rigidly, this would be a classic cross-grain disaster. The genius of a proper breadboard end lies in its joinery:
- A long tongue is typically cut along the end of the main panel, fitting into a corresponding groove in the breadboard end.
- The center of the breadboard end is often glued to the center of the panel’s tongue. This fixes the breadboard end centrally.
- However, the crucial innovation is that the outer sections of the breadboard end are attached with pins or screws that pass through elongated holes in the tongue. These elongated holes allow the main panel to expand and contract freely across its width, sliding along the pins, while the breadboard end itself provides structural stability and prevents cupping.
- The pins are often wedged or decorative, but their primary function is to hold the breadboard in place while allowing lateral movement.
2. Floating Panels in Frames (Frame and Panel Construction)
Purpose: To create large, stable panels (e.g., cabinet doors, chest sides, wainscoting) using solid wood without the risk of cracking or warping.
Mechanism: This construction method involves a solid wood panel that “floats” within a frame made of rails (horizontal) and stiles (vertical).
- The panel is typically cut slightly smaller than the opening in the frame to allow for expansion.
- The edges of the panel are profiled (e.g., with a raised panel bit, or simply chamfered) to fit into a groove routed along the inside edges of the frame’s rails and stiles.
- Crucially, the panel is never glued into the groove. It is held in place by friction, small space balls, or just the depth of the groove. This allows the panel to expand and contract across its width and height independently of the stable frame.
- The frame itself is typically glued with long-grain-to-long-grain joints (mortise and tenon, cope and stick), making it dimensionally stable.
3. Elongated Screw Holes and Specialized Fasteners
Purpose: To attach wide solid wood components (like tabletops, shelves, or case backs) to a fixed base or frame without restricting their movement.
Mechanism: When a wide board needs to be fastened, the fasteners must allow for its width change.
- Elongated Screw Holes: Instead of drilling round pilot holes, drill slots (elongated holes) perpendicular to the grain of the moving board. Screws are driven through these slots into the fixed component. The head of the screw holds the board down, but the shaft can slide within the slot as the board expands and contracts.
- Table Buttons (Tabletop Fasteners): Small wooden or metal cleats that fit into a groove routed along the inside of an apron or frame. One end of the button is screwed to the underside of the tabletop, and the other end slides within the groove.
- Z-Clips (Desktop Fasteners): Metal clips that screw into the underside of a tabletop and hook into a kerf or groove in the apron. They allow for movement while securely fastening the top.
- Figure-8 Fasteners: Small metal discs with two screw holes. One hole screws into the underside of the tabletop, and the other into the top edge of the apron. The figure-8 shape allows for pivot and sliding movement.
When using any of these methods, the fixed screw (or the center of the slot/fastener) should be placed at the center of the board, allowing it to move equally in both directions from the center.
4. Grain-Direction Matching and Orientation
Purpose: To ensure that adjacent components move harmoniously and predictably, minimizing stress and visual distortion.
Mechanism:
- Panel Glue-ups: When gluing up a wide panel from several narrower boards, orient the growth rings to balance the cupping forces. If using flatsawn boards, alternate the direction of the growth rings (heartwood up, then heartwood down). This helps the overall panel remain flatter, as the cupping forces tend to cancel each other out.
- Drawer Construction: Drawer fronts are typically oriented with their grain running horizontally (width of the drawer). Drawer sides and backs have their grain running vertically (height of the drawer). This aligns the dominant movement directions: the front moves in its height (negligibly), and the sides/back move in their width (also the drawer’s height), allowing them to expand and contract without binding or cracking.
- Case Construction: Ensure the grain direction of panels and their surrounding frames (if any) are considered. For instance, a solid wood back panel might be designed as a floating panel within a groove, or made from plywood for stability.
5. The ‘Rule of Never Gluing Cross-Grain’
Purpose: This is the cardinal rule of solid wood joinery, designed to prevent catastrophic failure in your projects.
Mechanism: Never glue a wide piece of solid wood to another piece of solid wood whose grain runs perpendicular to it, unless the joint is specifically designed to allow for movement (like a breadboard end or frame and panel).
- Example of Failure: Imagine gluing a wide solid wood tabletop directly to the top edge of a solid wood apron, with the apron’s grain running perpendicular to the tabletop’s grain. The tabletop, being wide, will attempt to expand and contract across its width with changes in humidity. The apron, being relatively narrow, will move negligibly along its length. The glue joint, being stronger than the wood itself, will prevent the tabletop from moving. The immense internal stress will then cause the tabletop to crack, split, or tear itself apart, or the glue joint to fail spectacularly.
- Solution: Instead of gluing cross-grain, use the elongated screw holes, table buttons, or other mechanical fasteners described above to attach the tabletop to the apron, allowing it to move freely.
Adhering to these design rules is not optional; it is a fundamental requirement for building durable, heirloom-quality solid wood furniture.
How to Acclimate Lumber
Acclimation is the process of allowing lumber to reach its Equilibrium Moisture Content (EMC) with the environment in which it will be worked and, more importantly, where the finished project will reside. This step is absolutely crucial for minimizing post-construction movement, warping, and cracking. Skipping acclimation is a common mistake, even among experienced woodworkers.
Why Acclimation is Crucial:
- Reduces Movement After Construction: If you mill and assemble wood that is at a high moisture content (e.g., fresh from the lumberyard or a damp workshop) and then move the finished piece into a drier home, it will shrink, potentially causing joints to open, panels to crack, or warps to develop. Acclimation stabilizes the wood before you cut and join it.
- Consistent Milling: Wood dimensions change with MC. If your lumber is constantly gaining or losing moisture during the milling process, your cuts will not be consistent, leading to poorly fitting joints and inaccurate dimensions. Acclimation ensures the wood is stable when you work it.
- Predictable Behavior: Acclimated wood behaves predictably, allowing you to confidently apply the design rules for movement.
The Acclimation Process:
- Bring to the Target Environment: The ideal place to acclimate lumber is in the actual room or building where the finished project will live. If that’s not possible, a workshop with controlled humidity and temperature that closely mimics the final environment is the next best option. This is your “target EMC” environment.
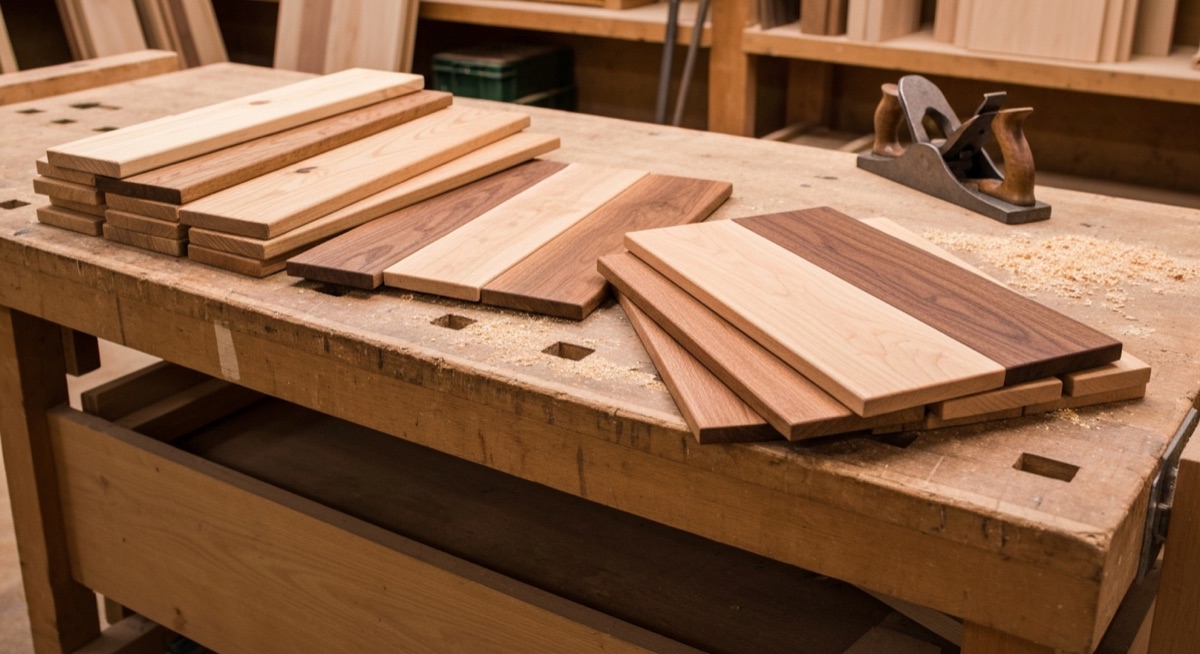
- Stack and Sticker: Never stack lumber directly on top of each other or against a wall. It needs airflow on all six faces.
- Lay down a level base (e.g., 2x4s or dedicated stickers) on the floor.
- Place your first layer of lumber.
- Place stickers (small, uniform strips of wood, typically 3/4” to 1” square) perpendicular to the lumber, directly above your base supports, spaced every 12-18 inches.
- Stack the next layer of lumber directly above the stickers, ensuring each sticker aligns vertically with the ones below it. This prevents warping and ensures even airflow.
- Leave adequate space around the stack for air circulation.
- Monitor Moisture Content: This is where a moisture meter becomes an indispensable tool.
- Pin-type meters: Use two small pins to penetrate the wood, measuring electrical resistance between them to determine MC. Take readings at different depths and locations on multiple boards.
- Pinless meters: Use an electromagnetic field to measure MC without piercing the wood. They are fast but typically measure to a shallower depth and can be influenced by wood density.
- Goal: Monitor the MC of several boards in your stack over time. When the readings stabilize and match the expected EMC for your target environment (e.g., 6-8% MC for a typical heated home in winter, 9-11% in summer), your wood is acclimated.
- Allow Sufficient Time: There’s no fixed rule, but patience is key.
- Thin boards (e.g., 1/2”) might acclimate in a few days to a week.
- Standard 3/4” stock typically takes 2-4 weeks.
- Thicker stock (e.g., 8/4 or 2”) can take several months.
- The rule of thumb: Allow at least one week per inch of thickness for initial acclimation, then monitor with a meter.
- Rough Cut and Re-acclimate (Optional but Recommended): If you have very long or wide boards that will be cut down significantly, it can be beneficial to rough cut them to slightly oversized dimensions after initial acclimation. This exposes fresh end grain and surfaces, allowing them to equalize more quickly, especially if the internal MC differs from the surface MC. Then, sticker and allow them to re-acclimate for a shorter period before final milling.
By religiously acclimating your lumber, you set the stage for a stable and successful project, minimizing the surprises that can lead to frustration and failure.
Calculating Expected Movement
While understanding the principles of wood movement is crucial, being able to quantify it allows for precise design and planning. You can calculate the expected change in width (or thickness) of a board given a change in moisture content. This is particularly useful for designing floating panels, breadboard ends, or determining required tolerances.
The basic formula for calculating linear change due to moisture content variation is:
Change in Dimension (inches) = Original Dimension (inches) × ( (MC_initial - MC_final) / FSP ) × (Shrinkage Coefficient / 100)
Let’s break down the components:
- Original Dimension (inches): The current width (or thickness) of your board.
- MC_initial (%): The current moisture content of your wood (measured with a moisture meter).
- MC_final (%): The expected equilibrium moisture content of the wood in its final environment. This is your target EMC.
- FSP (%): The Fiber Saturation Point. For most species, a reliable average is 30%.
- Shrinkage Coefficient (%): This is the total percentage of shrinkage a species undergoes from FSP to oven-dry (0% MC) in a specific direction (tangential or radial).
- Use the Tangential Shrinkage Coefficient (S_T) for flatsawn boards (as their width is predominantly tangential).
- Use the Radial Shrinkage Coefficient (S_R) for quartersawn boards (as their width is predominantly radial).
- You can find these values in resources like the USDA Forest Products Laboratory’s “Wood Handbook” or the table provided earlier in this guide.
Example Calculation:
Let’s say you have a flatsawn Red Oak tabletop board that is 10 inches wide.
- You measure its MC_initial at 10%.
- You expect it to dry down to a MC_final of 6% in a heated home during winter.
- From our table, the Tangential Shrinkage Coefficient (S_T) for Red Oak is 10.5%.
- We’ll use FSP = 30%.
-
Calculate the percentage of total movement range:
(MC_initial - MC_final) / FSP = (10% - 6%) / 30% = 4% / 30% = 0.1333(This means the wood is moving through about 13.33% of its total possible shrinkage range below FSP). -
Calculate the expected change in width:
Change in Width = Original Dimension × ( (MC_initial - MC_final) / FSP ) × (S_T / 100)Change in Width = 10 inches × ( (10 - 6) / 30 ) × (10.5 / 100)Change in Width = 10 inches × (4 / 30) × 0.105Change in Width = 10 inches × 0.1333 × 0.105Change in Width = 0.139965 inches
So, this 10-inch wide Red Oak board is expected to shrink by approximately 0.140 inches (just under 9/64”) as it dries from 10% MC to 6% MC. This is a significant amount that absolutely must be accounted for in your design.
Conversely, if the board were to swell from 6% MC to 10% MC, it would expand by the same amount.
Using the Formula in Design:
- Floating Panels: If you calculate that a panel will shrink by 1/4 inch overall, you need to ensure your groove depth and panel size allow for at least that much clearance on all sides (e.g., 1/8” on each side for a 1/4” total shrinkage).
- Breadboard Ends: The amount of movement calculated helps determine the required length of elongated screw holes.
- Overall Project Stability: Knowing the potential movement helps you select the right joinery and fastening methods.
This formula provides a powerful tool for informed design, moving beyond guesswork to precise, data-driven woodworking.
Frequently Asked Questions
Q1: Can finishes stop wood movement?
A: No, finishes cannot stop wood movement. Wood movement is driven by changes in the wood’s moisture content, which is a fundamental hygroscopic property. Finishes, especially film-building finishes like polyurethane or lacquer, act as a barrier that slows down the rate at which moisture enters or leaves the wood. This can help stabilize the wood and reduce rapid fluctuations, but it will not prevent the wood from eventually reaching equilibrium with the ambient humidity. Penetrating finishes (oils, waxes) offer even less resistance to moisture exchange. For optimal stability, always finish all surfaces (top, bottom, edges, inside, outside) evenly to ensure moisture exchange is balanced, which helps prevent cupping and warping.
Q2: Does plywood or MDF move?
A: Yes, plywood and MDF (Medium-Density Fiberboard) do move, but significantly less than solid wood and in a more uniform, predictable manner.
- Plywood: Consists of thin wood veneers glued together with alternating grain directions (cross-banding). This cross-grain construction effectively cancels out much of the differential movement, making plywood highly dimensionally stable. It still expands and contracts slightly, primarily due to changes in moisture content, but typically only a fraction of solid wood’s movement.
- MDF: Made from wood fibers broken down and reconstituted with resin under heat and pressure. It lacks the distinct grain direction of solid wood. MDF will swell uniformly when exposed to moisture (it’s very prone to water damage if not sealed) and shrink when it dries. Its movement is generally isotropic (equal in all directions) and less than solid wood, but it will still occur.
Q3: Is steaming wood good for stability?
A: Steaming wood is primarily a commercial process used in kiln drying or for bending wood. While kiln drying involves high heat and steam to remove moisture and “set” the wood’s dimensions at a specific low moisture content, it does not magically make the wood impervious to future moisture changes. Kiln-dried wood will still absorb and release moisture, and thus move, in response to ambient relative humidity. For bending, steaming plasticizes the wood, allowing it to be shaped, and it will largely hold that shape as it dries, but it does not inherently make the wood more stable against future movement once it’s dry.
Q4: How important is humidity control in my workshop?
A: Humidity control in your workshop is extremely important for consistent and successful woodworking.
- Accurate Milling: If your shop’s humidity fluctuates wildly, the wood you’re working on will constantly change dimensions. This means cuts made one day might not fit the next, leading to joinery issues and inaccurate assemblies.
- Proper Acclimation: A stable workshop environment allows your lumber to acclimate to a consistent EMC, reducing the shock it experiences when moved to its final environment.
- Reduced Stress: Maintaining a stable humidity (ideally matching the average EMC of the final project environment) minimizes internal stresses in the wood during construction, leading to stronger, more stable glue joints and assemblies.
- Tool Care: Consistent humidity also helps prevent rust on metal tools and machinery.
Q5: What’s the best way to store cutoffs to prevent warping?
A: Treat your cutoffs and project components with the same respect you give full boards.
- Sticker Them: Even short pieces benefit from being stickered. Arrange stickers perpendicular to the grain, ensuring airflow around all surfaces.
- Keep Them Flat: Store them on a flat, level surface.
- Off the Floor: Avoid storing wood directly on concrete floors, as concrete can draw moisture into the wood.
- Organize: Group similar species and sizes together. This helps maintain consistent moisture content within each group and makes finding pieces easier.
- Acclimate: If you plan to use a cutoff for a future project, let it acclimate in your shop environment just like new lumber.
Conclusion
Wood movement is not a flaw in the material; it is an inherent characteristic of a living, breathing natural resource. The difference between a novice and a master woodworker often lies in their understanding and respect for this fundamental principle. By delving into the science of why wood moves, understanding its directional tendencies, appreciating species-specific behaviors, and most critically, implementing thoughtful design strategies, you equip yourself to create projects that not only look beautiful but endure through generations.
Embrace the movement. Design for it. And watch your craftsmanship stand the test of time, free from the cracks and warps that plague those who choose to ignore nature’s persistent laws.