Disclosure and scope: This guide includes promotional links to Figura. We reviewed its published workflow on 8 October 2026; we have not purchased a file or completed a physical print for this guide. Service features and checkout terms can change.
A drawing can be the starting point for a decorative 3D figure, but there are two very different projects here: buying a file to print yourself, or ordering a finished object. Choose Figura DIY if you already have a printer and can review a model in a slicer. Choose the shipped route if you want the figure and do not want to manage printing.
That makes Figura relevant to a home workshop as a creative printing project. It is not a replacement for measured CAD drawings, replacement machine parts or load-bearing hardware.
Which route fits your project?
| Decision | Print at home | Shipped figurine |
|---|---|---|
| What you receive | Digital files after confirmed payment | A physical figure made and shipped by the service |
| Equipment you need | A suitable printer, filament and a slicer workflow you understand | No home printer required |
| Your main responsibility | Review the model, configure the printer and inspect the sliced result | Review the preview, chosen size, delivery details and final order |
| Costs to allow for | File, material, supports, possible failed attempts and your time | Figure, shipping and applicable taxes |
| Best fit | A maker who wants control over the print | Someone who mainly wants the finished keepsake |
For a single gift, buying a printer just to use a download is a much bigger commitment than buying the file. For an existing printer owner, the useful question is whether the design is manageable on the machine already in the workshop.
What Figura currently provides for DIY
Figura’s print-at-home page describes a colored GLB and a reviewed 3MF download, with print preparation offering five- or eight-color 3MF output for Bambu Studio. This is a file product: it does not include a shipped figure, printer or filament.
The published sequence is drawing upload, image preview, 3D model, print-file preparation and review, then checkout and downloads after payment is confirmed. The page says a geometry problem blocks checkout until the file is ready. That check is useful, but it is not evidence that a particular printer will produce a strong or attractive result.
You still choose the printer profile, filament mapping, orientation, supports and infill. A colored preview alone does not show that your hardware can reproduce every color. If you use another slicer or a different color system, confirm the intended workflow before buying instead of assuming that a 3MF extension guarantees compatibility.
A real source example: the five-legged heart creature
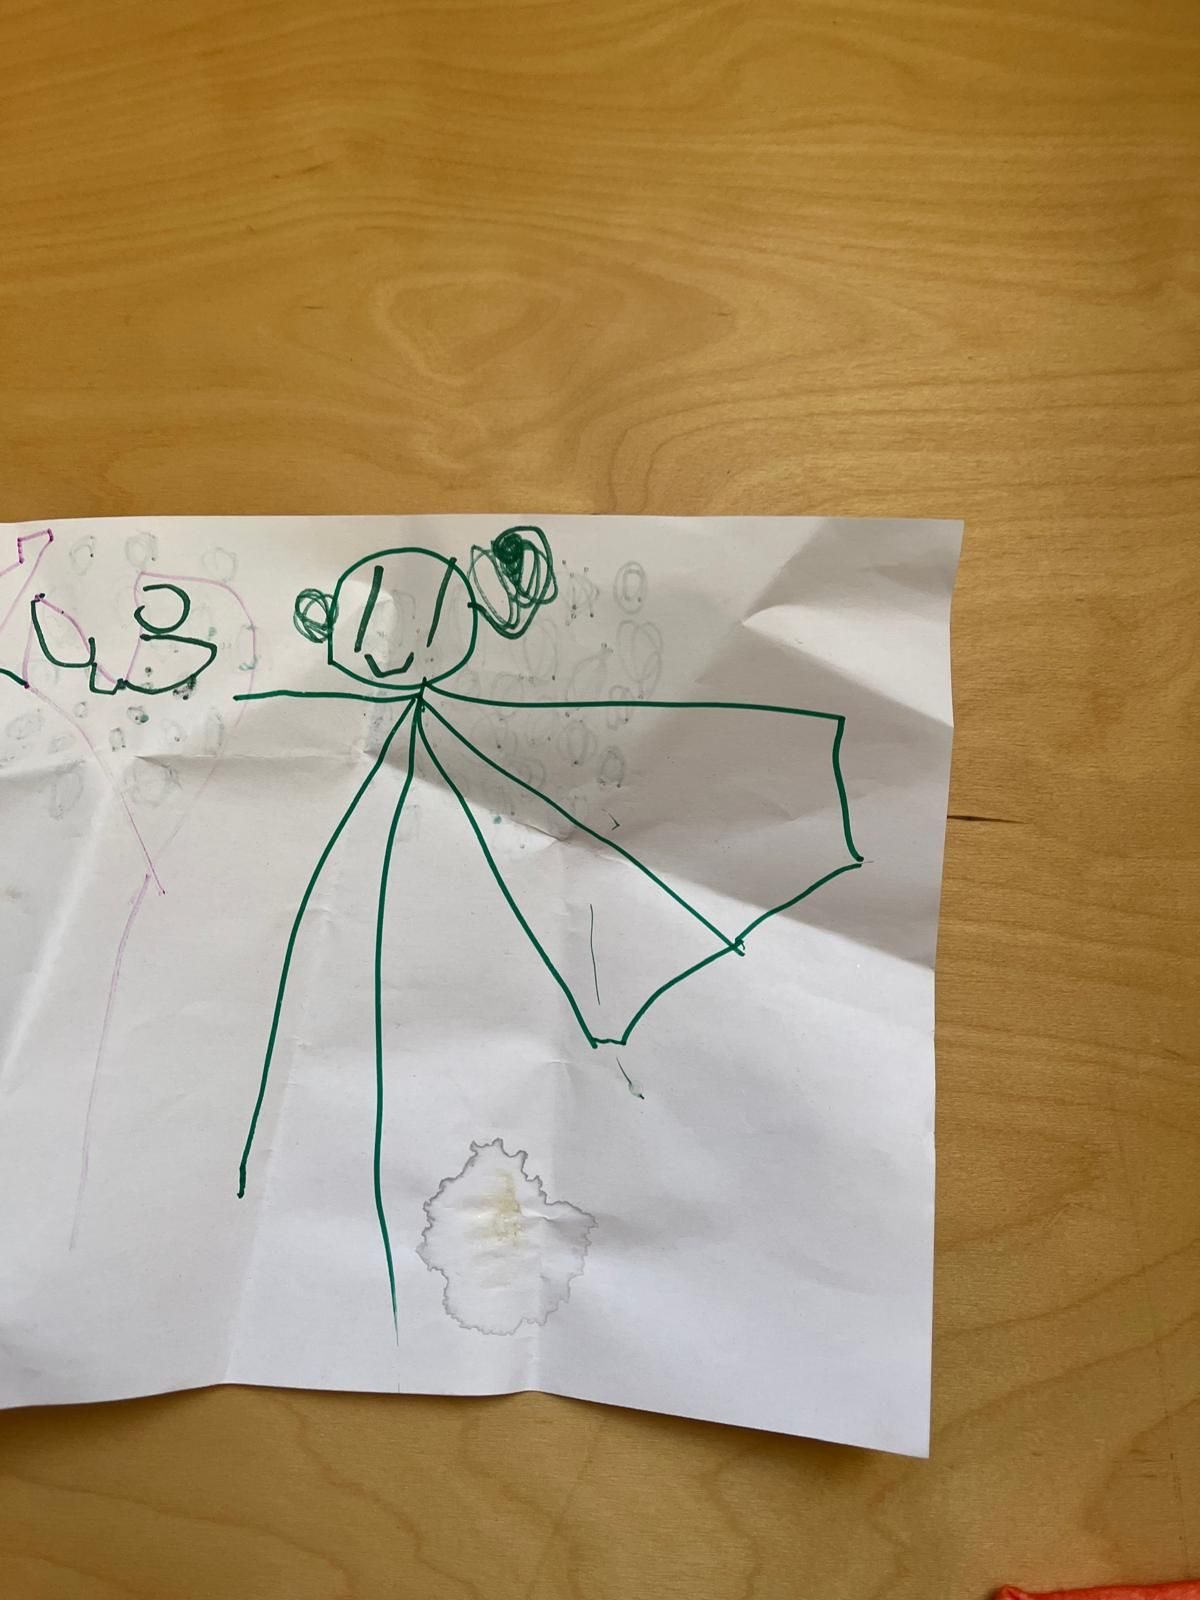
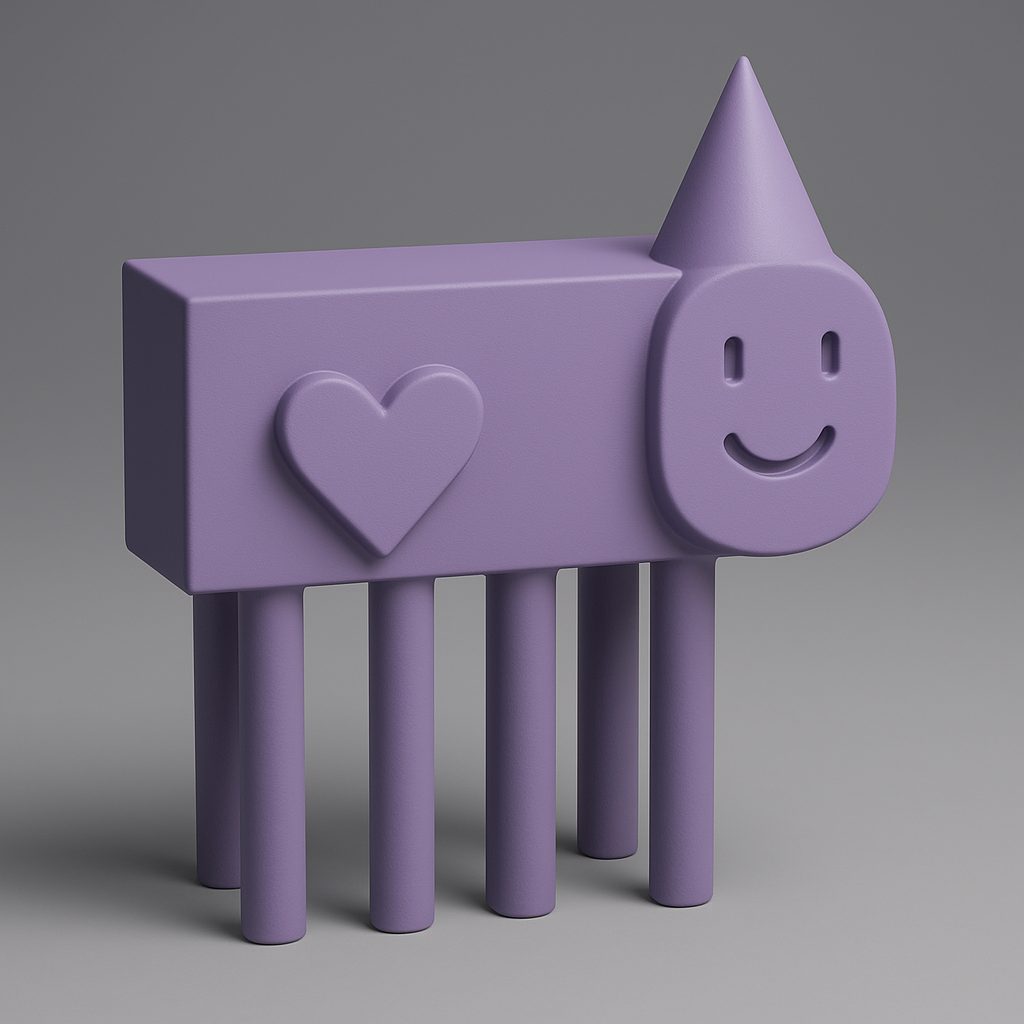
The hero is Figura’s published interpretation of the drawing below. The source is its public gallery; this is not a physical print tested by Build Coded.
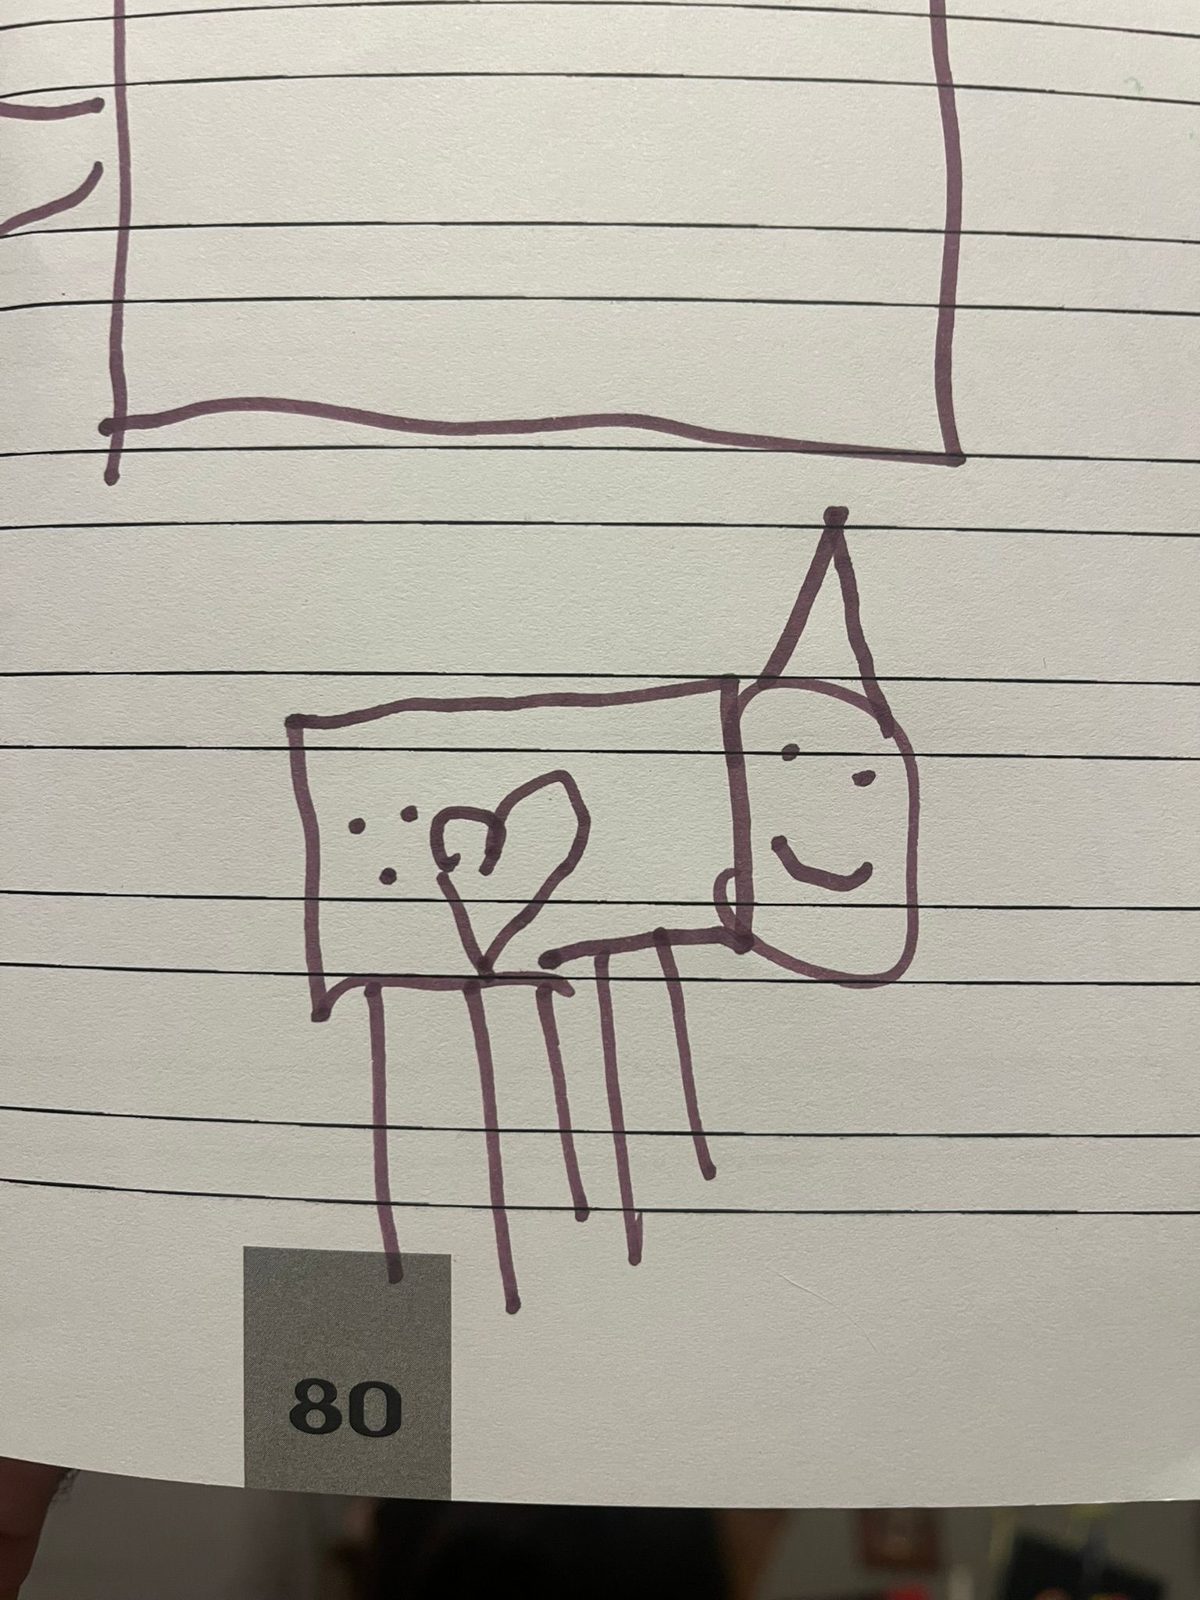
There are three useful checks in this example. First, count the legs: an unusual number can be central to the character. Second, locate the heart on the rectangular body. Third, compare the smiling face and pointed shape above it. A pleasant-looking result is not enough if one of those details is the reason you chose the drawing.
The drawing does not specify a complete three-dimensional back or a precise thickness for each leg. Those require interpretation. The gallery’s purple color is also a choice you should notice rather than assume every drawing will produce the color you have in mind.
For DIY, that becomes a practical review task: look at leg connections and the base in the model, then inspect them at the intended size in your slicer. For a shipped figure, confirm that the approved preview represents the character you want before ordering. Neither route turns this published example into a print-quality guarantee.
Decide what success means before generating
Write down three features the figure must retain. For the heart creature, those might be the five legs, the heart and the smiling face. Keep those separate from details you can tolerate changing, such as inferred depth on a flat drawing.
Next, choose a plausible display size and ask whether the smallest important details will remain visible. Do not approve a model just because its large on-screen preview looks impressive. A small badge or thin finger needs a second look at the intended print size and in the sliced layers.
If you want a surprise gift for a fixed date, check production and delivery expectations directly. Neither a preview nor this guide is a delivery guarantee. If exact geometry or mechanical strength matters, use a design process that includes dimensions and appropriate testing instead.
Before paying
- Confirm whether the checkout is for digital files or a shipped object.
- Compare the image preview and the rotatable model against your essential features.
- For DIY, read the file and software requirements and budget for material and retries.
- For a shipped figure, verify size, destination availability, shipping and final total.
- Read current access instructions. Figura’s DIY page currently says to keep the creation page open for payment confirmation and downloads; save the files once available.
Ready to assess the DIY route? Check Figura’s print-at-home requirements. Prefer the finished object? Compare Figura’s physical figure options before starting.
Prepare the input with our drawing photo checklist, then use the 3MF review checklist before running your printer.