Disclosure and scope: This guide includes promotional links to Figura. We reviewed its published workflow on 8 October 2026; we have not purchased a file or completed a physical print for this guide. Service features and checkout terms can change.
Start with one complete, clearly photographed character. A sharp image makes it easier to inspect what you submitted and compare it with the generated preview. It does not guarantee that an AI service will preserve every mark or infer the unseen side correctly.
This checklist is for turning an original drawing into a decorative figure with Figura. It is especially useful when the drawing has meaningful details that matter more than a polished, generic result.
1. Choose the character, not the whole page
Figura’s published FAQ recommends one main character per figure. If the page contains several characters, decide which one you want before uploading. Make a separate copy for cropping and keep the original file untouched.
Leave a little space around the complete outline. Check the ends of ears, fingers, wings, antennae and feet: these are easy to cut off when framing tightly. Do not crop through a feature you expect the finished figure to include.
If two shapes overlap, decide what the overlap means. A line crossing an arm may be a background mark, an accessory or a separate object. The service cannot ask the paper what the artist intended. If the meaning is essential and the preview gets it wrong, pause instead of treating the first result as final.
2. Make the paper easy to read
Place the drawing flat and photograph it in even light. Hold the camera facing the page rather than taking a steep angled view. Watch for your phone’s shadow, a bright reflection on glossy paper and folds that hide part of the outline.
Zoom into the saved photograph before uploading. Can you see the eyes, the boundary between neighboring shapes and the smallest detail you care about? If those details are blurred, retake the photograph. Heavy sharpening or an artistic filter can change the evidence you wanted to preserve.
A scan or original digital drawing is another option. According to Figura’s FAQ, uploads can be PNG, JPEG or WebP, up to 10 MB. Check the current upload screen if it shows different requirements.
3. Remove personal information from the upload copy
A drawing may include a child’s full name, school, date of birth or a family note. Crop or redact unnecessary personal information on a copy before sending it to any service. Use artwork you own or have permission to use, and review the service’s current privacy terms if the image is sensitive.
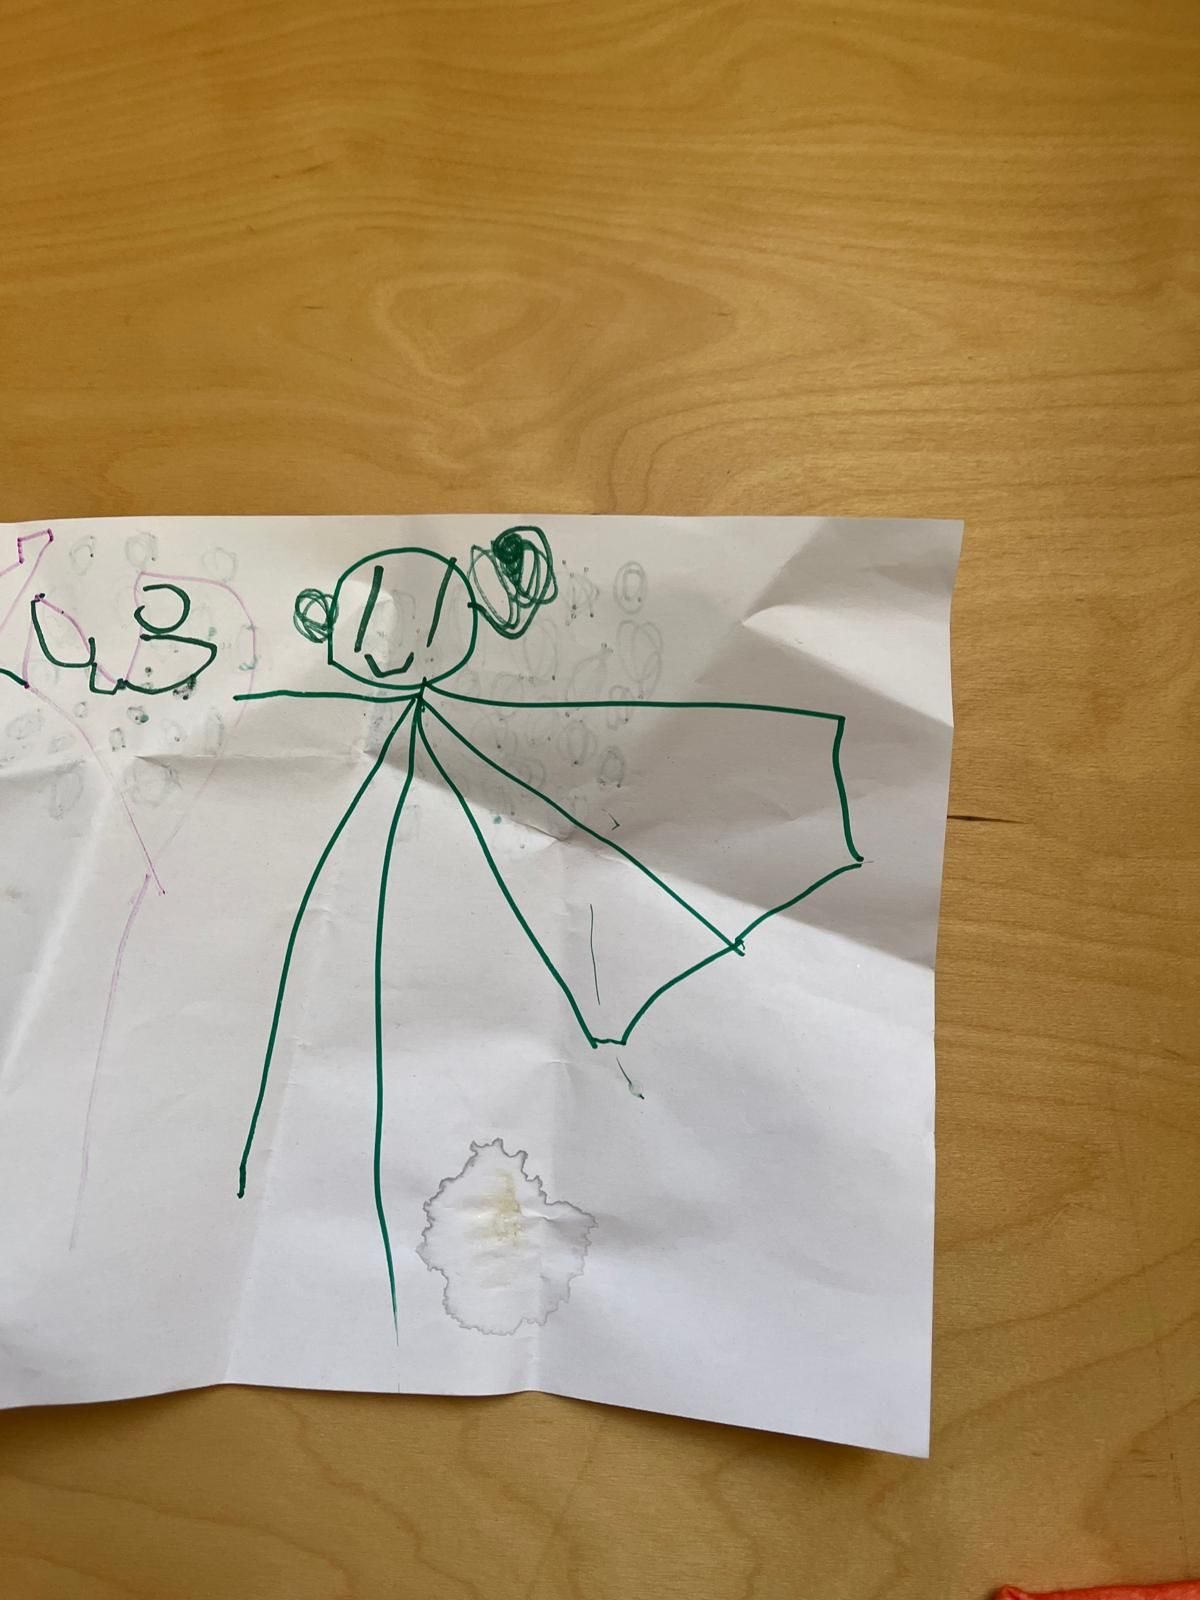
Do not mistake marks elsewhere on the paper for part of the character. In the public green-character example above, the sheet has creases and unrelated marks around the subject. For your own upload, make a deliberate decision about what belongs in the figure and what is simply on the surrounding paper.
The displayed drawing is a public Figura example. We have not uploaded a private drawing, ordered this character or verified a physical result.
4. Write a three-feature acceptance note
Before you see a preview, record what must survive. This stops an attractive result from distracting you from a missing feature.
| Your note | What to inspect in the preview |
|---|---|
| Main silhouette | Head shape, pose and number of limbs |
| Identity detail | A star, badge, unusual eye or other defining mark |
| Main color areas | Which parts are red, yellow or another important color |
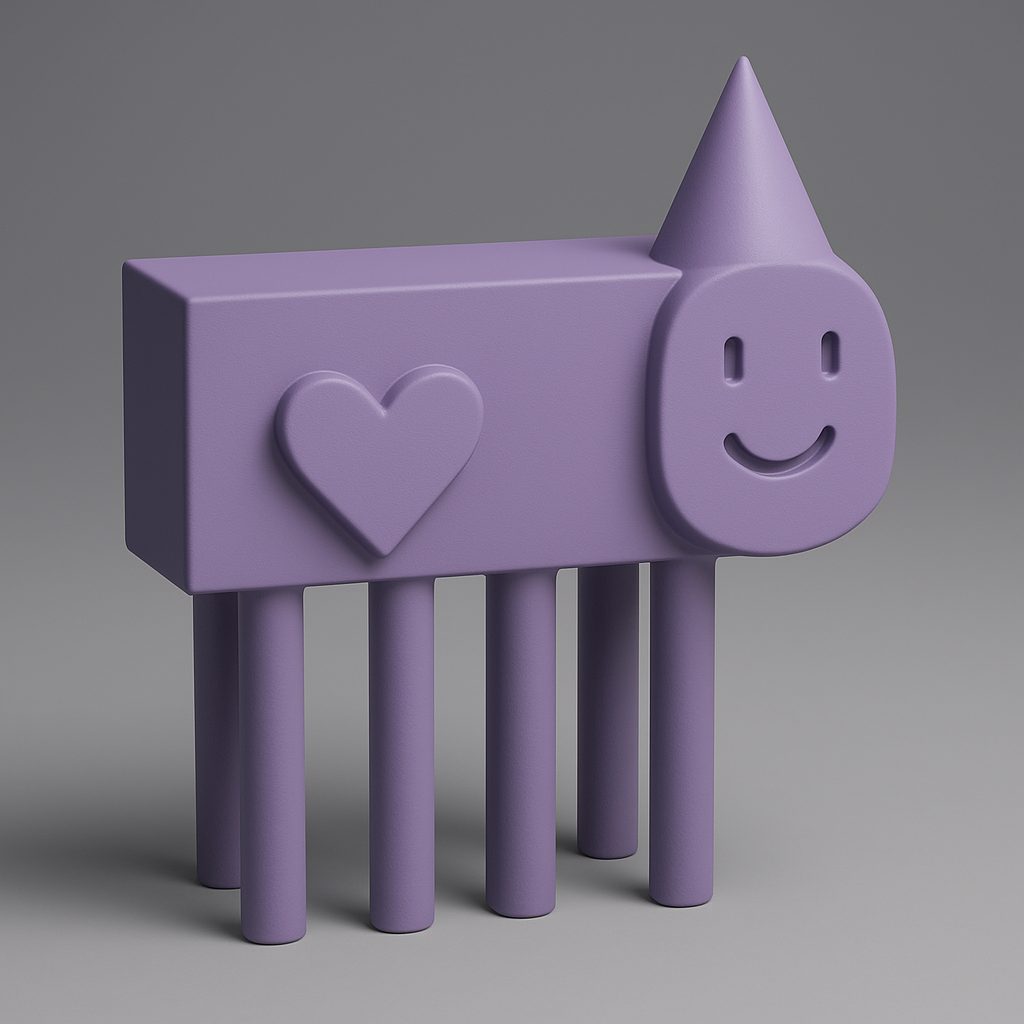
For the green character, an editorial checklist could be “round smiling face; curled shapes beside the head; wing-like outline on the right.” Figura’s public gallery interpretation below gives you a concrete comparison.
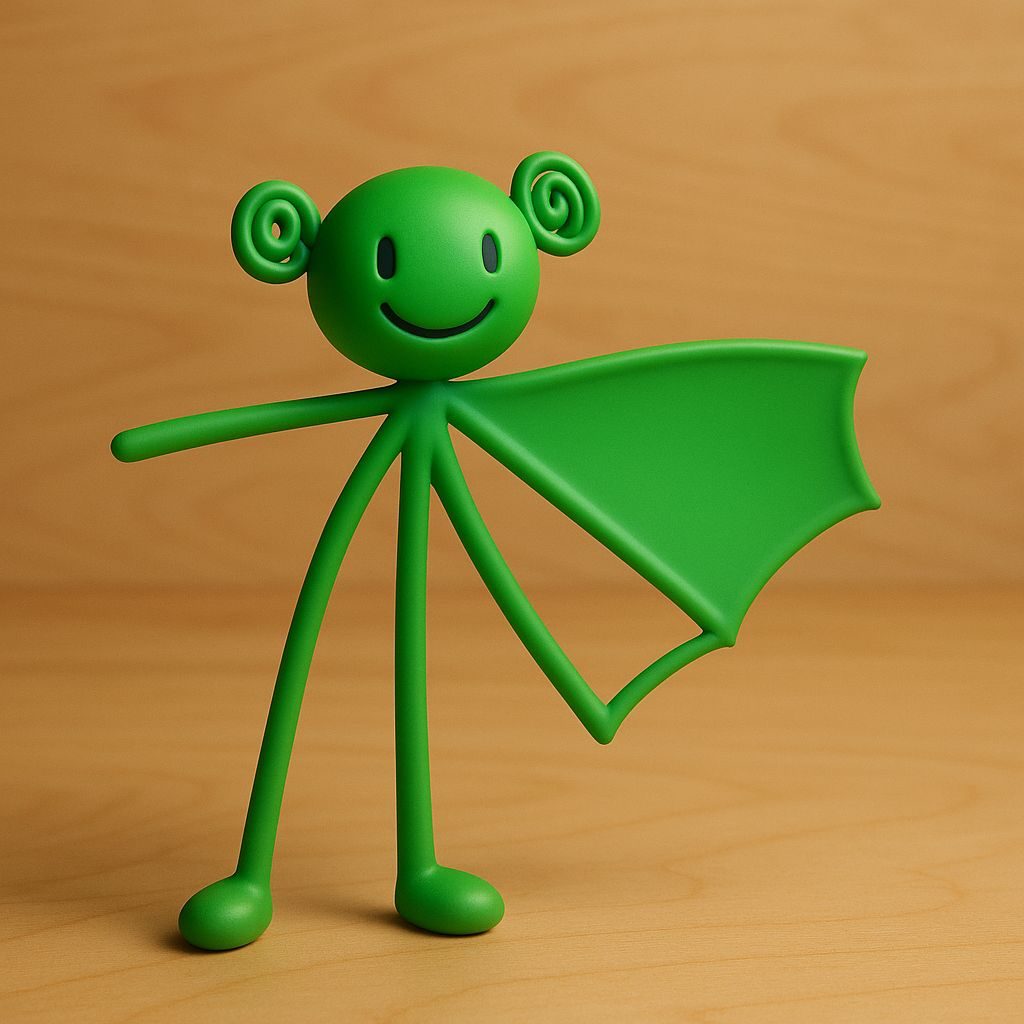
Notice the difference between keeping an idea and literally reproducing a line. The thin drawn legs become thicker forms with feet, and the open wing-like outline becomes a filled surface. These are visible interpretation choices in the example, not features we can promise for another upload. Decide whether similar changes would suit your drawing before approving your own preview.
Also write down any ambiguity. The drawing may not specify the back, thickness or depth. Those are interpretations in a 3D result. If you need an exact shape on a hidden side, ask the service about that requirement before committing.
5. Review the image and the model separately
The image preview is your first chance to notice a changed expression, missing accessory or incorrect color. The rotatable 3D model is a separate check: look at the sides, back, underside and connections between parts.
A detail can appear in a colored image without being useful as printable geometry. For a home print, continue to our 3MF and sliced-layer checklist. For a shipped figure, verify the selected size and ask about an essential feature that still looks unclear.
Stop if the result loses the feature that made the drawing special. Retaking the input is sensible when the photograph is the problem; it is not a guarantee that repeated generation will fix a modeling limitation.
Your upload readiness check
You are ready to inspect Figura’s workflow when you have one character, a complete sharp outline, no unnecessary personal information, permission to use the artwork and a short list of essential features.
Review Figura’s drawing-to-file workflow if you plan to print it yourself. If you are still choosing between a file and a finished figure, read our DIY versus shipped comparison first.