Why Build an End-Grain Cutting Board
An end-grain cutting board is one of the most satisfying projects a beginner can attempt. It’s doable with intermediate tools, it teaches you everything about dimensioning, glue-ups, planing, and finishing in a single project, and you end up with a beautiful, genuinely useful object. A well-built end-grain board costs $150 to $300 in stores. You can build a better one for $50 in lumber.
End-grain is different from an edge-grain or face-grain board. On an end-grain board, you are looking at the end of the wood fibers, like you’re looking down on the tops of a bundle of straws. Knives push between the fibers rather than cutting them, which means the board self-heals, kniveslastlonger, and the surface develops a beautiful patina over years of use.
This project takes two weekends because the glue needs overnight clamp time twice. It is not a weekend project you can rush. But the total hours of active work are only about six. The rest is waiting for glue to cure.
Wood Selection
Use hard, tight-grained hardwoods that are food-safe. Open-pored woods like oak trap bacteria. Avoid pine, cedar, and anything with strong aromatic oils (cedar, teak).
The classics are:
- Hard maple (Janka 1450) - cream white, the workhorse
- Black walnut (Janka 1010) - chocolate brown, softer but fine for cutting boards
- Cherry (Janka 950) - pink-red, darkens with age
- Hickory (Janka 1820) - harder than maple, cream to brown
Avoid:
- Red oak (open pores trap bacteria)
- Pine and other softwoods (too soft, dent immediately)
- Exotic species you don’t recognize (some are toxic)
For a typical 12 by 18 inch board at 1.5 inches thick, you’ll need roughly 4 board feet of hard maple and 2 board feet of walnut, or about $40 to $60 at a decent lumberyard. Buy 4/4 stock, which is technically 1 inch thick but usually measures around 7/8 inch rough.
Tools You’ll Need
Required
- Table saw for ripping and crosscutting accurately
- Planer or jointer/planer for flattening and thicknessing
- Clamps - at least 8 medium parallel clamps or pipe clamps. More is better.
- Router with a 1/4 inch roundover bit for the edges
- Random orbit sander with grits from 80 to 220
Helpful
- Jointer for flattening one face and squaring one edge before planing
- Bandsaw for trimming the second glue-up to rough dimensions
- Drum sander if you have one (not required, but amazing for this)
Without a planer, this project is hard. You can rent one at Home Depot for about $60 a day. It is genuinely worth it.
Shopping List
- Hard maple, 4 board feet, S2S if available
- Black walnut, 2 board feet, S2S
- Titebond III wood glue (food-safe once cured, water-resistant)
- Mineral oil (food-grade, USP grade, from any pharmacy)
- Beeswax
- 80, 120, 180, 220 grit sanding disks
- Painter’s tape
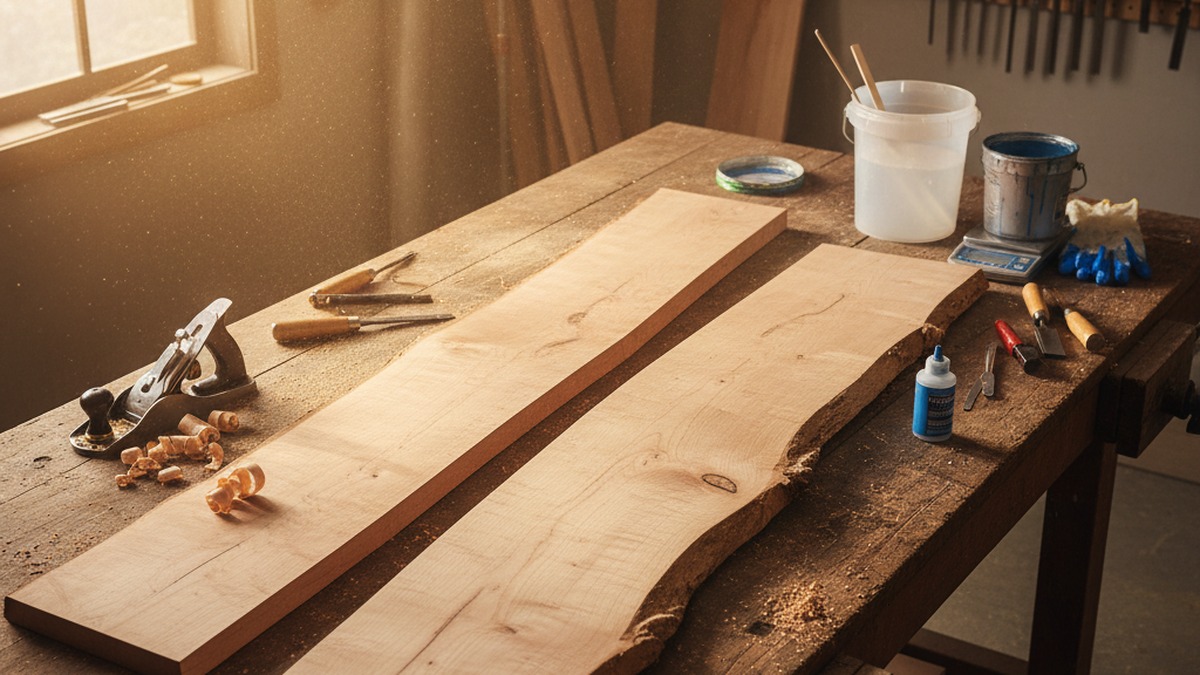
Step 1: Mill the Rough Stock
Start by squaring up your lumber. This is non-negotiable. End-grain work demands that your strips be perfectly dimensioned, because every error compounds through the project.
If you have a jointer, flatten one face and square one edge on every board. If you don’t, you can get by with a planer and careful table saw work, but the results will be rougher.
On the planer, take your stock down to a uniform 3/4 inch thick. Every piece of maple and walnut should end up exactly the same thickness. Measure with calipers if you have them. A 0.01 inch error across 10 strips becomes a 0.1 inch step in your glue-up, which means serious planing and sanding later.
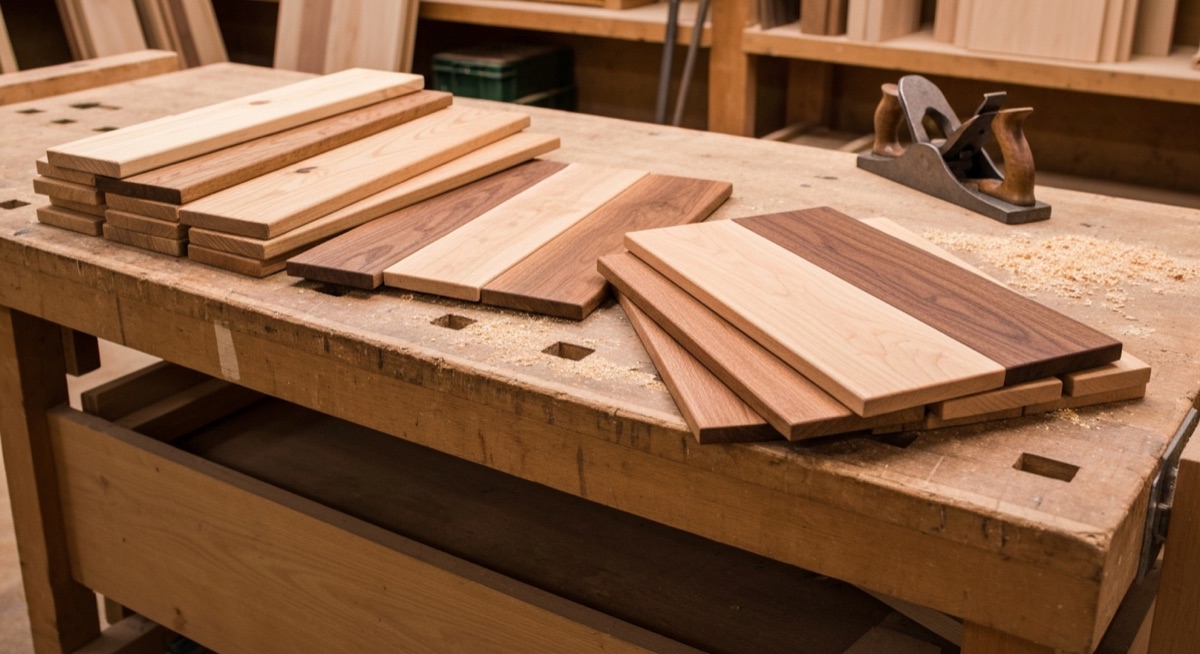
Rip the boards to 1.5 inch wide strips on the table saw. Use a push stick. Keep your blade sharp so you get glassy cuts that don’t need jointing afterward. You should end up with:
- 8 maple strips at 3/4 by 1.5 inches by roughly 18 inches long
- 4 walnut strips at the same dimensions
Arrange the strips alternating maple and walnut. The classic pattern is maple, walnut, maple, maple, walnut, maple, maple, walnut, maple. You can do equal alternation too. Play with the layout on your bench until you like it.
Step 2: First Glue-Up
This is the edge-grain glue-up. You’re laminating the strips together into a wide panel, with the grain running the full length of the board.
Before glue: do a dry run. Clamp everything up without glue. Make sure every joint closes tight with no gaps. Make sure your clamps fit. Make sure you have enough of them. Panic in the middle of a glue-up is the number one cause of failed cutting boards.
When you’re ready:
- Lay a bead of Titebond III on every joint. Spread it with your finger or a thin piece of wood. You want full coverage, no dry spots, no puddles.
- Clamp alternating top and bottom every 6 inches. This keeps the board from bowing under clamp pressure.
- Tighten to firm pressure. Squeeze-out should appear as a small, even bead along every joint.
- Use a wet rag to wipe off the biggest blobs of squeeze-out. Leave a film for now. You’ll scrape it off after it gels.
- Check that the board is flat. Sight down the length. If it’s bowing, loosen clamps and reposition.
- After 30 minutes, scrape off the rubbery squeeze-out with a card scraper or chisel. It comes off much easier at this stage than when it’s rock hard.
- Leave clamped for at least 8 hours. Overnight is safer.
Step 3: Plane the First Panel Flat
Unclamp in the morning. The panel will be a little rough with dried squeeze-out. Knock off the worst of it with a card scraper.
Run the panel through the planer, taking 1/32 inch passes alternating faces until both sides are clean and flat. You should end up with a smooth, approximately 3/4 inch thick panel roughly 12 or 13 inches wide.
Trim one edge square on the table saw, then rip the panel to final width (say, 12 inches). Crosscut the ends clean and square. You now have a rectangular edge-grain panel.
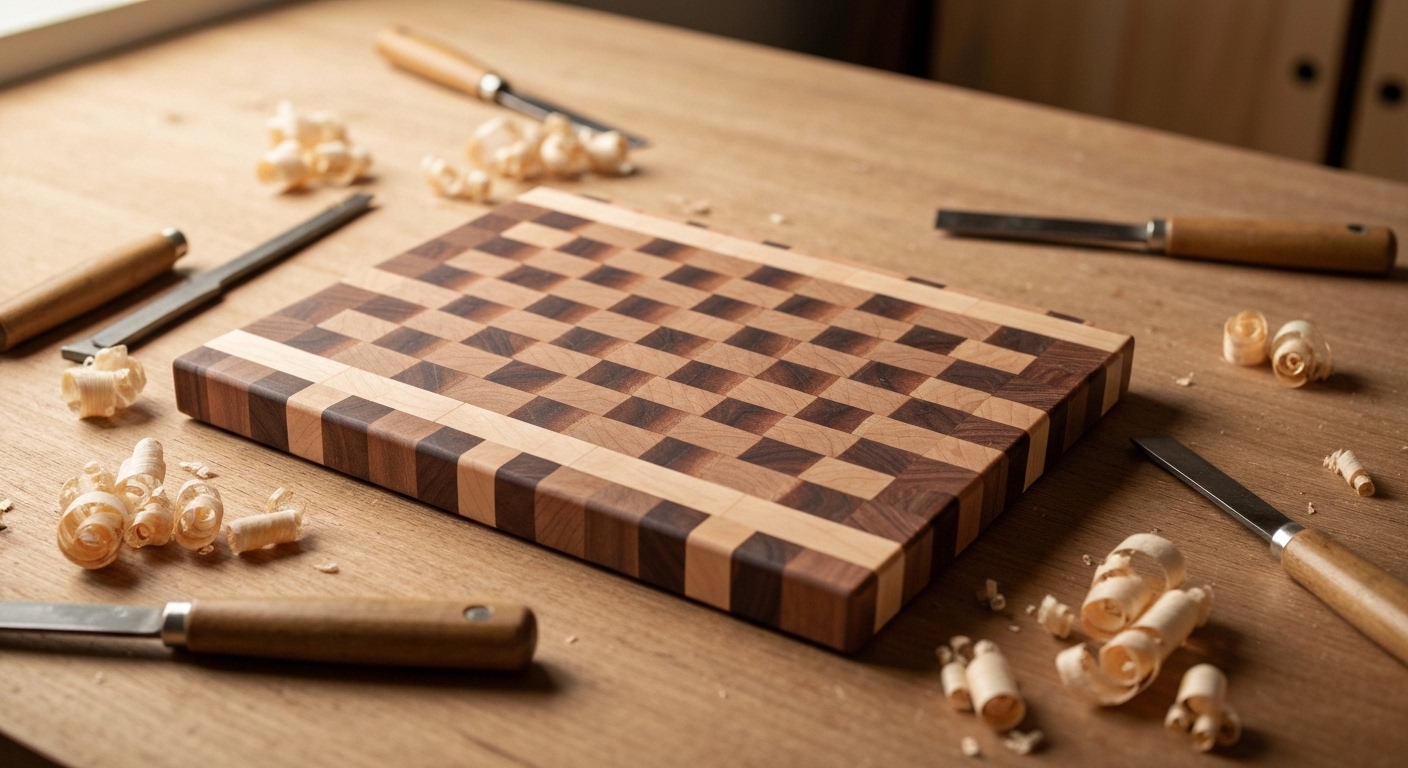
Step 4: Cut Into Strips (The Rotation)
Here is where end-grain magic happens. You’re going to crosscut the panel into strips, rotate each strip 90 degrees, and glue them back together. That rotation exposes the end grain as the new top face.
On the table saw, crosscut the panel into strips 1.5 inches wide. Keep the cuts clean and square. You should get around 8 strips from a 12 inch long panel.
Each strip now has maple/walnut/maple/walnut visible on both long edges. Those edges will become the top and bottom of your final cutting board.
Reverse every other strip end-for-end so the checker pattern shifts. Or don’t, for a striped pattern. Your choice. Lay them out and see what looks right.
Step 5: Second Glue-Up
This is the end-grain glue-up. End grain soaks up glue like a sponge, so you need to apply it generously. Some people use a thin pre-coat of glue, let it flash off for a minute, and then apply a second thicker coat. I skip that and just apply generously.
Critical: the long edges of these strips must be dead flat and square. If they’re rounded or tilted, you will get gaps. Pass each strip over a jointer, or take them to 220 grit on a sander with a sanding block, or just run them past a flat block of wood with sandpaper stuck to it.
Repeat the glue-up procedure from step 2:
- Dry run first
- Generous glue on every joint
- Alternate clamps top and bottom
- Squeeze out, check flat, scrape after 30 minutes
- Overnight clamp
Warning: end-grain glue-ups want to bow more than edge-grain ones. Use cauls (straight blocks of wood on top and bottom) to keep the panel flat. Paint or wax the cauls so glue doesn’t stick to them.
Step 6: Flatten the End-Grain Panel
This is the hardest step. End grain tears out in a planer. Do not send this panel through a lunchbox planer unless you enjoy catastrophic tearout and destroyed blades.
Options, best to worst:
- Drum sander. If you have access to one, this is the answer. Drum sanders don’t care about grain direction. Take light passes (1/64 inch or less) at 80 grit until the board is flat, then step up to 120.
- Hand plane with a very low angle. A low-angle smoother at 12 degrees, razor sharp, taking very light cuts works. It’s slow but effective.
- Belt sander. Aggressive but controllable. Keep it moving in circular patterns, check flatness often with a straightedge.
- Random orbit sander at 60 or 80 grit. The slowest option but the safest for beginners.
Whatever you choose, your goal is a flat surface. Check with a straightedge in both directions. Any dips or crowns become very visible under finish.
Once the top is flat, flip and do the bottom. The bottom doesn’t need to be as pretty but should be flat for stability.
Step 7: Router the Edges
Put a 1/4 inch roundover bit in your router, set the depth so it just barely cuts a rounded edge, and ease all eight edges (top four, bottom four). Go in the direction that prevents tearout, which means cutting against the rotation of the bit. Take two passes, a shallow one and a final full pass.
Also, rout finger grooves on the two short edges if you want. A 1/2 inch core box bit set 3/8 inch deep, routed 1 inch in from each end, gives you a nice lifting grip.
Step 8: Sanding Sequence
Sand up through the grits: 80, 120, 180, 220. Change discs often. End grain wears sandpaper fast.
Between the 180 and 220 passes, wipe the board down with a damp cloth. This raises the grain (the fibers swell and stand up). Let it dry for 30 minutes, then sand with 220. The raised grain gets cut off flush and your final surface is much smoother.
Sand the edges and corners by hand with 220 grit. Pay attention to the edges of the router work, which can be slightly fuzzy.
At 220 grit, the board should feel like soft leather. Run your hand across it. If you feel any roughness, do another 220 pass.
Step 9: Food-Safe Finish
The simplest and most effective finish for a cutting board is food-grade mineral oil, optionally followed by a board cream (mineral oil + beeswax).
Do not use:
- Polyurethane (will chip under a knife)
- Linseed oil that isn’t labeled food-safe (most raw linseed is not; boiled linseed contains driers you don’t want in food)
- Cooking oils like olive oil (they go rancid)
- Tung oil without verifying food safety; pure 100% tung oil is safe but solvent-cut tung oil is not
Warm the mineral oil slightly (set the bottle in hot water for 5 minutes) and flood the entire board. Let it soak in for an hour. Wipe off anything that hasn’t absorbed. Repeat two or three times over 24 hours. The first couple coats will disappear completely.
Once you stop seeing rapid absorption, apply a board cream made of mineral oil and beeswax (1 part beeswax to 4 parts mineral oil, melted together and cooled). This leaves a subtle protective wax film on the surface.
For long-term care, re-oil the board every month or two, more often if you wash it frequently. When the surface starts to look dry and dull, it’s time to feed it.
Step 10: Care and Maintenance
- Never put an end-grain cutting board in the dishwasher. Hot water will delaminate your glue joints.
- Hand wash with soap and warm water, dry immediately.
- Do not leave wet. Stand it on edge to air dry evenly.
- Re-oil monthly. Dry wood cracks. Don’t let it get there.
- Sand out deep scores every year or two with 220 grit, then re-oil.
A well-cared-for end-grain board lasts a lifetime. Some antique butcher blocks in commercial kitchens are over 100 years old and still in daily use.
Final Thoughts
Your first end-grain board will have small gaps, a slightly uneven surface, and a couple of visible glue lines. That is completely normal and part of why this project is so rewarding. Your second board will be noticeably better. Your fifth will be as good as anything in a boutique kitchen store, and for the next 40 years of cooking you will reach for the one you made instead of one you bought.
Take your time on the glue-ups. Don’t rush the flattening. Use good wood. Use good glue. Finish it right, care for it forever, and every time someone compliments it you can say four words that never get old: “I made it myself.”
Related Reading
- How to Build an Epoxy River Table (Beginner’s First Pour) — the natural next step when you want to combine wood and epoxy in a bigger showpiece project
- Wood Types Explained: Hardwoods vs Softwoods — understand why maple is the cutting board standard and when to reach for walnut accents
- Best Wood for Beginner Woodworking: 8 Species and When to Use Each — the workability and cost guide for sourcing the maple and walnut you need